The kitchen always fills with the sweet aroma of strawberries and cream whenever I make Strawberry Shortcake Truffles. It takes me back to summer days at my grandmother’s house, where fresh strawberries were abundant, and dessert was a delightful affair. Every bite of those truffles holds the laughter of family gatherings and the warmth of shared memories. The joy of rolling up little bites of goodness feels like crafting pieces of happiness that echo the simple pleasures of life.
Why Strawberry Shortcake Truffles Still Feels Like Home
The first time I made Strawberry Shortcake Truffles, I followed my grandma’s footsteps as if her spirit were guiding me. She was the master of comfort food, always transforming the simplest ingredients into wonderful creations. I remember her kitchen, the heart of our home, bustling with life and filled with the laughter of my siblings. She would often say that the best recipes come from the heart; they’re meant to be shared and enjoyed together.
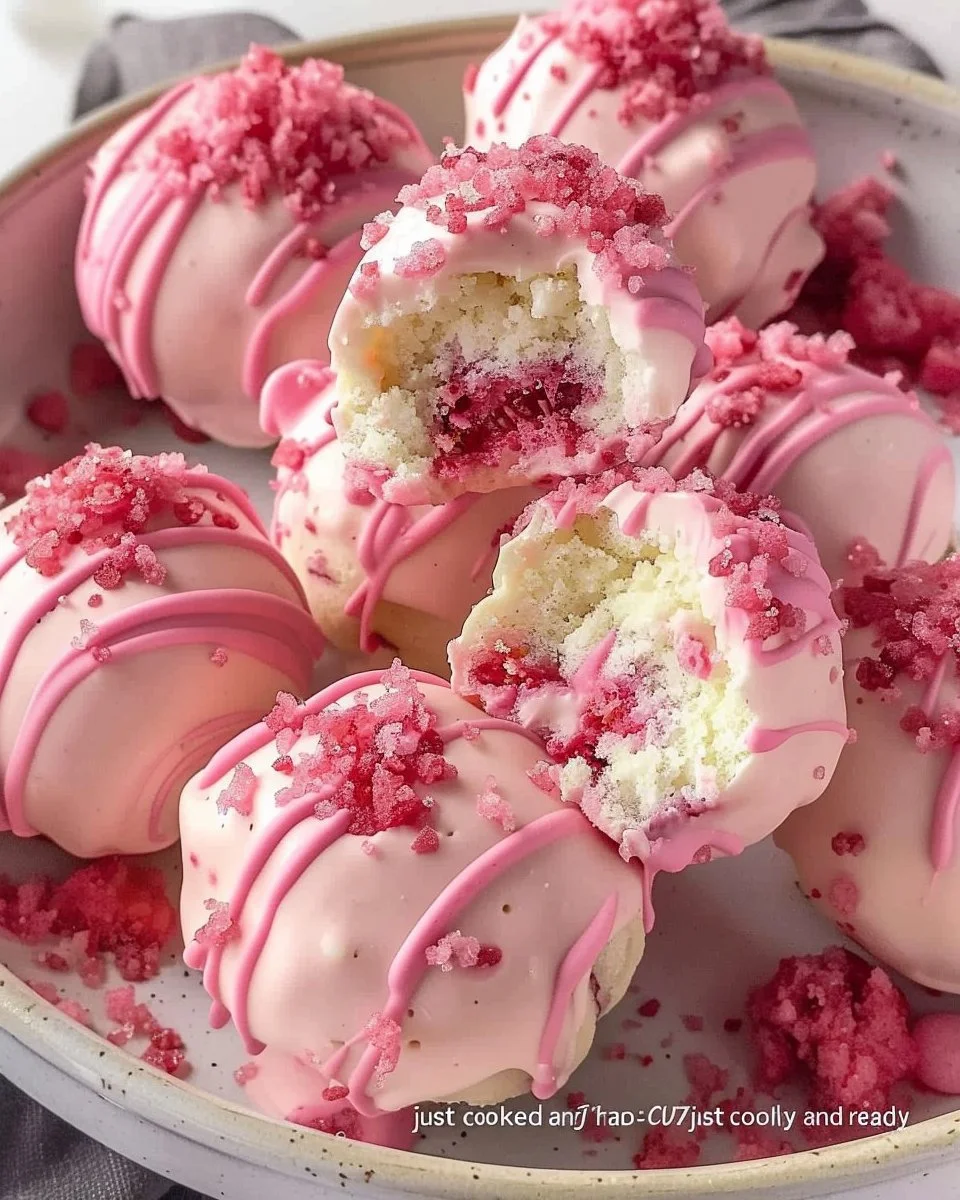
In those days, desserts were more than just sweets. They were moments to cherish, from mixing the batter to the first bite. Strawberry Shortcake Truffles remind me of those precious times. Their creamy center and soft pink coating evoke nostalgic feelings of happiness and love. Making them feels like a celebration, a way to keep those memories alive in my own kitchen.
Bringing Strawberry Shortcake Truffles Together
“Every time I stir this pot, it smells just like Sunday at home.”
Making Strawberry Shortcake Truffles is an experience that encapsulates the rhythm of cooking. It begins with the sound of a whisk meeting batter, a gentle mix that promises sweet results. As you blend, the mixture transforms, and the bright pink frosting adds a pop of color to the soft, crumbly cake. Just like a gentle hug, the ingredients come together, creating an aroma that lifts your spirits and fills the kitchen with warmth.
The texture of the cake crumbs slightly gritty yet inviting creates a satisfying contrast with the smooth frosting. This is where the magic happens. You can feel your worries fade away as you work with your hands, molding the sticky mixture into little spheres of joy. Each truffle holds a promise of flavor waiting to burst as you cover them in silky chocolate.
Ingredients You’ll Need
Creating these lovely truffles is simpler than you might think. Here’s a little list to guide you through:
- 1 box (15.25 oz) vanilla or white cake mix, plus ingredients listed on the box (usually eggs, oil, water)
- 1 cup strawberry frosting (store-bought or homemade; canned frosting works best for this)
- 1/2 cup crushed vanilla wafer cookies or graham crackers (optional but adds texture)
- 1/4 cup freeze-dried strawberries, finely crushed (optional for extra strawberry punch)
- 16 oz pink candy melts or pink chocolate coating (Ghirardelli pink melting wafers work great)
- 2 tbsp coconut oil or shortening (helps thin the chocolate for smoother coating)
- 4-6 oz white chocolate or white candy melts (for drizzling)
- Crushed freeze-dried strawberries (for sprinkling)
- Pink sanding sugar or sprinkles
- Optional: edible gold leaf, gold stars, or pearl dust for extra fancy vibes
- 9×13 baking pan
- Large mixing bowl
- Cookie scoop or spoon
- Baking sheet
- Parchment paper or wax paper
- Fork or dipping tool for chocolate coating
- Piping bag or zip-top bag for drizzling
Feel free to add a little extra vanilla if you love that cozy aroma or use fresh butter to give richness to the mixture.
Step-by-Step Directions
Step 1: Bake the Cake
- Preheat oven according to cake mix package directions, usually around 350°F.
- Prepare and bake the cake according to package instructions in a 9×13 pan.
- Let cool COMPLETELY in the pan. Warm cake will make your truffles a melty mess.
- Once cool, use your hands or a fork to crumble the entire cake into fine crumbs in a large bowl. It should look like cake breadcrumbs. This is strangely therapeutic—destroy that cake. Let out your stress.
Step 2: Make the Truffle Mixture
- Add the strawberry frosting to the cake crumbs. Start with 3/4 cup and add more if needed.
- Mix with your hands, which is the best tool for this job, until it feels like play-dough. The mixture should be moldable and hold its shape when squeezed.
- If using crushed vanilla wafers or freeze-dried strawberries, fold them in now for extra texture and flavor.
- The mixture should be moist enough to hold together but not too wet or sticky. If it feels too dry, add more frosting a tablespoon at a time. Too wet? Add more cake crumbs or crushed cookies.
- Taste the mixture. This is essential—does it taste good? It better, because that’s what the inside of your truffles will taste like.
Step 3: Roll the Truffles
- Line a baking sheet with parchment or wax paper.
- Using a cookie scoop or spoon, portion out about 1-2 tablespoons of mixture for each truffle.
- Roll between your palms to create smooth balls. Wet hands slightly if the mixture is sticking.
- Place each ball on the prepared baking sheet, leaving space in between.
- You should get about 24-30 truffles depending on their size. Refrigerate for at least 30 minutes, or freeze for 15 minutes, until firm. This is crucial—soft truffles will fall apart when dipping.
Step 4: Melt the Pink Coating
- In a microwave-safe bowl, combine pink candy melts and 2 tbsp coconut oil or shortening.
- Microwave in 30-second bursts, stirring between each, until completely smooth and melted. Take care not to overheat or it will seize.
- The consistency should be thin enough to coat the truffles easily. If it feels too thick, add more coconut oil a teaspoon at a time.
- Transfer to a deep, narrow bowl or cup—this makes dipping easier than a shallow bowl.
Step 5: Dip and Coat
- Remove truffles from the refrigerator or freezer. Work with 6-8 at a time, keeping the rest cold.
- Using a fork or dipping tool, place one truffle in the melted chocolate. Spoon the chocolate over the top to cover completely.
- Lift the truffle with the fork, letting excess chocolate drip back into the bowl. Gently tap the fork on the edge of the bowl to remove more excess.
- Carefully slide the truffle off the fork onto the parchment-lined baking sheet using a toothpick or another fork to help.
- Repeat with remaining truffles, reheating the chocolate as needed if it starts to thicken.
- Work quickly—the chocolate sets fast. If the truffles start warming up, pop them back in the fridge and do another batch.
Step 6: Decorate
- While the pink coating is still slightly wet (within 1-2 minutes of dipping), sprinkle with crushed freeze-dried strawberries, pink sugar, or sprinkles. Press gently to make sure they stick.
- Allow the pink coating to set completely—about 10-15 minutes at room temperature or 5 minutes in the fridge.
- Melt white chocolate or white candy melts in the microwave the same way you did with the pink chocolate.
- Transfer to a piping bag or zip-top bag with a tiny corner snipped off.
- Drizzle white chocolate over the truffles in a back-and-forth pattern or a circular motion, depending on how wild or minimalist you want it.
- Immediately add any final toppings while the white chocolate is still wet.
- Let everything set completely before packaging or serving.
Step 7: Admire Your Work
- Step back and appreciate how gorgeous these look.
- Take 47 photos because you’ve earned it.
- Try not to eat them all in one sitting. This is genuinely impossible, but you can definitely try.
Serving Strawberry Shortcake Truffles With Family Warmth
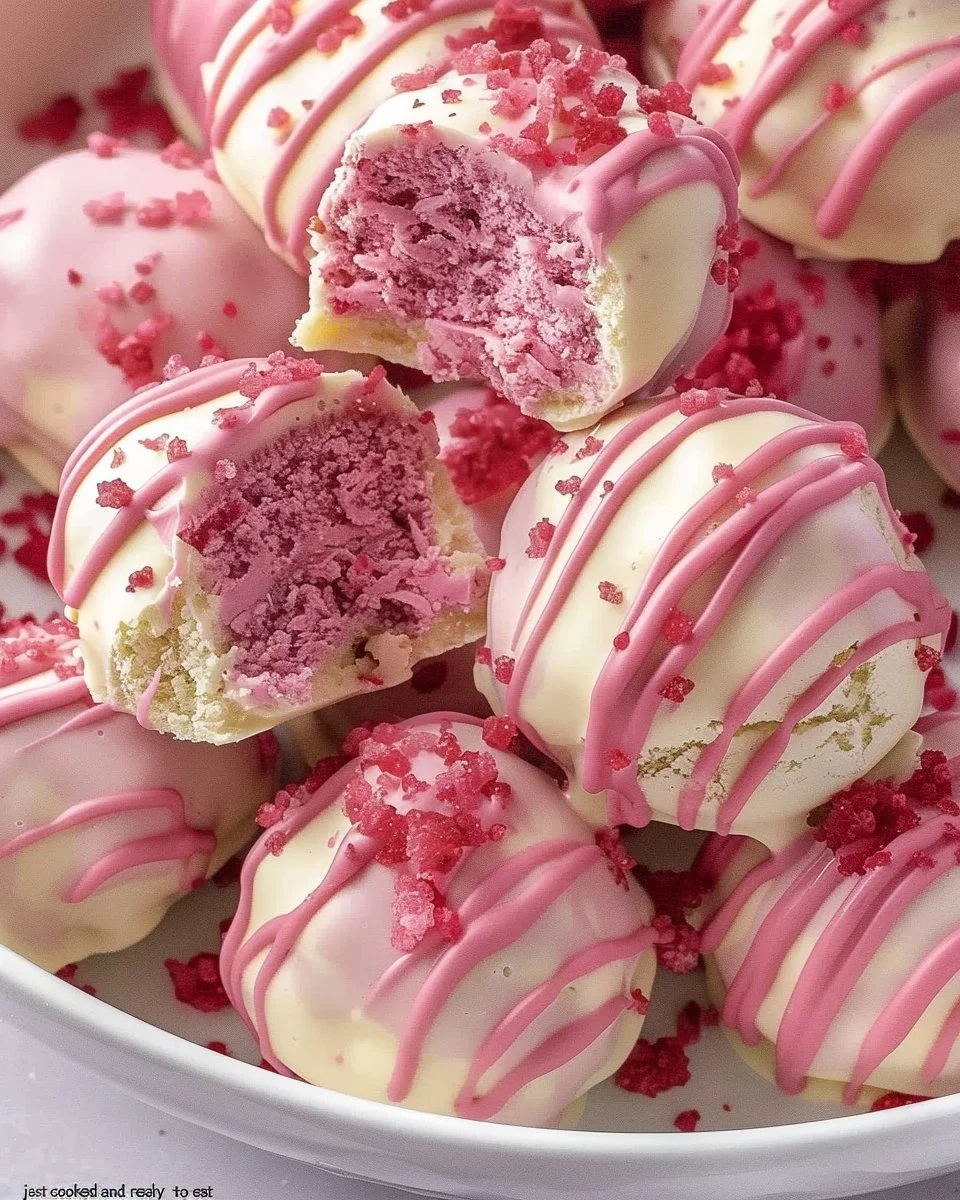
Once your truffles are beautifully set and gleaming, it’s time to share them with loved ones. They are the perfect treat for gatherings, family dinners, or even an afternoon pick-me-up. Setting them on a platter adorned with fresh strawberries creates a stunning display that invites everyone to indulge.
Sometimes, my children enjoy helping to plate the truffles, and their excitement adds an extra layer of joy to serving. We often share laughter and stories as we snack, creating new memories to bond over. The vibrant colors and inviting tastes bring a lively spirit to our table that feels comforting and joyful.
Storing Strawberry Shortcake Truffles for Tomorrow
To keep your truffles fresh for another day, it’s essential to store them properly. Place them in an airtight container and keep them in the refrigerator. They are best enjoyed within a week.
After a day or two, the flavors mellow beautifully, enhancing the overall taste. A chilled truffle on a warm day feels like a little piece of summer happiness, a reminder of sweet family moments.
Amelia’s Kitchen Notes
Here are a few little lessons I’ve discovered while making these delectable truffles:
- For a richer flavor, you might consider using homemade frosting instead of store-bought. The taste is always more vibrant.
- If you have leftover cake scraps, feel free to freeze them for future batches. They can easily be thawed and made into truffles later.
- Clean-up can be a breeze if you soak your mixing bowls and utensils in warm, soapy water right after use. It will prevent the sticky mixture from hardening, making it easier to clean.
Family Variations on Strawberry Shortcake Truffles
The beauty of these truffles lies in their versatility. Every family has its own twist on them. For example, adding a touch of lemon zest to the frosting can brighten the flavor and give it a refreshing twist.
During the fall, we might incorporate pumpkin spice into the cake mix, replacing the strawberry layer with pumpkin-flavored frosting. Or, my niece loves to add a hint of almond extract for an unexpectedly delightful flavor. The possibilities are endless, reminding us that each twist can create new memories while still feeling like home.
FAQs About Strawberry Shortcake Truffles
Can I make this ahead of time?
Yes, and honestly, it might taste even better the next day once the flavors have settled and come together.
What other flavors can I try?
Feel free to experiment! Chocolate cake with raspberry frosting or even vanilla cake with lemon frosting can create exciting variations.
How long will they last?
Stored in the refrigerator, the truffles can last up to a week, though they are often gone much sooner in our house.
Conclusion
Creating Strawberry Shortcake Truffles is like wrapping a piece of home in chocolate and sharing it with those you love. I hope these little bites of joy bring warmth to your kitchen, just as they do in mine. If you are looking to explore more, you might enjoy checking out this strawberry shortcake truffles recipe, or perhaps learn something new from the easy strawberry shortcake truffles. There’s always a new twist out there waiting to be discovered, and I encourage you to embrace it. Together, let’s keep the heart of home cooking alive.
Strawberry Shortcake Truffles
Ingredients
For the cake and truffle mixture
- 1 box box (15.25 oz) vanilla or white cake mix plus ingredients listed on the box (usually eggs, oil, water)
- 1 cup strawberry frosting store-bought or homemade; canned frosting works best
- 1/2 cup crushed vanilla wafer cookies or graham crackers optional but adds texture
- 1/4 cup freeze-dried strawberries, finely crushed optional for extra strawberry punch
For the coating
- 16 oz pink candy melts or pink chocolate coating Ghirardelli pink melting wafers work great
- 2 tbsp coconut oil or shortening helps thin the chocolate for smoother coating
- 4-6 oz white chocolate or white candy melts for drizzling
- to taste crushed freeze-dried strawberries for sprinkling
- to taste pink sanding sugar or sprinkles
- optional edible gold leaf, gold stars, or pearl dust for extra fancy vibes
Instructions
Bake the Cake
- Preheat oven according to cake mix package directions, usually around 350°F.
- Prepare and bake the cake according to package instructions in a 9x13 pan.
- Let cool COMPLETELY in the pan.
- Crumble the entire cake into fine crumbs in a large bowl.
Make the Truffle Mixture
- Add the strawberry frosting to the cake crumbs, starting with 3/4 cup.
- Mix until it feels like play-dough and is moldable.
- If using crushed cookies or freeze-dried strawberries, fold them in now.
- Taste to ensure it is flavorful.
Roll the Truffles
- Line a baking sheet with parchment or wax paper.
- Portion out about 1-2 tablespoons of mixture for each truffle.
- Roll into smooth balls and place them on the baking sheet.
- Refrigerate for at least 30 minutes until firm.
Melt the Pink Coating
- In a microwave-safe bowl, combine pink candy melts and coconut oil.
- Microwave in 30-second bursts until smooth.
- Transfer to a deep bowl for easier dipping.
Dip and Coat
- Dip each truffle in the melted chocolate, letting excess drip off.
- Place back onto the parchment-lined baking sheet.
Decorate
- While the pink coating is wet, sprinkle with decorations.
- Allow to set completely before serving.
