I still remember the first winter I made these Strawberry Kiss Cookies for my family, the kitchen warm with the oven and the house smelling faintly of vanilla and berries as snow pressed against the windows. That day felt quiet and steady, and pulling a tray of soft pink cookies from the oven felt like passing along a small piece of comfort. If little, tender strawberry treats are your kind of small comfort, you may also enjoy a softer sandwich-style take on berry baking in this gentle recipe for soft strawberry cake mix sandwich cookies which brings the same cozy feeling in a different shape.
The Story Behind These Strawberry Kiss Cookies
These cookies arrived in my kitchen the way many family recipes do: through slow trial, a few successes, and a fondness for what made people smile. I began with a simple shortbread idea and added a packet of strawberry gelatin for color and that familiar strawberry tang. It felt right, as if each small addition was a note in a song I knew by heart.
Over the years I learned to trust small things in the recipe. Room temperature butter gives a smooth, even dough. Chilling the dough keeps the cookies from running too thin across the baking sheet. And a light dusting of powdered sugar keeps the top soft and bright while the kiss makes a glossy center. These are not flashy cookies. They are steady and reliable, the kind you make when you want to give someone the comfort of something homemade.
Baking them is as much about quiet patience as it is about technique. I like to make them when I have space in my day to welcome the rhythm of measuring, mixing, and waiting. That slow pace becomes part of the gift — a chance to breathe and to remember why we bake for others.
Why This Recipe Feels Comforting
There is comfort in the familiar flavors of butter, vanilla, and a hint of almond. The strawberry gelatin brings a bright note that feels like a childhood memory, and the chocolate kiss at the center is a small, indulgent surprise. Together they make a cookie that is both simple and satisfying.
The texture matters here. You want a cookie that is tender but holds its shape, with edges that feel slightly firm and centers that remain soft. That contrast between a delicate crumb and a glossy chocolate center is what keeps people coming back for more. I like to think of these cookies as little bundles of warmth you can share without fuss.
Making these cookies also teaches a few gentle lessons: the value of chilling dough, the way a little heat from the oven can help the chocolate set, and the simple truth that good baking rewards patience. I keep this recipe in rotation because it is forgiving and kind to the baker, which to me is the most comforting trait a recipe can have.
Bringing the Cookies Together
“Some recipes just feel right the moment they come together.”
When you gather the ingredients and tools for these cookies, take a moment to enjoy the small rituals. Soften the butter on the counter, sift the powdered sugar for dusting, and let the egg sit at room temperature for a few minutes. These tiny habits make the dough come together more smoothly and give you that even, gentle texture that makes the cookies feel homemade in the best way.
Work steadily and watch for the cues. The butter and sugar should whip until light and fluffy, the dough should hold its shape when rolled into balls, and the edges of the baked cookies should look set before you take them out. These are the little signals that tell you the cookies are on their way to being just right.
Ingredients You’ll Need
1 cup (226g) unsalted butter, softened
1 cup (200g) granulated sugar
1 large egg, at room temperature
1 tsp vanilla extract
1/2 tsp almond extract (optional)
2 cups + 2 tbsp (280g) all-purpose flour
1 tsp baking powder
1/4 tsp salt
1 package (3 oz) strawberry-flavored gelatin mix
1/4 cup powdered sugar, for dusting
24-30 chocolate kiss candies, unwrapped, one per cookie
Notes: Room temperature butter helps with texture and makes the dough easier to mix. Letting the egg sit on the counter for a short time keeps the batter smooth and prevents chilling the dough from taking too long. The strawberry gelatin is what gives these cookies their soft pink color and that classic strawberry note.
If you enjoy tender, strawberry-forward cookies, you might also like the way other home bakers treat jammy fillings in this bright take on pastry-inspired sweets like strawberry pop tart sugar cookies which pairs flaky ideas with the same friendly strawberry flavor.
Step-by-Step Directions
- PREPARE THE DOUGH: In a large mixing bowl, beat the softened butter and granulated sugar until light and fluffy, about 2-3 minutes. Add the egg, vanilla extract, and almond extract (if using), beating until well combined. Mix in the strawberry-flavored gelatin powder until fully incorporated. Work steadily and scrape the bowl so the color mixes evenly.
- PREPARE THE DRY INGREDIENTS: In a separate bowl, whisk together the flour, baking powder, and salt. Gradually add the dry ingredients to the wet mixture, mixing on low speed until a soft, pink dough forms. If the dough feels too soft or sticky, add 1-2 extra tablespoons of flour. Stop mixing as soon as everything comes together to keep the cookies tender.
- SHAPE & CHILL THE COOKIES: Scoop about 1 tablespoon of dough and roll it between your palms to form a smooth ball. Place the dough balls on a lined baking sheet and chill in the refrigerator for at least 1 hour, or up to overnight for best results. This step is essential for preventing spreading and gives the cookies a neat, even shape.
- PREHEAT & ARRANGE: Preheat the oven to 350°F (175°C). Arrange the chilled dough balls on a parchment-lined baking sheet, spaced about 2 inches apart, so they have room to expand. Lining and spacing make it easier to lift the cookies and keep them looking tidy when they come out of the oven.
- DO NOT PRESS BEFORE BAKING: Do NOT press an indentation into the dough before baking—this will cause excess spreading. The dough needs to remain slightly rounded so the edges set properly and the center stays soft. Trust the chilling step and leave the shaping as a simple ball.
- BAKE: Bake for 11-13 minutes, or until the edges look set and slightly firm. The cookies may look soft in the center, but they will continue to firm up as they cool, so watch for lightly golden edges rather than a fully browned top. Time can vary by oven, so check them toward the earlier end of the timing.
- ADD THE CHOCOLATE KISSES: Remove the cookies from the oven and let them sit on the baking sheet for 2 minutes before adding the kisses. While still warm, gently press a chocolate kiss into the center of each cookie. The residual heat will help the chocolate stick without melting too much, creating a glossy, centered finish.
- COOL COMPLETELY: Transfer the cookies to a wire rack and let them cool completely, allowing the chocolate to set and the interior to finish baking gently. This resting time is part of the magic; the cookies firm slightly and the flavors settle into that familiar balance. Be patient and wait until the chocolate has a slight snap when touched.
- DUST WITH POWDERED SUGAR: To avoid getting powdered sugar on the chocolate, dust the cookies FIRST, then press in the kisses. Use a small sieve for an even dusting so the tops look soft and delicate. Once the kisses are placed and the chocolate has set, the cookies are ready to serve.
Serving Strawberry Kiss Cookies With Care
These cookies are small and sweet, so they pair well with simple companions. I like to serve them on a plain plate with a jug of milk or a pot of tea. The tea helps to cut the sweetness, while the milk brings out the buttery notes. For a family gathering, arrange them on a single tiered tray where each cookie looks like a little gift.
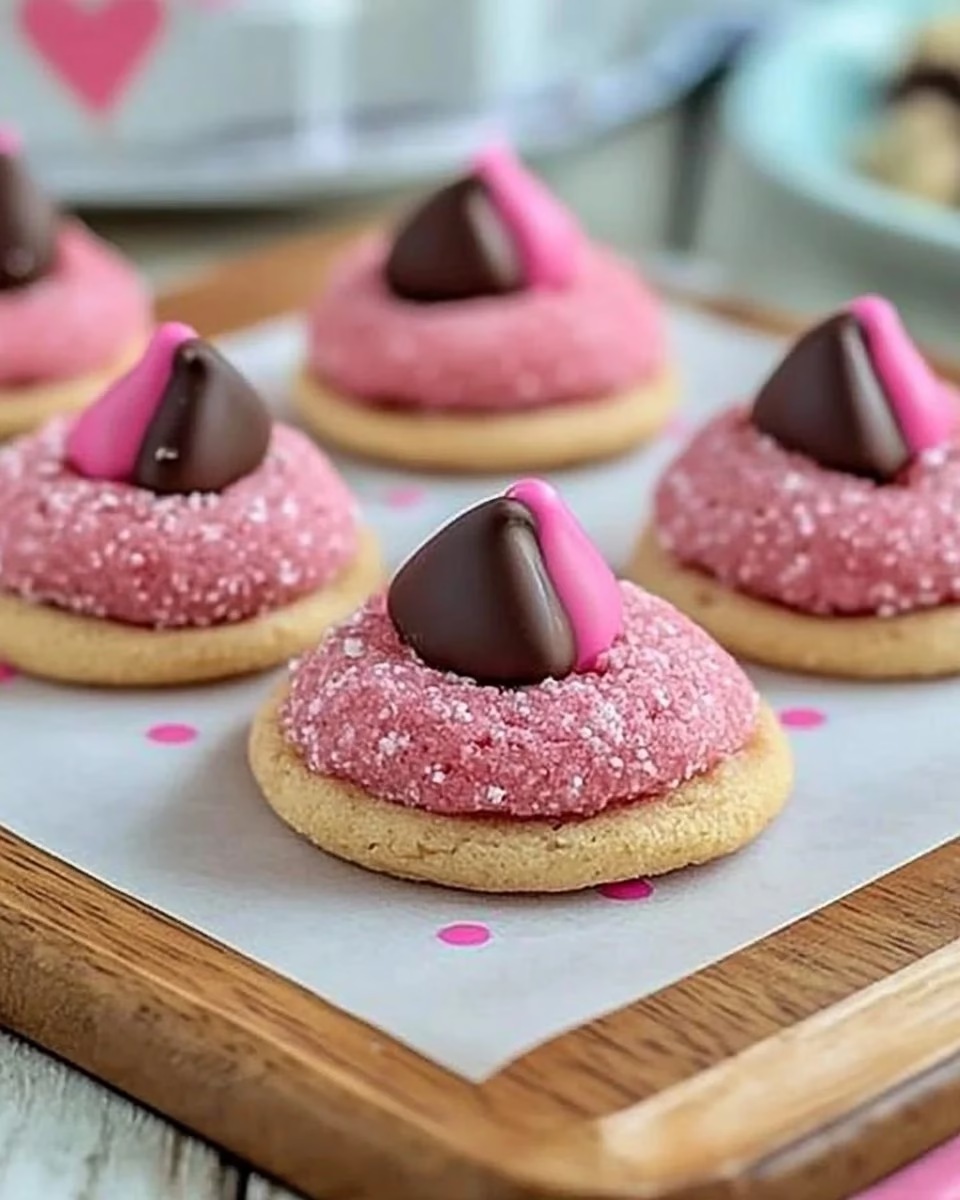
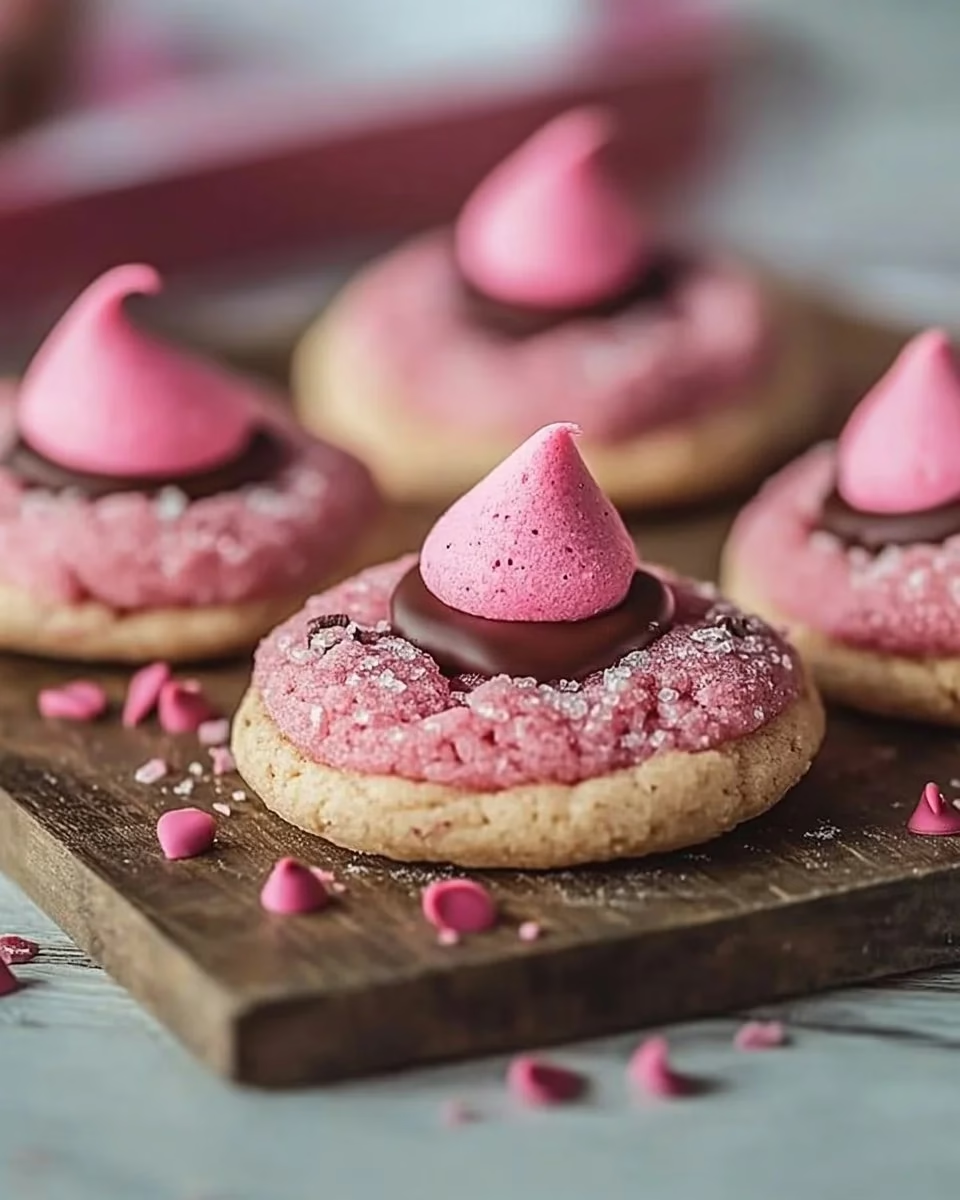
If you bring them to a party, place a few napkins nearby and arrange the cookies in rows so people can see the glossy chocolate centers. At home, set a few on a saucer by the sink or next to a book when you want a quiet treat. The look of these cookies is part of their charm: soft pink, dusted with sugar, and topped with a neat kiss of chocolate.
For a holiday plate, cluster the cookies around a small bowl of extra kisses or add a sprig of mint for a touch of green. These small touches make sharing feel thoughtful without being fussy. The cookies themselves are the main comfort, and the way you present them should feel natural and warm.
Storing Strawberry Kiss Cookies for Later
Store cooled cookies in an airtight container at room temperature for up to 4 days. Place a sheet of parchment paper between layers to keep them from sticking together and to protect the chocolate centers. If you live where it is warm, keep them in a slightly cooler spot or a low-temperature refrigerator for the first day to help maintain the chocolate shape.
For longer storage, freeze the unfilled cookie dough balls for up to 3 months. Thaw them in the refrigerator overnight before baking as directed. If you freeze baked cookies, wrap them well and thaw at room temperature; reheat for a few minutes in a low oven if you want them slightly warm, but take care not to melt the chocolate.
A small tip: flavors often settle and deepen after a day. If you can make the cookies a day ahead, they often taste even better as the strawberry note and butter mellow together. This is one reason I do most of my baking a day before an event when I can.
Mary’s Baking Notes
- Chilling is not optional. Chilling the dough keeps the cookies from spreading and gives you that tender, slightly domed shape that holds the kiss in the center.
- Don’t overmix once the flour goes in. Stir just until the flour disappears to avoid a tough texture. A light hand keeps the crumb fine and pleasant.
- Use room temperature ingredients. The butter and egg at room temperature help the dough come together smoothly and allow the gelatin to distribute evenly for a consistent color and flavor.
- Watch the edges for doneness. The centers should still look slightly soft when you take the cookies out, and the edges should look set. They will continue to firm as they cool.
- Dust before adding chocolate. A light dusting of powdered sugar before placing the kisses keeps the tops looking bright and neat without getting sugar on the chocolate.
These are little practices that have helped me repeat this recipe with confidence. They are simple, but they make a difference when you want steady, comforting results.
Family Variations That Still Work
- Lemon-tinged: Swap half the vanilla for 1 teaspoon of lemon zest for a bright note. The strawberry and lemon make a fresh, friendly combination.
- Cocoa-dusted centers: For a darker chocolate effect, gently dust the kisses with unsweetened cocoa before placing them and then press them into the warm cookie. This adds a subtle, bittersweet contrast.
- Almond-forward: Use the almond extract if you enjoy a marzipan-like hint. Start with 1/2 teaspoon and add to taste; it pairs very well with the strawberry note.
- Mini sandwich: Sandwich two cookies together with a small dab of strawberry jam or buttercream. This makes a chewier bite and feels like a little celebration.
- Festive sprinkles: If you are making cookies for a party, roll the tops in fine sprinkles before baking. The chill step helps the sprinkles adhere and keeps the look tidy.
Each of these stays true to the spirit of the cookies: familiar flavors, simple changes, and dependable results. They are small edits you can trust.
FAQs About Strawberry Kiss Cookies
Can I make this ahead of time?
Yes, and it often holds up beautifully, especially when the dough is chilled overnight. Chilling concentrates flavors and helps the cookies maintain shape during baking.
Can I use a different candy besides chocolate kisses?
You can use chocolate chips or a small square of chocolate if you prefer, but keep in mind the shape affects how the cookie looks and how the chocolate sets. A flat piece may melt differently than a kiss.
What if my dough is sticky after chilling?
If the dough is still sticky after chilling, add 1 tablespoon of flour at a time while mixing until it is firm enough to roll. Cold hands help too; dipping them in cool water keeps the dough from sticking to your fingers.
Can I reduce the sugar or use a sugar substitute?
This recipe is designed for the balance of granulated sugar and powdered sugar for dusting. Reducing sugar will change the texture and browning. If you need to change sugar for health reasons, try a tested substitute in a small batch first to see how it affects the dough.
How do I know when they are done?
Look for edges that are set and slightly firm while the center still looks soft. The cookies should not be fully browned. They will finish cooking as they cool on the baking sheet and on the rack.
Small Comforts in Serving and Sharing
When I bring a plate of these cookies to a neighbor or set a small stack on the counter for my family, I am offering more than a sweet. I am offering a pause, a familiar scent, and a moment of quiet pleasure. The simple joy of biting into a soft, lightly sugared edge and finding a glossy chocolate center is something I am always glad to share.
If you are sending these as a gift, choose a shallow tin or a box lined with parchment. Layer the cookies with small sheets of wax paper and tuck a handwritten note on top. The note does not need to be long. A single sentence about why you thought of them is enough to make the gesture feel personal.
At home, make a small ritual of it. Put on a kettle, lay out a few cookies, and invite someone to sit for a few minutes. These cookies make good company for quiet conversations and for the simple pleasure of a shared snack.
A Final Thought
I hope these Strawberry Kiss Cookies bring a little comfort to your kitchen, the same way they have in mine over the years. Baking them is a gentle act, a small way to slow down and pass along warmth. If you make a batch, let them cool well, dust them with care, and offer a few to someone who could use a quiet, sweet moment. From my kitchen to yours, may these cookies make your day a little softer.
Strawberry Kiss Cookies
Ingredients
For the Cookie Dough
- 1 cup unsalted butter, softened Room temperature for better mixing.
- 1 cup granulated sugar
- 1 large egg, at room temperature Let sit at room temperature for a smooth batter.
- 1 tsp vanilla extract
- 1/2 tsp almond extract (optional) Adds a hint of marzipan flavor.
Dry Ingredients
- 2 cups + 2 tbsp all-purpose flour Add more if dough is too sticky.
- 1 tsp baking powder
- 1/4 tsp salt
- 1 package (3 oz) strawberry-flavored gelatin mix Provides color and flavor.
For Dusting and Filling
- 1/4 cup powdered sugar, for dusting Light dusting for a delicate finish.
- 24-30 pieces chocolate kiss candies, unwrapped One for each cookie.
Instructions
Prepare the Dough
- In a large mixing bowl, beat the softened butter and granulated sugar until light and fluffy, about 2-3 minutes.
- Add the egg, vanilla extract, and almond extract (if using), beating until well combined.
- Mix in the strawberry-flavored gelatin powder until fully incorporated.
Prepare the Dry Ingredients
- In a separate bowl, whisk together the flour, baking powder, and salt.
- Gradually add the dry ingredients to the wet mixture, mixing on low speed until a soft, pink dough forms.
- If the dough feels too soft or sticky, add 1-2 extra tablespoons of flour.
Shape & Chill the Cookies
- Scoop about 1 tablespoon of dough and roll it between your palms to form a smooth ball.
- Place the dough balls on a lined baking sheet and chill in the refrigerator for at least 1 hour, or up to overnight.
Preheat & Arrange
- Preheat the oven to 350°F (175°C) and arrange the chilled dough balls on a parchment-lined baking sheet, spaced about 2 inches apart.
Do Not Press Before Baking
- Do NOT press an indentation into the dough before baking.
Bake
- Bake for 11-13 minutes, or until the edges look set and slightly firm.
- The cookies may look soft in the center, but they will continue to firm up as they cool.
Add the Chocolate Kisses
- Remove the cookies from the oven and let them sit on the baking sheet for 2 minutes before adding the kisses.
- While still warm, gently press a chocolate kiss into the center of each cookie.
Cool Completely
- Transfer the cookies to a wire rack and let them cool completely.
Dust with Powdered Sugar
- Dust the cookies FIRST with powdered sugar before pressing in the kisses.