There is a quiet joy that comes when the kitchen smells like sweet mint and warm butter, and a pie is cooling in the freezer while the light softens through the curtains. I remember the first time I made this Shamrock Shake Pie for my family, a slow afternoon where the radio played softly and my daughter helped press the crust into the pan. The recipe felt like a small celebration, a familiar flavor that bridged a childhood shake with a grown up dessert. If you enjoy simple, honest pies, you might also find comfort in my American Flag Pie recipe, which shares that same steady, homey feeling.
Why This Shamrock Shake Pie Has Always Been a Favorite
This pie has lived on my counter during holidays and quiet Sundays because it is gentle and certain. It is not fussy. It asks for patience and a few simple ingredients and rewards you with a cool, creamy slice that tastes like a kind memory.
I first made it on a rainy afternoon when my mother could not come over and I wanted to make something to feel like home. Using instant pudding and whipped topping made it easy, but the care I gave to each step made it feel more than ready-made. It has stayed in rotation because family members ask for it again and because it keeps well enough to make ahead.
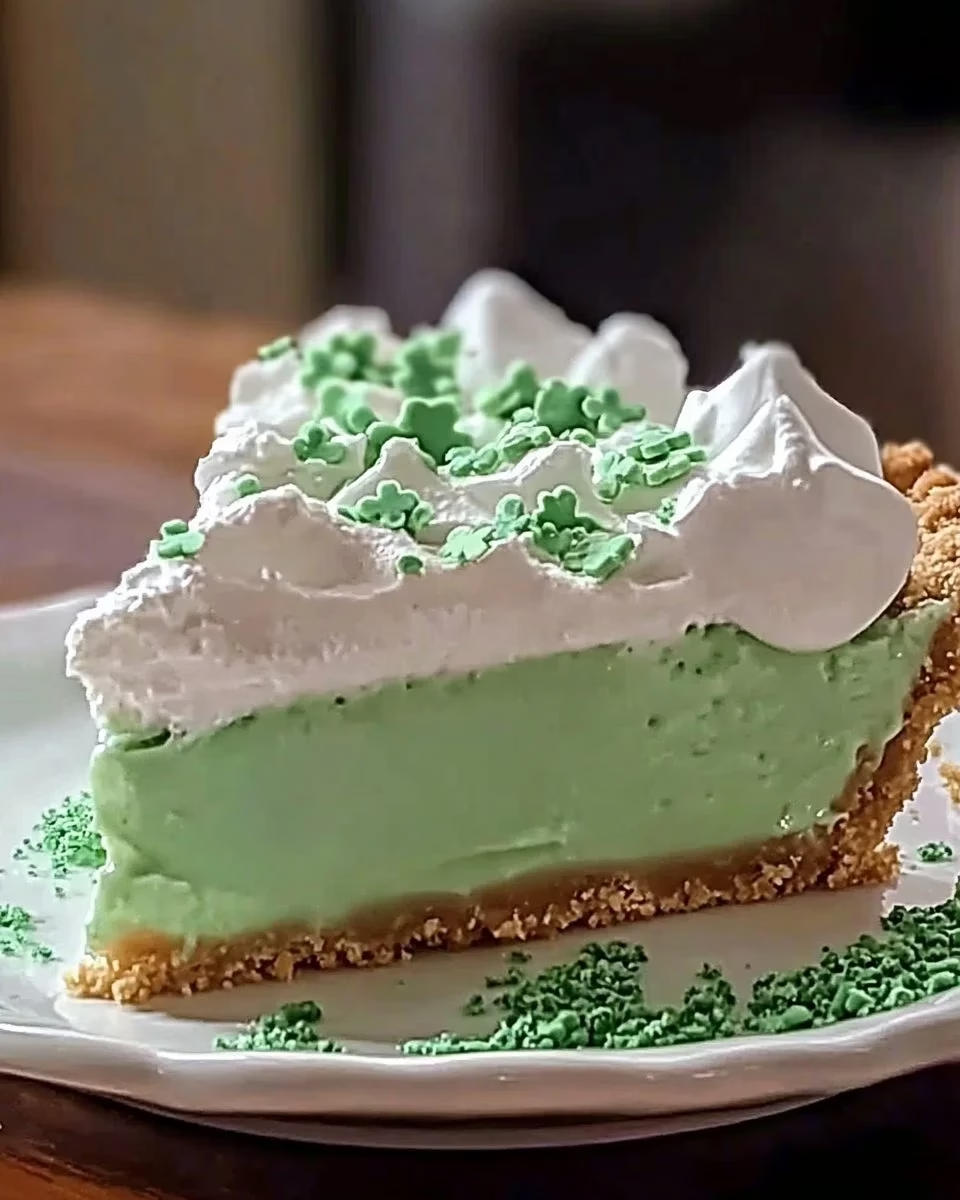
There is something comforting about green mint and soft vanilla coming together in a pie you can slice and share. It reminds me of small pleasures like warm tea, folded napkins, and sitting around a table talking slowly. That is the kind of baking I like to do; steady, warm, and meant for people you love.
The Story Behind This Shamrock Shake Pie
Recipes often begin as a little experiment, and this one began the same way. I wanted the light, minty taste of a shamrock shake but in a form that could feed a family and sit on a table. I found an easy way to turn a favorite shake into a chilled pie, and over the years I kept the method simple so younger hands could help.
The crust is an old habit of mine: graham crumbs and brown sugar pressed with melted butter until it feels like wet sand. The filling is a gentle mix that sets firm in the freezer. It is not about speed. It is about watching textures change and knowing the right touch when you fold in the whipped topping. Those small moments, like folding with a spatula until the mixture looks even, make the pie feel like a real, homemade thing.
How to Make This Pie the Calm Way
“Some recipes just feel right the moment they come together.”
Start by gathering everything before you begin. I like to lay out the crackers, butter, pudding, and the chilled milk so nothing surprises me midway. This small habit keeps the process calm and steady.
Take time with the crust. When the crumbs look fine and the mixture clumps when squeezed, you know it is ready. For the filling, whisking the pudding mix into cold milk with mint and food color takes a minute of elbow work, and that rhythm helps you slow down. Folding in the whipped topping should be gentle. You want soft streaks to disappear, but you do not want to beat air out of the topping.
Once assembled, the pie rests in the freezer where flavors settle. The waiting can feel long the first time, but the payoff is a pie that slices cleanly and tastes cool and bright. Room temperature for a few minutes before slicing gives cleaner cuts and a softer mouthfeel.
Ingredients You’ll Need
12 full sheets graham crackers
2 tbsp brown sugar (adds a warm note to the crust)
0.5 cup (1 stick) butter, melted (room temperature helps with texture)
2.5 cups milk, cold (chilled milk helps the pudding set properly)
0.25 tsp green food coloring (gel preferred for a brighter color)
2 tsp mint extract (start light and add more to taste)
1 box (5.1 oz) instant vanilla pudding mix
1 container (8 oz) whipped topping, thawed (fold gently for light texture)
Each of these items plays a small part. The graham crackers give the crust a soft crunch, the brown sugar brings a little caramel warmth, and the butter binds the crumbs into a firm base. The milk and instant pudding create a quick custard. The mint and green coloring make it feel like spring, while the whipped topping keeps the filling airy and smooth.
Step-by-Step Directions
-
In a food processor, pulse graham crackers and brown sugar into fine crumbs. With the motor running, drizzle in melted butter until mixture resembles wet sand. Press firmly into a greased 9-inch pie dish. Freeze for 15-20 minutes.
-
In a large bowl, whisk cold milk, food coloring, and mint extract until combined and green. Add instant pudding mix and whisk vigorously for 2-3 minutes until thickened. Let stand 5 minutes.
-
Gently fold the thawed whipped topping into the pudding mixture with a spatula until smooth and no white streaks remain. Fold slowly to keep it light and airy.
-
Spoon the green filling into the frozen crust. Smooth the top with a spatula and tap the dish gently to settle the filling. Cover loosely and freeze for at least 6 hours, or overnight, until completely firm.
-
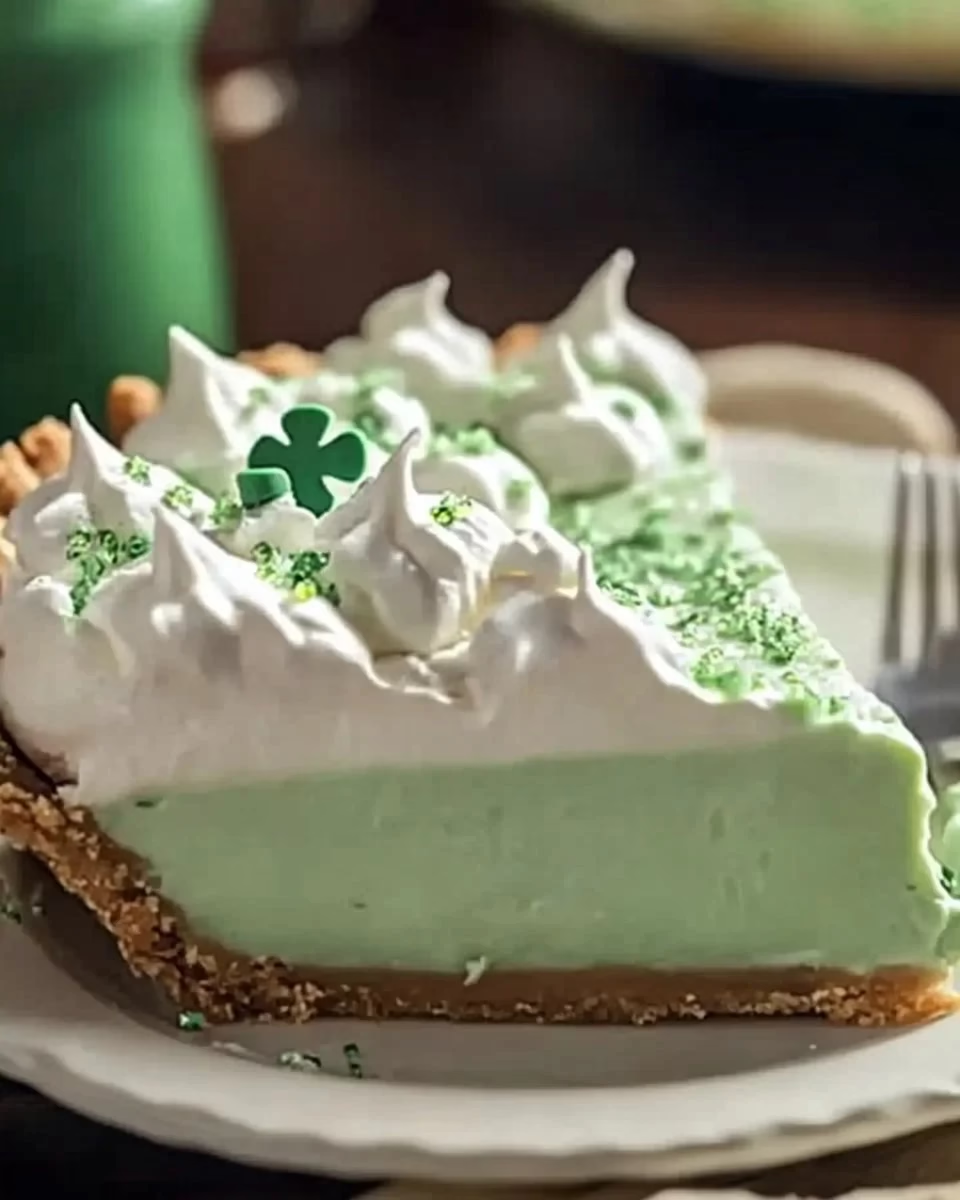
Let pie sit at room temp for 5-10 minutes before slicing for cleaner cuts. Garnish with whipped cream, cherries, or chocolate shavings as desired. Serve cold and enjoy the cool, minty taste.
Each step is simple on its own. Watch textures more than clocks. The crust should feel firm to the touch after a short chill, the pudding should thicken as you whisk, and the final pie should be firm enough to hold a clean slice.
Bringing Shamrock Shake Pie Together
When you begin, give yourself a clear surface and a warm kettle for tea if you like to sip while baking. Little comforts make the work feel kinder. Measure carefully, but do not worry if a spoonful here or there changes. Baking this pie is forgiving in a way that encourages gentle experiments.
If you like a brighter green, use gel coloring but add it a little at a time. The mint extract is vivid, so start with less and taste as you go. The mix will look pale when you first stir in the whipped topping, and then it will smooth into a cool, even color. That is your cue that it is ready for the crust.
Take a moment to press the crust evenly into the pan. I use the bottom of a measuring cup to press with steady, even pressure. The crust should hold together when you tap it, and it should feel compact without being too hard. That balance makes the first bite pleasant and not all crust or all filling.
Serving Shamrock Shake Pie With Care
I like to bring this pie out with a pot of coffee or a tray of simple cookies. It pairs well with a warm beverage because the cool pie balances the warmth of a cup. For a family afternoon, I slice it into modest wedges and let people add a little whipped cream on top if they like.
When I serve this pie, I watch how people reach for the slice. There is often a little smile before the first bite. For gatherings, I set forks on a small plate and place napkins within easy reach. Little gestures like that make serving feel thoughtful without fuss.
If you want to be a touch decorative, add a few chocolate shavings or a cherry on each slice. That pop of color makes the green filling feel playful and festive without changing the taste. Keep portions modest and let people go back for more if they wish.
Try a simple companion pie when you want a different color or theme on the table, and you will see how small changes make a collection of simple desserts feel like a whole meal.
Storing Shamrock Shake Pie for Later
This pie keeps very well when stored correctly. I usually cover it loosely with foil or plastic wrap and keep it in the freezer. When you plan to serve it, move it to the fridge for an hour before the event, then bring it to room temperature for 5-10 minutes before slicing.
If you have leftover slices, keep them covered in the refrigerator for up to three days. The texture will soften a little but it remains pleasant. You can also wrap single slices in wax paper and keep them in the freezer for a quick, cool treat another day.
Avoid sitting the pie at room temperature for long periods. It will warm and soften. That may be welcome if you like a softer bite, but for the crisp, cold feel of a classic slice, a brief rest before serving is enough.
Mary’s Baking Notes
-
On crust texture: If your graham crumbs seem large, pulse a little longer. You want a fine texture so the butter bonds evenly. The mixture should clump when squeezed between fingers.
-
On mint flavor: Mint extract can be strong. Start with two teaspoons and add a little more if you want. If you do increase it, add a drop at a time and taste as you go.
-
On whipping and folding: When you fold in the whipped topping, use a gentle turn and lift motion. Work around the bowl until it looks uniform. That keeps the filling light and creamy.
-
On coloring: Gel color is stronger than liquid, so a drop goes a long way. If the color seems pale after folding, add a tiny dab and fold again. It is easier to add than to take out.
-
On make ahead: This pie benefits from an overnight chill. If you make it the day before, it tastes like it had a little more time to settle. Label it if it is for a crowd so you know when it was made.
These notes are small habits I use to keep the pie steady and sure. They come from making the same recipe enough times to know what to watch for. I prefer simple, clear cues rather than strict times or numbers.
Family Variations on This Pie
We have kept the base the same but tried a few small changes that make the pie feel new while staying true to the original.
-
Chocolate crunch: Sprinkle finely chopped chocolate or chocolate chips into the crust before pressing. It gives a little snap and a hint of richness.
-
Mint chocolate swirl: Fold a small amount of softened chocolate pudding into part of the filling before spooning it in, then swirl gently with a knife. You get a marbled look and a gentle chocolate note.
-
Lighter mint: Use 1 teaspoon mint extract and add fresh finely chopped mint leaves on top for a more herb-like note. The leaves change the aroma and make the pie feel fresh.
-
Citrus twist: Add a teaspoon of lemon zest to the crust for a bright counterpoint. The lemon lifts the mint and makes the pie feel less sweet for those who like balance.
Each of these changes stays faithful to the calm, familiar feel of the original. They are small steps, not major reworkings, and they keep the same sense of home baking.
FAQs About This Pie
Can I make this ahead of time?
Yes, and it often holds up beautifully. If you make it a day ahead, keep it covered in the freezer and then move it to the fridge for an hour before serving for best texture.
Can I swap out the whipped topping for whipped cream?
You can. Fresh whipped cream will give a silkier texture and a slightly fresher taste. Beat to soft peaks and fold gently, taking care not to overwork the mixture.
Will the crust get soggy?
Not if you chill it before adding the filling. Freezing the crust for 15 to 20 minutes helps it set and resist softening. A firmer press when you form the crust also helps.
Can I make mini pies or use a tart pan?
Yes, this recipe adapts well to smaller pans. Reduce filling as needed, and watch freezer time since smaller pies set faster. Mini pies make lovely single servings for a small gathering.
How do I know when the filling is properly mixed?
Look for an even, light green color and a smooth texture without streaks of white from the whipped topping. The mix should be thick enough to hold its shape when spooned.
A Few More Gentle Reminders
When you bake for people you love, the small gestures matter. A neat slice, a warm plate, or a folded napkin can make a simple pie feel like a gift. I always tell myself to breathe slowly while I work. It helps me press the crust evenly and fold the filling with care.
If a child or friend wants to help, let them do a small part. Pressing crumbs, picking a garnish, or stirring the milk can make them part of the memory. Those moments are as important as the taste.
Trust the signs more than the clock. Baking is a conversation with the ingredients. They will tell you when they are ready if you listen.
From My Kitchen to Yours
I hope this recipe brings a little calm to your kitchen and a small celebration to your table. When you slice into the pie and see the cool green center, I hope you remember someone you love and a soft, warm afternoon.
If you ever feel unsure, fold slowly, taste gently, and remember the simple pleasure of sharing. I keep coming back to this Shamrock Shake Pie because of the way it makes a good day feel a little kinder.
Shamrock Shake Pie
Ingredients
Crust Ingredients
- 12 sheets full sheets graham crackers
- 2 tbsp brown sugar adds a warm note to the crust
- 0.5 cup butter, melted room temperature helps with texture
Filling Ingredients
- 2.5 cups milk, cold chilled milk helps the pudding set properly
- 0.25 tsp green food coloring gel preferred for a brighter color
- 2 tsp mint extract start light and add more to taste
- 1 box instant vanilla pudding mix
- 1 container whipped topping, thawed fold gently for light texture
Instructions
Crust Preparation
- In a food processor, pulse graham crackers and brown sugar into fine crumbs.
- With the motor running, drizzle in melted butter until mixture resembles wet sand.
- Press firmly into a greased 9-inch pie dish.
- Freeze for 15-20 minutes.
Filling Preparation
- In a large bowl, whisk cold milk, food coloring, and mint extract until combined and green.
- Add instant pudding mix and whisk vigorously for 2-3 minutes until thickened.
- Let stand for 5 minutes.
Combine Filling
- Gently fold the thawed whipped topping into the pudding mixture with a spatula until smooth and no white streaks remain.
Assemble Pie
- Spoon the green filling into the frozen crust.
- Smooth the top with a spatula and tap the dish gently to settle the filling.
- Cover loosely and freeze for at least 6 hours, or overnight, until completely firm.
Serving the Pie
- Let pie sit at room temp for 5-10 minutes before slicing for cleaner cuts.
- Garnish with whipped cream, cherries, or chocolate shavings as desired.
- Serve cold and enjoy the cool, minty taste.
