The warm smell of chocolate and salt used to fill my kitchen on slow afternoons, and Pretzel Shamrocks fit right into that memory. I would sit at the wide wooden table, stirring the melted green candy until it was glossy and smooth, while the radio played softly in the background. Little hands would press three pretzel pieces together into a clover while I held the lollipop stick steady. If you like the gentle comfort of familiar sweets, you might also enjoy my chocolate pretzel Easter nests, which carry that same simple joy.
Why Pretzel Shamrocks Feel Comforting
I first made these for a small family gathering years ago, when I wanted something simple to celebrate spring without fuss. There is something calm about dipping a crunchy pretzel into warm, smooth candy and watching it set. The recipe stuck around because it asks for patience more than skill, and it returns reliable little treats that everyone recognizes and smiles at.
These treats are about more than dessert. They are about the rhythm of the kitchen, about watching candy cool and harden while stories pass from one chair to another. Pretzel Shamrocks have stayed in rotation because they are forgiving and kind to busy days. They are the kind of recipe you can bring out when you want to make something pretty without a lot of planning.
I trust this recipe because it is simple and steady. The ingredients are honest and few. The results are familiar: a crisp snap from the pretzel, a sweet, almost creamy bite from the candy, and a tiny shimmer from sprinkles if you choose to add them. There is no rush. The best part is how the little shamrocks look waiting on a tray, each one slightly different and all ready to be passed around.
“Some recipes just feel right the moment they come together.”
How to Make Pretzel Shamrocks
Bring your work surface into a comfortable order and give yourself time. Use a sturdy baking sheet and a sheet of parchment paper to make cleanup gentle. When you melt the candy, watch for a smooth, glossy texture and no lumps. The cue is a thin ribbon of melted candy that falls cleanly from the spoon.
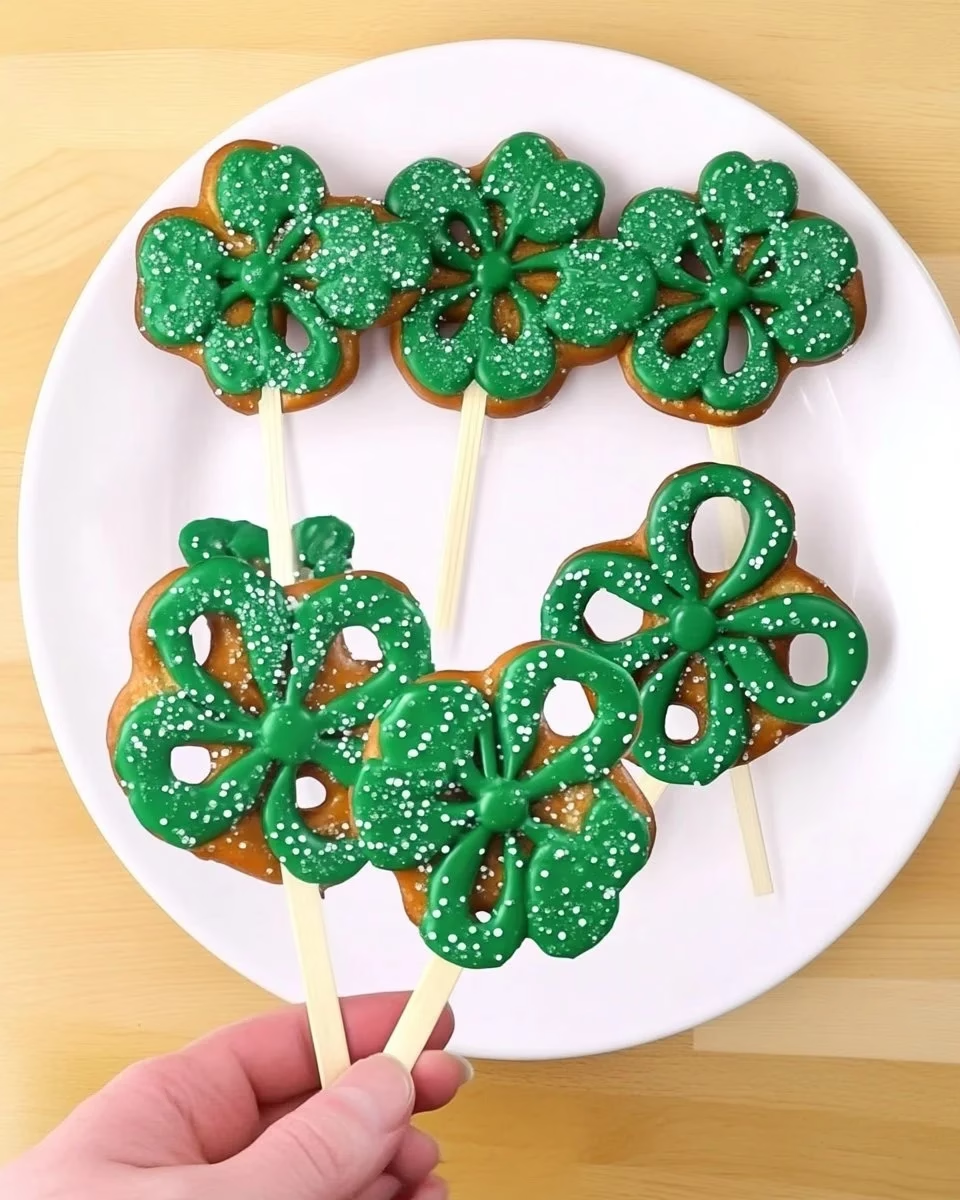
When you dip a pretzel into the candy, there is a satisfying pull as the coating slides down and clings to the crunchy surface. Forming the shamrock is an exercise in patience and a quiet creativity. Arrange three pretzel pieces in a rounded triangle for the leaves and add a short pretzel for the stem, pressing gently so the candy will help them stick together.
From there, dip the shaped cluster into the candy again to seal the pieces and give each shamrock a glossy finish. If you like, add sprinkles right away so they nestle into the wet candy. Insert the lollipop stick into the base while the candy is still soft, so it anchors without breaking. Allow them to rest on the parchment until the coating feels firm and no longer tacky.
Ingredients You’ll Need
pretzel rods
green candy melts
sprinkles (optional)
lollipop sticks
Room temperature helps with texture for the candy melts. Choose firm pretzel rods that will hold a shape. Sprinkles add a festive touch but are entirely optional. Lollipop sticks should be sturdy and food-safe.
Step-by-Step Directions
-
Melt the green candy melts according to package instructions. Heat them gently in short bursts or over a double boiler, stirring until the mixture is smooth and glossy, with no lumps remaining. Watch for a silky texture that flows easily from the spoon as a sign it is ready.
-
Dip one end of each pretzel rod into the melted candy and place it on a baking sheet lined with parchment paper. Hold the pretzel for a moment so the candy clings, then set it down and let the excess drip back into the bowl. Arrange them with space between so they do not stick to one another.
-
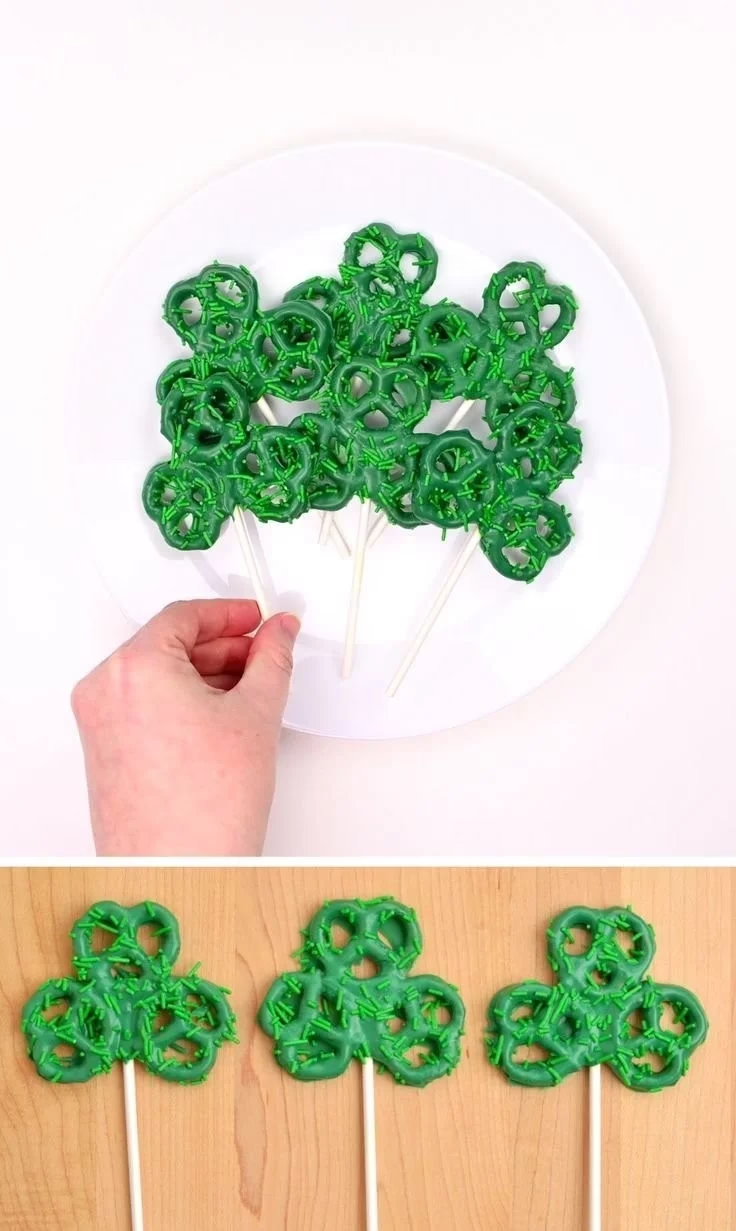
Use additional pretzel rods to form a shamrock shape with three ‘leaves’ and a ‘stem.’ Lay three short pretzel pieces in a rounded triangle for the leaves and add a small pretzel for the stem, pressing them together gently so the candy will act as glue. Work patiently and adjust the pieces until they look balanced and comforting.
-
Once shaped, dip the pretzel shamrocks in more melted candy. Hold the cluster carefully and lower it into the candy until it is mostly covered, then lift and let the excess drip off. The candy should coat the joints and whole surface, sealing them into a neat, glossy shamrock.
-
Add sprinkles while the candy is still wet, if desired. Sprinkle lightly and evenly so the colors sit on the surface instead of sinking in. Choose small, flat sprinkles that will settle gently into the coating and look homey and familiar.
-
Insert lollipop sticks into the base of the shamrocks. Push the stick in while the candy is still soft, taking care to keep it centered and steady. The stick will anchor the treat and make it easy to hold without breaking the delicate assembly.
-
Let them cool until the candy hardens, then serve and enjoy! Allow the tray to sit at room temperature until the coating is firm to the touch and the surface no longer feels tacky. Once set, arrange them on a platter and watch the faces light up as you pass them around.
Serving Pretzel Shamrocks With Care
I like to serve these on a simple white platter so their green color looks vivid and warm. They do well with a cup of strong tea or a warm mug of coffee, and they pair thoughtfully with a quieter dessert plate. For a family gathering, I arrange them in a circle and tuck a small note or label into the center so everyone knows these are homemade.
Pretzel Shamrocks also travel well. If you want to take a few to a neighbor or a friend, nestle them in a shallow box layered with parchment. They keep their shape and charm when handled with care, and they look especially nice when stacked on tissue or wrapped with a thin ribbon for a small, heartwarming gift.
When you set them out for children, make a small sign suggesting one per person so the treats are shared with fairness. I have watched these little favors start conversations and coax shy smiles, and that gentle sharing is one of the joys of baking.
Storing Pretzel Shamrocks for Later
Store the shamrocks in an airtight container at room temperature to keep the coating crisp and bright. If your kitchen is warm, set the container in the coolest spot you have so the candy does not soften. Layer pieces with parchment to prevent sticking and keep the shapes intact.
They stay fresh for several days when kept dry. The texture of the pretzel will remain pleasantly crisp, and the candy coating keeps its smooth feel. If you need to keep them a little longer, a cool pantry or cupboard will protect them from humidity without turning them brittle.
If you find the candy has dulled a bit after a few days, let them rest in the air for a short while before serving; they often regain a touch of their original shine. These small steps make it easy to plan ahead and keep the treats ready for unexpected guests.
Mary’s Baking Notes
-
Work with patience. The candy melts will be forgiving if you stir gently and do not rush the heating. Overheating can make them grainy, so heat in short bursts and stir well.
-
Use sturdy pretzel rods for the frame. A pretzel that bends or snaps too easily will make forming the shamrock harder. I prefer thick rods that give a solid base for the lollipop stick.
-
Keep the workspace warm but not hot. A very cold surface can make the candy set before you have adjusted the pieces, while a very hot room can keep it too soft. Aim for a comfortable, temperate kitchen.
-
Try a few practice shapes before making a full batch. When you are testing, use a small amount of candy and a couple of rods so you learn how much pressure to use and how the pieces sit together. Practice builds calm confidence.
-
Sprinkles are optional. If you do add them, choose them wisely. Smaller, flat sprinkles sit prettiest and stay on the surface without changing the texture too much.
Family Variations on Pretzel Shamrocks
Some families like a touch more sweetness. You can drizzle a little white candy over the green for a delicate contrast. I have made a batch with a tiny bit of crushed peppermint on top for a winter twist, and it felt like a cozy surprise.
Another gentle change is to use dark green or even pastel melts for different seasons. The base technique stays the same, and the result always feels familiar. For a nuts-friendly household, finely chopped toasted nuts can be pressed lightly into the wet candy instead of sprinkles.
If you are making these with children, let them choose the sprinkles and press them in themselves. It turns the recipe into a shared afternoon, and each shamrock becomes a small piece of someone’s imagination. Keep the shapes simple and the mood patient.
FAQs About Pretzel Shamrocks
Can I make this ahead of time?
Yes, and it often holds up beautifully, especially when stored properly and allowed to rest overnight. Keep them in an airtight container at room temperature and layer with parchment to protect the finish.
What if my candy hardens while I am working?
Warm it gently and slowly until it softens again, stirring to smooth it out. If you need to keep it warm longer, set the bowl over a warm but not boiling water bath, stirring occasionally to maintain the texture.
Are sprinkles necessary?
No, they are a small decorative choice and entirely optional. Sprinkles add color and a playful touch, but the shamrocks are lovely plain and glossy as well.
Can I use other shapes instead of shamrocks?
Absolutely. The technique works for hearts, stars, or simple rounds made from pretzel pieces. The key is to press the pretzels together gently and use enough candy to glue them into place.
How do I keep the lollipop stick from wobbling?
Insert the stick while the candy is still soft enough to hold the stick in place, and push it in straight and steady. If you need extra support, add a dab of melted candy at the base around the stick to secure it as it hardens.
A Final Thought
I hope these Pretzel Shamrocks bring a quiet comfort to your kitchen, the same way they have to mine through seasons and small celebrations. They remind me that baking does not require grandeur to be meaningful. A few steady steps, a warm bowl, and the company of those you love are all you need. From my kitchen to yours, may you find ease and pleasure in every small, shared bite.
Pretzel Shamrocks
Ingredients
Main Ingredients
- 1 cup pretzel rods Choose sturdy pretzel rods.
- 1 cup green candy melts Melt according to package instructions.
- optional amount sprinkles Use small, flat sprinkles for decoration.
- 12 pieces lollipop sticks Ensure they are sturdy and food-safe.
Instructions
Preparation
- Melt the green candy melts in short bursts or over a double boiler, stirring until the mixture is smooth and glossy.
- Dip one end of each pretzel rod into the melted candy and place it on a baking sheet lined with parchment paper.
- Use additional pretzel rods to form a shamrock shape with three leaves and a stem.
- Once shaped, dip the pretzel shamrocks in more melted candy and let the excess drip off.
- Add sprinkles while the candy is still wet, if desired.
- Insert lollipop sticks into the base of the shamrocks while the candy is still soft.
- Let them cool until the candy hardens before serving.
Serving Suggestions
- Serve on a simple white platter for a better presentation.
- They can be enjoyed with coffee or tea.
- Store in an airtight container at room temperature.
