
The smell of hot oil and ginger fills the kitchen as the first batch of pot sticker dumplings browns in the pan. My kids hover, cheeks flushed from the stove heat, and my husband reaches for the soy-vinegar jar like it is a tiny treasure. Sometimes a bowl of pot sticker dumplings sits beside a bright sweet potato salad recipe I’ve made, and the mix of warm, savory dumplings and the cool, tangy salad makes the whole meal feel like a small celebration in our everyday life.
Why Pot Sticker Dumplings Still Feels Like Home
The first time I learned to make pot sticker dumplings, I was watching my grandmother fold wrappers at a low kitchen table. Her fingers moved quick and sure, and she hummed a song I could not name. I remember the sound of the wrapper paper against her palms, the way she pinched each edge with the same soft strength she used to tuck my brother into bed.
These dumplings became our family shortcut to comfort. They were a quick dinner after soccer practice and a sticky, joyful mess at birthday gatherings. When I say this pot sticker dumplings recipe feels like home, I mean it in the small, steady ways: the way the ginger lifts the filling, how the edges crisp and then steam soft, and how everyone gathers to dip and tell a little story while they eat.
When I make them now, I think about patience and the pleasure of repetition. The rhythm of filling, folding, and frying becomes a kind of quiet music in the kitchen. Even if you have never folded a dumpling before, the act is forgiving. It welcomes imperfect pleats and encourages curiosity. That is what makes this recipe more than a dish. It is a way to invite people into the warmth of your table.
Bringing Pot Sticker Dumplings Together
“Every time I stir this pot, it smells just like Sunday at home.”
There is a lovely rhythm to making pot sticker dumplings. You mix the filling until it glistens and holds together. The bok choy adds a bright green fleck to the pale meat, and the grated ginger gives an immediate lift that you can almost taste before it hits the pan.
When you fold each wrapper, you will feel the soft give of the dough under your fingertips. Some will look perfect, and others will be homespun and sweet. The first sizzle when those dumplings touch the hot oil is always a little thrilling. From there, a quick steam under the lid puffs them into tender pockets that hide a savory, warm center. The edges wait for you to see them turn golden, and the whole kitchen breathes in that familiar, satisfying aroma.
Ingredients You’ll Need
Ground meat (pork, chicken, or beef)
Bok choy, chopped
Fresh ginger, grated
Garlic, minced
Soy sauce
Dumpling wrappers
Soy-vinegar dipping sauce
(a little extra vanilla if you love a cozy aroma)
(fresh butter gives this its richness when you want a touch of comfort)
I like to have a small bowl of water at the ready to wet the edges of the wrappers. That water is an unsung hero. Also keep a damp towel over the unused wrappers so they do not dry out. Fresh ginger makes a big difference here. If you only have powdered ginger, it will work in a pinch, but the bright, quick sting of fresh grated ginger is part of the soul of this dish.
Step-by-Step Directions
-
In a mixing bowl, combine ground meat, chopped bok choy, grated ginger, minced garlic, and soy sauce.
Stir until the filling becomes glossy and slightly sticky, the way it should be to stay put inside the wrapper. Use your hands if you like; the warmth will help the flavors meld and you can feel the texture. Breathe in the fresh scent of ginger and garlic that rises from the bowl. -
Take a dumpling wrapper and spoon about a tablespoon of the filling into the center.
Be gentle and steady so the wrapper does not tear, and leave a little space near the edge so you can seal it neatly. If the filling bulges too much, use a little less or flatten it slightly with your spoon. It will still taste wonderful even if the shape is not perfect. -
Wet the edges of the wrapper with water, fold in half, and pinch to seal.
Run a finger around the edge or dip the edge in the small bowl of water and press firmly to close. You can pleat the wrapper for a pretty finish or simply press to seal; both ways keep the filling safe and make the dumpling ready for the pan. The sealed pocket should feel snug and slightly plump in your hand. -
Repeat with remaining wrappers and filling.
Make enough for the whole family or extras to keep in the freezer for later, arranging them on a lightly floured tray so they do not stick. Working in small batches keeps the wrappers fresh and the filling at the right texture. Put a damp cloth over your work so the dumplings stay soft while you finish the rest. -
In a pan, add a little oil and heat over medium heat.
Wait until the oil shimmers but is not smoking, then lower the heat a touch so the bottoms can brown slowly and get that beautiful crisp. A nonstick pan or a well-seasoned skillet will make this step easy and reduce the chance of sticking. The gentle sizzle will tell you the pan is ready for its first guests. -
Place the dumplings in the pan and cook until the bottoms are golden brown.
Keep them a bit apart so the edges do not touch and so the heat reaches each dumpling evenly. Watch for that satisfying brown ring at the base while the tops remain soft and pale. The smell will deepen, and you may find everyone drifting closer to the stove. -
Add a small amount of water to the pan and cover to steam the dumplings for about 5 minutes.
The water will hiss and create a steamy cloud that finishes the cooking and makes the dough tender. Keep the lid on tight so the steam can do its work, and check after five minutes to ensure the meat is cooked through. When you lift the lid, watch the steam curl and feel the warmth that floods the kitchen. -
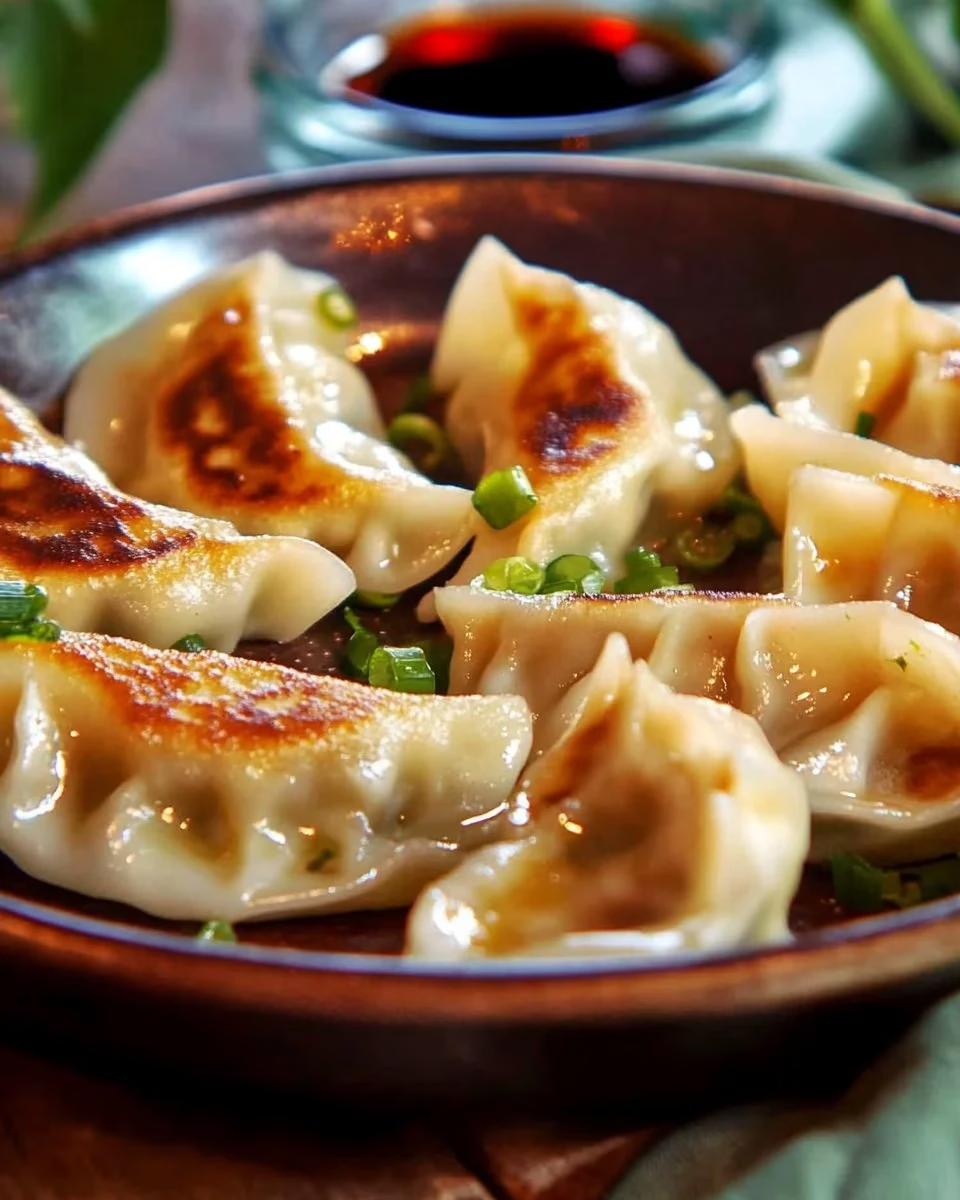
Serve hot with soy-vinegar dipping sauce.
Arrange the dumplings on a platter, drizzle a little sesame oil if you like, and put the dipping sauce at the center for everyone to reach. The contrast of hot dumpling and tangy sauce is part of the comfort, and the crisp bottom with tender top makes every bite a small celebration. Share immediately so nobody has to wait too long for the best, warm bites.
How We Enjoy Pot Sticker Dumplings at Home
We eat pot sticker dumplings at all kinds of meals. On school nights, they are a quick pairing with steamed rice and a simple cucumber salad. For weekend lunches, we make a big batch and set them on the table with little bowls of dipping sauce so everyone can snack and talk. Sometimes I make them as an appetizer for guests, and they always start the meal with chatter and smiles.
Our son likes to dip his dumplings once and eat them upright. My daughter prefers to tear the wrapper and eat the filling first. We save the best pleated ones for my husband because he says they look like little parcels of love. Little rituals like these make the meal feel personal. The way we serve pot sticker dumplings invites conversation and small moments of joy.
If you would like a bright side dish that balances the warm, savory dumplings, I often serve a chilled salad on the side, like an anti-inflammatory sweet potato salad that brings a sweet and tangy counterpoint to the savory pockets. The contrast of textures and temperatures makes the meal feel complete and thoughtfully put together.
Storing Pot Sticker Dumplings for Tomorrow
Leftovers keep well and often taste even better the next day. Put any uneaten dumplings in an airtight container and refrigerate for up to three days. The flavors settle and deepen, and the filling becomes more cohesive, which is a quiet reward for cooking extra.
To reheat, place them in a hot pan with a splash of water and cover to steam until warm, then uncover to crisp the bottoms again. You can also reheat them in the oven at a moderate temperature until heated through, or use an air fryer for a quick refresh that restores crispiness. Avoid microwaving right away if you want the bottoms to stay crisp; if you must microwave, then finish them in a pan for texture.
If you plan to freeze your dumplings, lay them on a tray in a single layer until firm, then transfer them to a freezer bag. Frozen pot sticker dumplings keep for up to two months. When you are ready to cook them from frozen, skip the thawing step and add a few extra minutes to the steaming stage. They will come out tender and satisfying.
Amelia’s Kitchen Notes
-
Use a small bowl of water to seal the wrappers.
It sounds small, but it makes the whole process smoother and keeps the edges glued without making a mess. Dipped finger, pressed edge, done. -
Chop the bok choy finely and squeeze out excess water.
Wet vegetables throw off the meat mixture and can make the filling soggy. A gentle squeeze keeps the texture right and helps the flavors be more even. -
Make a double batch and freeze half.
It feels generous to have ready-made dumplings waiting in the freezer. On a busy night, you will be so glad you did a little extra work earlier. -
Use a mix of meats if you like.
A blend of pork and chicken can be lovely and keeps the filling juicy without being heavy. Season lightly and taste a small bite before you fold the rest. -
Keep a damp towel over the wrappers while you work.
They dry out fast, and a quick cover keeps them soft and easy to fold. It is a small step that saves frustration.
Family Variations on Pot Sticker Dumplings
We have a few playful variations that keep the recipe fresh and fun. In the winter, I sometimes add a spoonful of hoisin to the filling for a deeper sweetness. In spring, a little chopped carrot and scallion bring color and a faster-cooking crunch. For a vegetarian version, use mashed firm tofu with sautéed mushrooms, ginger, and bok choy for a filling that still feels hearty.
At holiday gatherings, we sometimes add a touch of toasted sesame oil and a sprinkle of chopped roasted peanuts for texture. My brother likes to add a pinch of five-spice to the filling for warmth and a hint of star anise. These small changes keep the base recipe familiar while giving everyone a chance to explore a new taste.
If you prefer a lighter pan-fry, steam the dumplings first and then just give them a quick crisp in a dry skillet. That method keeps them soft but still gives you a little texture on the bottom. The core idea is the same: warm filling, tender wrapper, and a flavorful dip.
FAQs About Pot Sticker Dumplings
Can I make the filling ahead of time?
Yes, you can prepare the filling a day ahead and keep it covered in the fridge. Let it come to room temperature before you start filling the wrappers so the mixture is easy to work with and the flavors are balanced.
Do I need special wrappers to make pot sticker dumplings?
No, store-bought dumpling wrappers work beautifully and save time. Look for them in the refrigerated section of an Asian market or many grocery stores. If you want to make wrappers from scratch, simple dough of flour and water will do, but the store-bought kind keeps the recipe approachable.
How do I keep the bottoms crisp without burning them?
Use medium heat and a bit of oil, and watch for the oil to shimmer. Brown the bottoms slowly, then add water and cover to steam. Finish by uncovering and letting the water evaporate so the bottoms crisp up without burning. Patience is the trick.
Can I freeze pot sticker dumplings before cooking?
Yes. Freeze them on a single layer until firm, then store in a freezer bag. Cook from frozen and add a couple of minutes to the steaming step. They keep well and make a reliable quick meal later.
What dipping sauce should I use if I like spicy flavors?
Mix soy sauce, a splash of rice vinegar, a pinch of sugar, and a few drops of chili oil or a spoonful of chopped fresh chili. Taste and adjust until it sings for you. A balance of salty, tangy, sweet, and spicy makes a tiny bowl of sauce feel like a big part of the meal.
Helpful Tips Before You Cook
If you are making pot sticker dumplings for the first time, give yourself the time to enjoy the process. Put on a playlist, set out small bowls for filling, and invite family members to help with folding. Even children can press the edges, and the work becomes part of the evening.
Use a light hand with salt in the filling if you plan to serve salty dipping sauce on the side. You can always add more flavor at the table. Keep fresh herbs like cilantro or scallion nearby to sprinkle on just before serving for a bright, fresh finish.
Clean as you go. A tidy counter makes the process feel calmer, and the next meal will happen more easily when the space is ready. Keep a wet cloth within reach to catch stray bits of filling and to cover the wrappers when you need a break.
A Warm Note On Sharing
When I bring pot sticker dumplings to a table, I think about who I want to feed. Sometimes that is a neighbor with a new baby who needs holding and easy dinners. Other times it is a crowd of teenagers who want food that they can hold in their hands and eat while they talk. The act of making these dumplings says, simply and clearly, that you are welcome and that there is room at this table.
Offer a small stack of napkins and a few extra bowls for dipping. Encourage people to try a steaming hot one and then a cooled one. Notice the quiet smiles and the quick conversations that start over sauce bowls. Those are the moments that make this recipe more than a meal.
Until the Next Recipe
I hope this pot sticker dumplings recipe gives you a gentle way into a new kitchen ritual. Take your time, enjoy the smells as they come together, and bring people in to help when you can. There is comfort in a shared plate, and there is joy in learning a little rhythm that becomes your own.
I hope these dumplings bring warmth to your home, the same small kind of warmth that keeps me cooking with my hands in the flour and my heart in the story.
Pot Sticker Dumplings
Ingredients
Dumpling Filling
- 1 lb Ground meat (pork, chicken, or beef) Choose your preferred type of meat.
- 1 cup Bok choy, chopped Chop finely and squeeze out excess water.
- 2 tbsp Fresh ginger, grated Fresh ginger is recommended for flavor.
- 2 cloves Garlic, minced Adds depth to the filling.
- 3 tbsp Soy sauce For seasoning the filling.
Dumpling Assembly
- 1 pkg Dumpling wrappers Store-bought wrappers work best.
- 1 cup Soy-vinegar dipping sauce Serve alongside the dumplings.
Cooking
- 2 tbsp Oil For frying the dumplings.
Instructions
Preparation
- In a mixing bowl, combine ground meat, chopped bok choy, grated ginger, minced garlic, and soy sauce.
- Stir until the filling becomes glossy and slightly sticky.
Filling the Dumplings
- Take a dumpling wrapper and spoon about a tablespoon of the filling into the center.
- Wet the edges of the wrapper with water, fold in half, and pinch to seal.
- Repeat with remaining wrappers and filling.
Cooking
- In a pan, add a little oil and heat over medium heat.
- Place the dumplings in the pan and cook until the bottoms are golden brown.
- Add a small amount of water to the pan and cover to steam the dumplings for about 5 minutes.
- Serve hot with soy-vinegar dipping sauce.
