The smell of cocoa and vanilla always takes me back to the small kitchen where I learned to bake, a warm counter dusted with flour and a tin of cookies cooling by the window, and when I make Mini Red Velvet Wreath Cakes for Festive Flavor Bliss I feel that same slow comfort. I remember a quiet afternoon when my niece and I pressed little rings of batter into a pan and watched them rise, and that memory sits beside the way I reach for a warm mug and a simple cookie when the weather turns. In that calm space I also keep other small treats like my favorite apple crisp mini cheesecakes, each one made with care and the same steady hands. Baking in small sweets brings the people I love closer, and these wreath cakes do exactly that.
The Story Behind This Mini Red Velvet Wreath Cakes for Festive Flavor Bliss
This recipe began as a way to keep a classic red velvet flavor in a smaller, gentler form that fit a family gathering. I first made a version of these for a winter potluck when my sister asked for something festive but not too fussy. I found that shaping the cakes in a little wreath brought smiles and slowed the table down in the nicest way.
Over the years I adjusted the mix so it stayed moist and tender, and I learned to trust small signs like a springy top and a faintly chocolate scent. It became a part of quiet afternoons when I wanted to share something simple and sweet. Those moments matter most to me, and each wreath cake carries a little of that calm.
What Makes This Recipe So Reliable
The recipe uses gentle chemistry that home bakers can count on, with baking soda meeting a touch of vinegar to lighten the crumb. Buttermilk brings a soft tang that keeps the cakes from feeling heavy, and the cocoa gives a whisper of chocolate that pairs well with cream cheese frosting. The result is a cake that feels classic and familiar in every bite.
I wrote this recipe so a beginner could follow and feel reassured, and so a seasoned baker could return to a trusted method. Small habits, like letting butter come to room temperature and measuring flour with a spoon and level, make a big difference in texture. I want you to feel steady when you bake these, like I do when I return to the same bowl and spatula.
The Gentle Process Behind It
“Some recipes just feel right the moment they come together.”
I begin by warming the oven and letting my butter soften on the counter. I mix the dry ingredients separately, then cream the butter and sugar until they feel light and soft, watching for a texture that holds air and looks pale. From there I add the egg and vanilla, then alternate adding the dry mix and buttermilk so the batter stays even and smooth.
When the red coloring joins the batter the color deepens quickly, like the first blush of winter fruit. I fill each well carefully, smoothing the tops with the back of a spoon and keeping the pan level so each wreath bakes the same. Watch for a gentle spring in the center and a hint of color change at the edges to know they are done.
Ingredients You’ll Need
1.25 cups all-purpose flour (ensures the perfect structure for your mini red velvet wreath cakes), room temperature helps with texture.
1 tablespoon cocoa powder (adds depth to the flavor), sift to avoid lumps.
0.5 teaspoon baking soda (helps create fluffy, light cakes), measure carefully.
0.25 teaspoon salt (enhances sweetness and harmonizes flavor), a small pinch brings balance.
0.5 cups unsalted butter (softened, contributes to rich, buttery taste), softened to the touch but not melted.
0.75 cups granulated sugar (provides sweetness and helps the cake rise), use straight from the bag.
1 large egg (binds ingredients together for stable structure), room temperature helps the batter join smoothly.
1 teaspoon vanilla extract (infuses a lovely aroma), a gentle classic note.
0.5 cups buttermilk (adds moisture and tanginess), shake and stir before measuring.
1 teaspoon white vinegar (reacts with baking soda for light cake), mix with buttermilk for a tender crumb.
1 tablespoon red food coloring (gives cakes festive hue), use liquid or gel based on preference.
8 oz cream cheese (softened, provides a creamy contrast), room temperature for smooth frosting.
0.5 cups unsalted butter (softened, ensures smooth texture), match the butter to the cream cheese.
2 cups powdered sugar (sweetens the frosting), sift for a silky finish.
1 teaspoon vanilla extract (enhances flavor profile), added to the frosting for depth.
I list these items plainly so you can gather them with care. Small notes like room temperature help you feel prepared at each step.
Step-by-Step Directions
-
Wreath Cake Preparation
Preheat your oven to a moderate temperature and prepare a mini wreath or donut pan by greasing lightly. Combine the flour, cocoa, baking soda, and salt in a bowl and stir until evenly mixed. Cream together the softened butter and granulated sugar until pale and slightly fluffy, then beat in the egg and vanilla until smooth and fragrant. Alternate folding in the dry mixture and the buttermilk, finish with the vinegar and red food coloring, and fill each well two thirds full; watch for a batter that moves like thick satin. -
Frosting Preparation
Beat the softened cream cheese and softened butter until the mixture is utterly smooth and without lumps, pausing to scrape the bowl so nothing hides behind the paddle. Gradually add the powdered sugar and the teaspoon of vanilla, mixing slowly at first and then faster until the frosting feels light and spreads easily. Taste for balance, adding a touch more powdered sugar if you want a firmer icing, and keep the frosting chilled briefly if it becomes too soft. -
Decoration
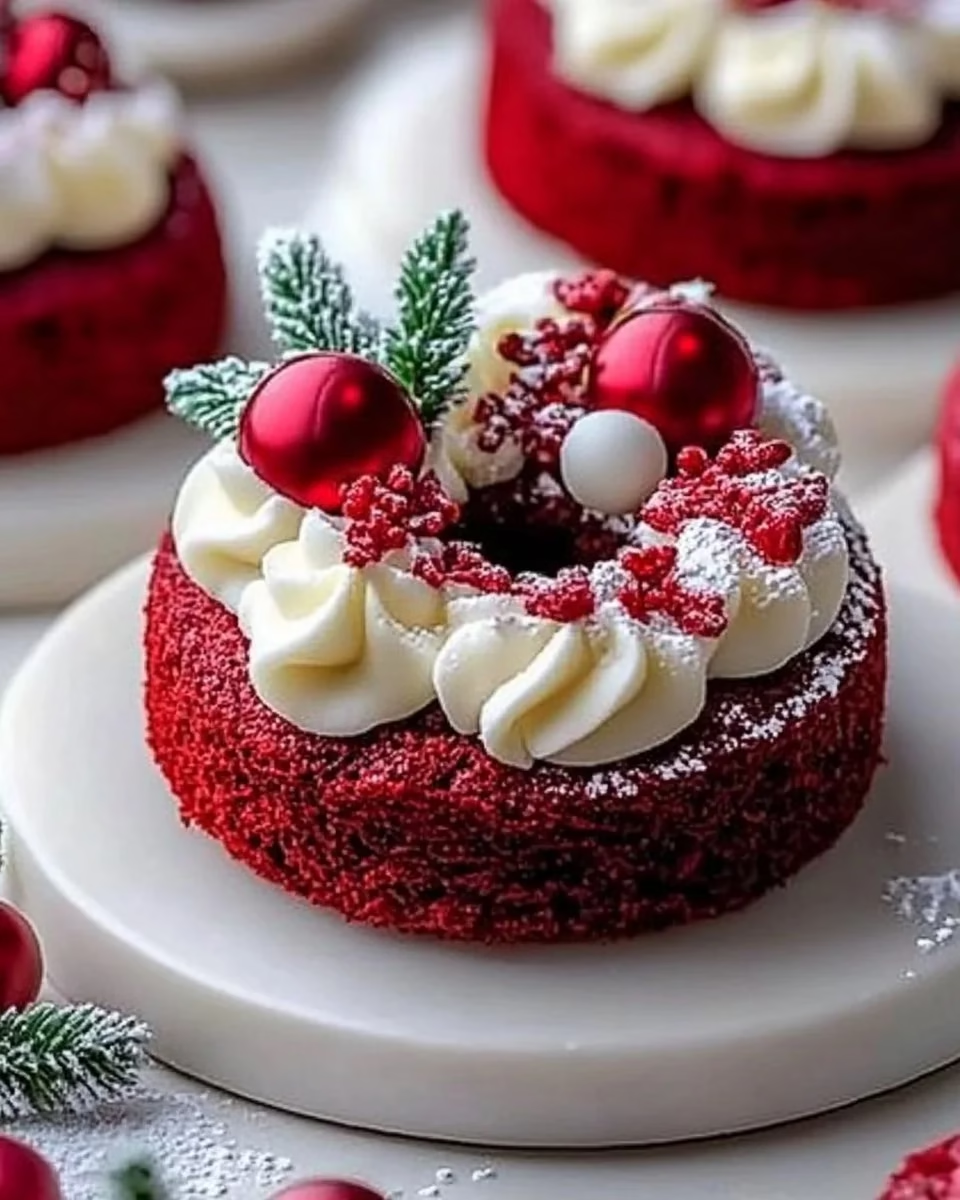
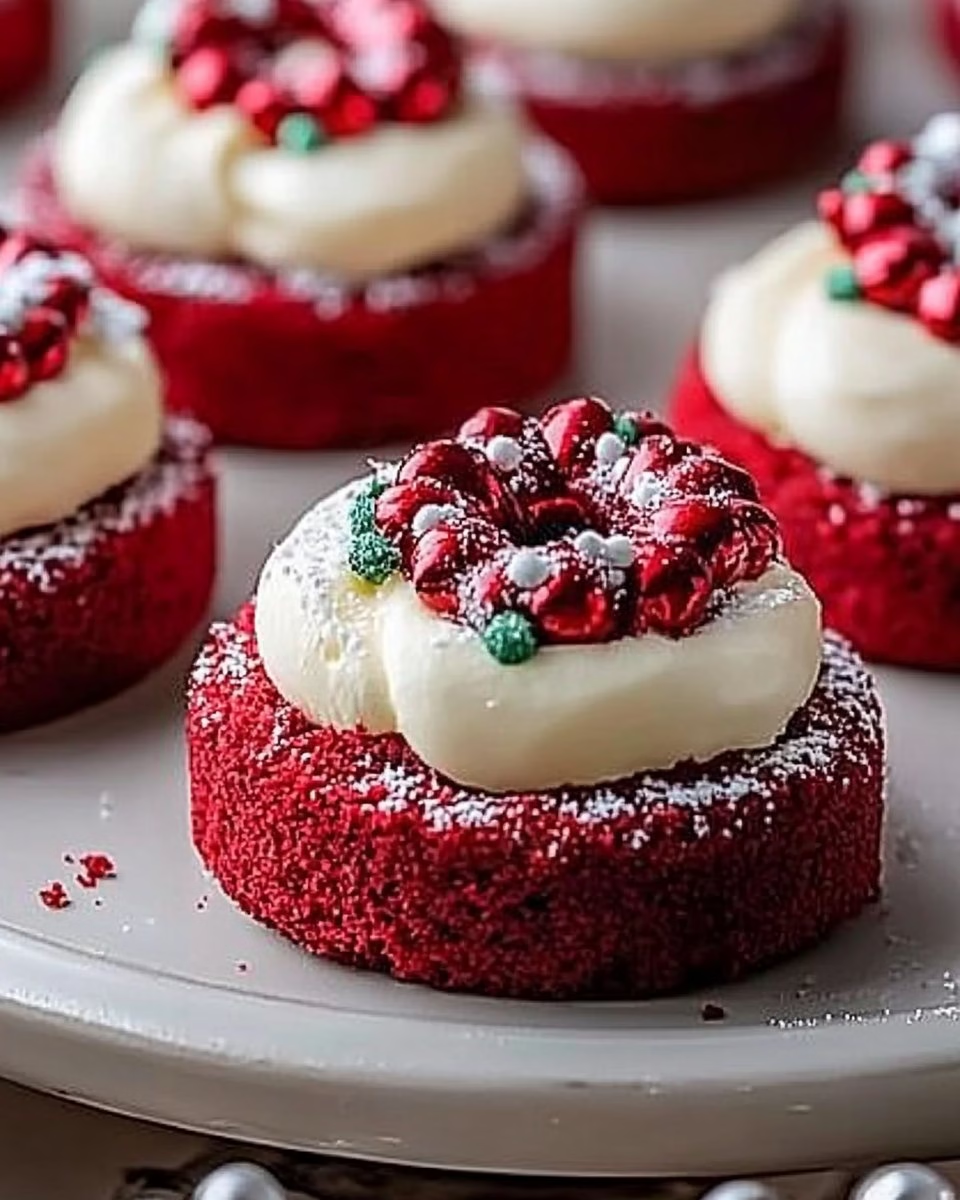
Once the mini wreath cakes have cooled until just set, turn them out and place them on a wire rack for full cooling; a slightly warm cake will make the frosting slide. Pipe or spread the cream cheese frosting in gentle spirals along the top, leaving the center visible like a little ring. Add simple decorations such as a sprinkle of cocoa, chopped nuts, or a dot of jam at the ring center, and let the frosting settle before stacking or plating for serving.
Gathering Simple Baking Staples
When I set out to bake, I pull the ingredients close and lay them out like old friends. I use measuring spoons and cups that I trust, a sturdy mixing bowl, and a wooden spoon I reach for without thought. The pan matters too; a well-seasoned mini pan keeps the cakes from sticking and helps them keep their gentle shape.
If you enjoy other small cakes, try a richer chocolate option sometimes, or keep one or two simple pans in the cupboard so you can make a treat at a moment’s notice. You might also find that learning one reliable batter lets you make other small desserts when friends stop by. For those who like variety, my take on small chocolate treats like Black Velvet Cupcakes uses similar ideas but shifts the warmth and color.
Serving Mini Red Velvet Wreath Cakes for Festive Flavor Bliss With Care
I like to serve these wreath cakes on a plain plate with a warm cup of coffee or a pot of tea nearby. They feel right for a holiday table and for a quiet afternoon when friends come by with an extra story to tell. The cream cheese frosting pairs well with a gentle sweetness in the cake, and the small size makes sharing easy.
Arrange them on a low-rimmed plate so the frosting stays near eye level and guests can admire the rings. A small napkin at each place makes the moment feel kinder, and offering a second cake to anyone who looks undecided shows the kind of hospitality that warms a room.
Keeping It Fresh and Saving a Slice for Tomorrow
These mini cakes keep well when stored in an airtight container in the refrigerator for up to three days. The cream cheese frosting keeps them moist and the small size helps flavors settle and mellow overnight. If you prefer them at room temperature, remove them from the refrigerator about thirty minutes before serving so they soften slightly.
To refresh a chilled cake, let it sit at room temperature and then warm gently in a low oven for a few minutes if you like it slightly warmed. I do not recommend freezing the frosted cakes, but you can freeze unfrosted mini cakes for up to one month, wrapped tightly and placed in a freezer container for best results.
Mary’s Baking Notes
Measure flour by spooning it into the cup and leveling it off. This keeps the crumb tender rather than dense.
Softened butter should still hold its shape but give when pressed slightly. This is what helps the batter cream properly.
Let the cakes cool in the pan for a few minutes before turning them out, but don’t leave them there until cold. A brief rest helps them release cleanly.
If your cream cheese frosting seems too loose, chill it a short time and then whip briefly to restore body. Small steps like this keep the texture smooth and even.
These tips are the quiet lessons I learned by baking again and again. They are the sort of adjustments that turn a good cake into a steady one.
Family Variations on a Classic Wreath Cake
If you want a small change, fold a tablespoon of orange zest into the batter for a light citrus lift that pairs beautifully with cream cheese. For a nutty touch, sprinkle finely chopped toasted pecans into the frosting before it sets so each bite has a hint of crunch. You can also replace part of the cocoa with finely ground toasted almonds for a subtle change in texture and flavor.
For a simpler twist, skip the food coloring entirely and let the cocoa take center stage, making a muted red velvet that feels more old fashioned. Another gentle option is to swap the white vinegar for lemon juice in the buttermilk mix for a slightly brighter tang. Each of these changes keeps the recipe familiar while letting your family’s tastes show.
Helpful Notes Before You Begin
Start with all your ingredients at hand and warmed to room temperature where noted, and give yourself quiet time to follow the steps. Rushing through creaming or folding can lead to a cake that is heavier than intended. Use a timer and trust your eyes and touch as you bake; a cake done well will feel springy and smell faintly of cocoa and butter.
If you bake in larger batches, line two pans and rotate them between racks halfway through baking to ensure even color and rise. Keep your oven door closed except to check toward the end of the recommended time, and remember that each oven runs its own little rhythm.
FAQs About Mini Red Velvet Wreath Cakes for Festive Flavor Bliss
Can I make this ahead of time?
Yes, you can make the cakes a day ahead and store them in the refrigerator. Frost them just before serving for the brightest look, or frost them lightly and chill if you prefer a firm frosting.
Can I use a different pan if I do not have a wreath pan?
You can use a mini muffin pan and press a small well in the center with the back of a spoon for a similar effect. The final look will be slightly different, but the flavor and texture remain the same.
What if my batter seems too thin or too thick?
If it seems too thin, check that you added the dry ingredients fully and stir gently until it holds together like thick cream. If too thick, add a splash more buttermilk, one tablespoon at a time, until it moves smoothly.
Can I make these gluten free?
You can try a one-to-one gluten free flour blend that bakes like regular flour, though the texture may be a touch crumblier. Give the batter a careful stir and watch the baking time as it may change slightly.
How do I know when the cakes are done?
Gently press the top; it should spring back and feel set. A toothpick in the thicker part should come out with just a few crumbs and not wet batter.
Little Lessons From Years of Baking
Be patient when you cream butter and sugar; air is the quiet lift that makes the crumb gentle. Let your pans come to room temperature before washing them if you have just used them; this protects finishes and keeps cakes from sticking. Taste and adjust the frosting, and do not be afraid to add a touch more sugar or a bit of salt to round the flavor.
I learned to trust simple tools and small timings more than perfect measurements. The calm practice of baking becomes a way to slow down and share comfort with those around the table. Each little habit accumulates into a reliable result.
Classic Twists We Love
A modest dusting of powdered sugar over the frosting gives a frosted look like new snow on a wreath, and it keeps the decoration simple. For a holiday table, add a couple of crystallized ginger pieces in the center of each wreath for warmth. Another small change is a tiny smear of raspberry jam in the center before piping, which makes a small jewel of flavor without taking over.
These tweaks let you fold in memories of different holidays and family moments where a taste can bring someone back to the kitchen table where laughter and stories mix with the smell of baking.
From My Kitchen to Yours
I hope these Mini Red Velvet Wreath Cakes for Festive Flavor Bliss find a place in your simplest celebrations and quiet afternoons. They are a small recipe, gentle to make and tender to share, and they remind me of the patient rhythm of baking with people I love. If you try them, take your time and let the little signs guide you: the batter that moves like satin, the tops that spring back, and the frosting that smooths like soft cream.
May these tiny wreaths bring warmth to your home and invite conversation and comfort around your table. Baking is a kind of love, and I hope this recipe gives you a way to share that with the people you care for.
Mini Red Velvet Wreath Cakes
Ingredients
For the Wreath Cakes
- 1.25 cups all-purpose flour Room temperature helps with texture.
- 1 tablespoon cocoa powder Sift to avoid lumps.
- 0.5 teaspoon baking soda Measure carefully.
- 0.25 teaspoon salt A small pinch brings balance.
- 0.5 cups unsalted butter Softened, contributes to rich taste.
- 0.75 cups granulated sugar Use straight from the bag.
- 1 large egg Room temperature helps the batter.
- 1 teaspoon vanilla extract A gentle classic note.
- 0.5 cups buttermilk Shake and stir before measuring.
- 1 teaspoon white vinegar Mix with buttermilk for tender crumb.
- 1 tablespoon red food coloring Use liquid or gel.
For the Frosting
- 8 oz cream cheese Room temperature for smooth frosting.
- 0.5 cups unsalted butter Softened, ensures smooth texture.
- 2 cups powdered sugar Sift for a silky finish.
- 1 teaspoon vanilla extract Enhances flavor profile.
Instructions
Wreath Cake Preparation
- Preheat your oven to a moderate temperature and prepare a mini wreath or donut pan by greasing lightly.
- Combine the flour, cocoa, baking soda, and salt in a bowl and stir until evenly mixed.
- Cream together the softened butter and granulated sugar until pale and slightly fluffy.
- Beat in the egg and vanilla until smooth and fragrant.
- Alternate folding in the dry mixture and the buttermilk, finish with the vinegar and red food coloring.
- Fill each well two thirds full; watch for a batter that moves like thick satin.
Frosting Preparation
- Beat the softened cream cheese and softened butter until the mixture is utterly smooth and without lumps.
- Gradually add the powdered sugar and the teaspoon of vanilla, mixing slowly at first and then faster until the frosting feels light and spreads easily.
- Taste for balance, adding a touch more powdered sugar if you want a firmer icing.
Decoration
- Once the mini wreath cakes have cooled until just set, turn them out and place them on a wire rack for full cooling.
- Pipe or spread the cream cheese frosting in gentle spirals along the top, leaving the center visible.
- Add simple decorations such as a sprinkle of cocoa, chopped nuts, or a dot of jam at the ring center.