I can still smell the lime when I think of that first pan I baked for my sister’s small summer party. The kitchen was warm, the windows open to a light breeze, and the scent of sweet condensed milk and citrus wrapped around us like an old apron. I learned then how a simple bar, made with patient hands and quiet care, can make people stop and smile. If you enjoy the same gentle sweets, you might like to try a similar citrus treat, such as a sweet cousin, Key Lime Fudge, but today I will guide you through the bars I keep coming back to.
Key Lime Bars
Ingredients
For the crust
- 1 1/2 cups graham cracker crumbs
- 1/2 cup sugar
- 1/2 cup unsalted butter, melted (room temperature helps with texture)
For the filling
- 2 large eggs (room temperature helps the filling come together)
- 1 can sweetened condensed milk (14 ounces, this adds a classic richness)
- 1/2 cup Key lime juice (fresh is best for bright flavor)
- 1 teaspoon lime zest (this brings a hint of perfume to the filling)
- powdered sugar for dusting (optional, a light touch makes them look festive)
Instructions
Preparation
- Preheat the oven to 350°F (175°C) and grease a 9×9-inch baking dish.
- In a bowl, mix graham cracker crumbs, sugar, and melted butter until combined.
- Press the mixture into the bottom of the prepared baking dish to form a crust.
- In another bowl, whisk together eggs, sweetened condensed milk, Key lime juice, and lime zest until smooth.
Baking
- Pour the filling mixture over the crust and bake for 20-25 minutes or until the filling is set.
- Cool the bars until just set, then refrigerate for at least 2 hours before cutting into bars.
Serving
- Dust with powdered sugar before serving, if desired, and enjoy!
Notes
Nutrition
Why This Key Lime Bars Has Always Been a Favorite
This recipe has held its place on my counter for years because it is steady and kind. It does not ask for rare ingredients or perfect timing, and yet it gives a bright, soft filling that feels like a small celebration. I usually reach for it when I want something that says I care without fuss. The balance of a buttery crust with a smooth, tangy center is simple, familiar, and quietly joyful.
I first made these bars on a lazy afternoon when a neighbor stopped by with a basket of limes. Baking them became a small ritual after that. The crust sings of buttery crumbs, and the filling is creamy and cool. Those same bars have traveled to family dinners, school lunches, and late night cups of tea. Every time I pull them from the fridge I remember the soft clink of the spoon and the small, satisfied faces that follow.
What makes this recipe reliable is its honesty. You can feel the dough under your fingertips as you press it into the pan. You can watch the filling set, not quake, not crack. It asks for a little patience with cooling and chilling, and it gives back a texture that is smooth and just firm enough to slice. That kind of trust is what I want in a dessert I make for people I love.
The Story Behind This Key Lime Bars
These bars come from a long line of simple, trusted desserts I learned from neighbors and old recipe cards. They carry the kind of home cooking that values good ingredients and steady hands. A childhood friend taught me how to zest limes without losing the fragrant oils, and my mother showed me how to press a crust so it holds its shape without crumbling away.
Over the years I have adjusted nothing more than a little zest here and a little less sugar there, always keeping the same heart. The dish is modest and bright. It is the kind of dessert you can make any afternoon for no reason at all, then share a piece with a friend who stays to talk a while. Making it is like wrapping a small gift in the quiet of your kitchen.
How to Make Key Lime Bars
“Some recipes just feel right the moment they come together.”
Start by warming the oven and preparing your pan, and let the smell of butter begin to fill the kitchen. The crust is an easy mix that will press smoothly into the pan. You want it even and firm, but not so packed that it becomes hard after baking.
When you whisk the filling, aim for a bright, glossy mix. The eggs, condensed milk, juice, and zest come together quickly if you keep a steady hand. Pour it over the crust with care, then watch the edges as the bars bake. I look for a slight firming at the center and tiny bubbles around the edge to know they are done.
Once out of the oven, cool them until they feel just set to the touch, then move them into the fridge to finish. The chill helps the texture settle into that fine, clean slice you will love. Dusting with powdered sugar is lovely, but the bars are just as comforting without it.
Preheat the oven to 350°F (175°C). Grease a 9×9-inch baking dish.
Pressing the crust is the first quiet task. A firm, even layer will hold the filling and give a crisp contrast to the soft center.In a bowl, mix graham cracker crumbs, sugar, and melted butter until combined. Press this mixture into the bottom of the prepared baking dish to form a crust.
Work with clean hands or the back of a spoon to press the crumbs down. Aim for an even thickness and a smooth top. You should feel the crust give slightly under firm pressure.In another bowl, whisk together eggs, sweetened condensed milk, Key lime juice, and lime zest until smooth. Pour this mixture over the graham cracker crust.
Whisk until the mixture looks glossy and uniform. Pour gently so the filling settles across the crust without splashing. The bright green of the juice and zest will remind you of summer.Bake for 20-25 minutes or until the filling is set.
Watch for a slight firming in the center and a faint golden edge. Avoid overbaking so the center keeps its tender creaminess. A light jiggle is okay, but it should not be loose.Let cool, then refrigerate for at least 2 hours before cutting into bars.
Cooling is not a step to skip. The chill gives the bars a neat edge and a pleasant, cool bite. Slice with a sharp knife and clean the blade between cuts for tidy pieces.Dust with powdered sugar before serving, if desired.
A gentle dusting makes the bars look special without changing the flavor. Serve with a small spoon of whipped cream or a thin slice of lime for a simple, lovely finish.
Ingredients You’ll Need
1 1/2 cups graham cracker crumbs
1/2 cup sugar
1/2 cup unsalted butter, melted (room temperature helps with texture)
2 large eggs (room temperature helps the filling come together)
1 can (14 ounces) sweetened condensed milk (this adds a classic richness)
1/2 cup Key lime juice (fresh is best for bright flavor)
1 teaspoon lime zest (this brings a hint of perfume to the filling)
Powdered sugar for dusting (optional) (a light touch makes them look festive)
These are simple things you may already have in the pantry. Good butter and fresh lime juice make a noticeable difference, but the recipe is forgiving and kind to gentle substitutions.
Bringing Key Lime Bars Together
The work here is calm and direct. Measure with care, but do not fret about perfection. The crust will come together in a few minutes and the filling needs only a steady hand. When you press the crust into the pan, think of it as laying the foundation for something you will be proud to share.
Bake in the middle of the oven so heat moves evenly around the pan. The smell that rises while they bake is soft and clean. When you open the oven, you will see a pale set across the top and a small, steady rise at the edges. That is your cue to turn off the heat and let them rest.
After removing from the oven, let the pan sit until it reaches a gentle warmth. Move the dish to the counter and allow it to cool to room temperature. From there, a good chill in the fridge will finish the bars and make slicing easier. This two-step resting gives you the texture you want without rushing.
Serving Key Lime Bars With Care
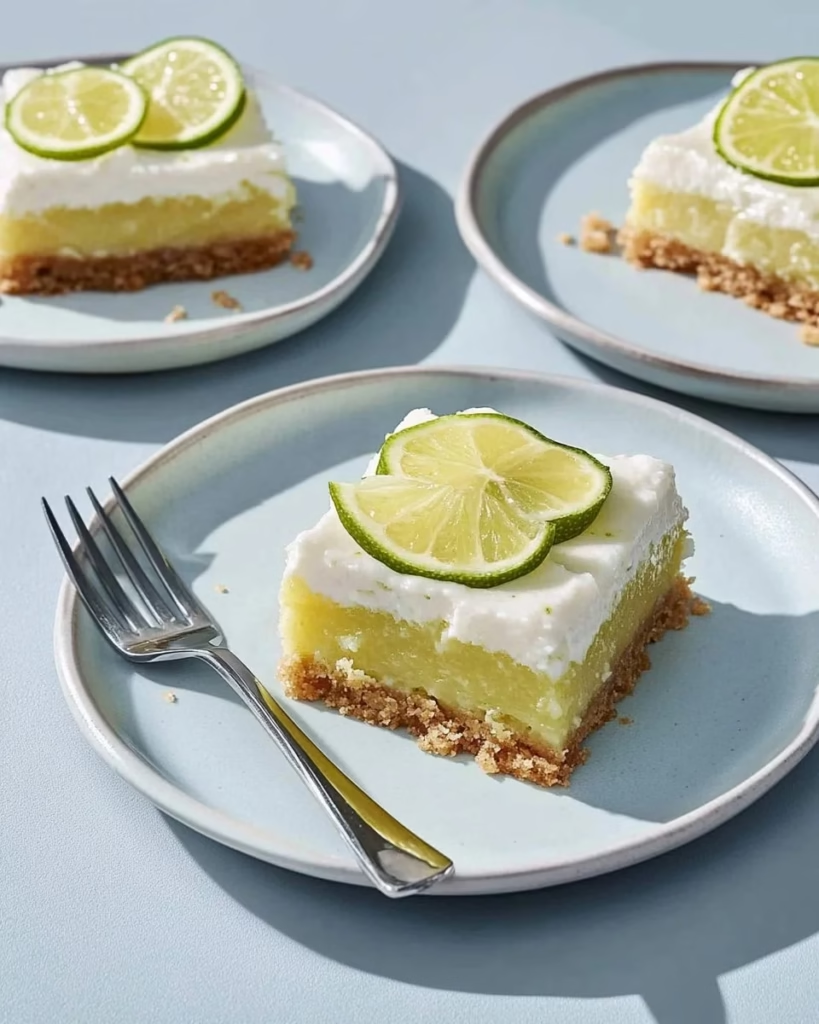
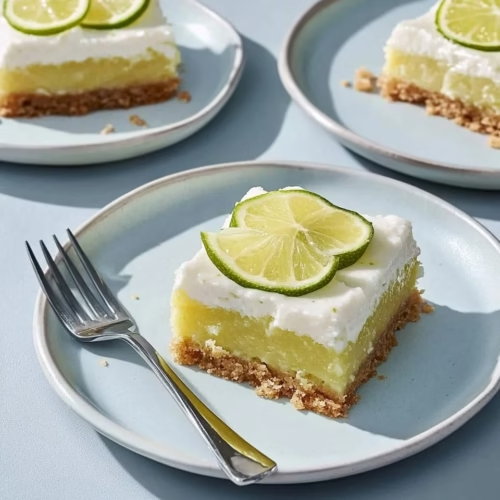
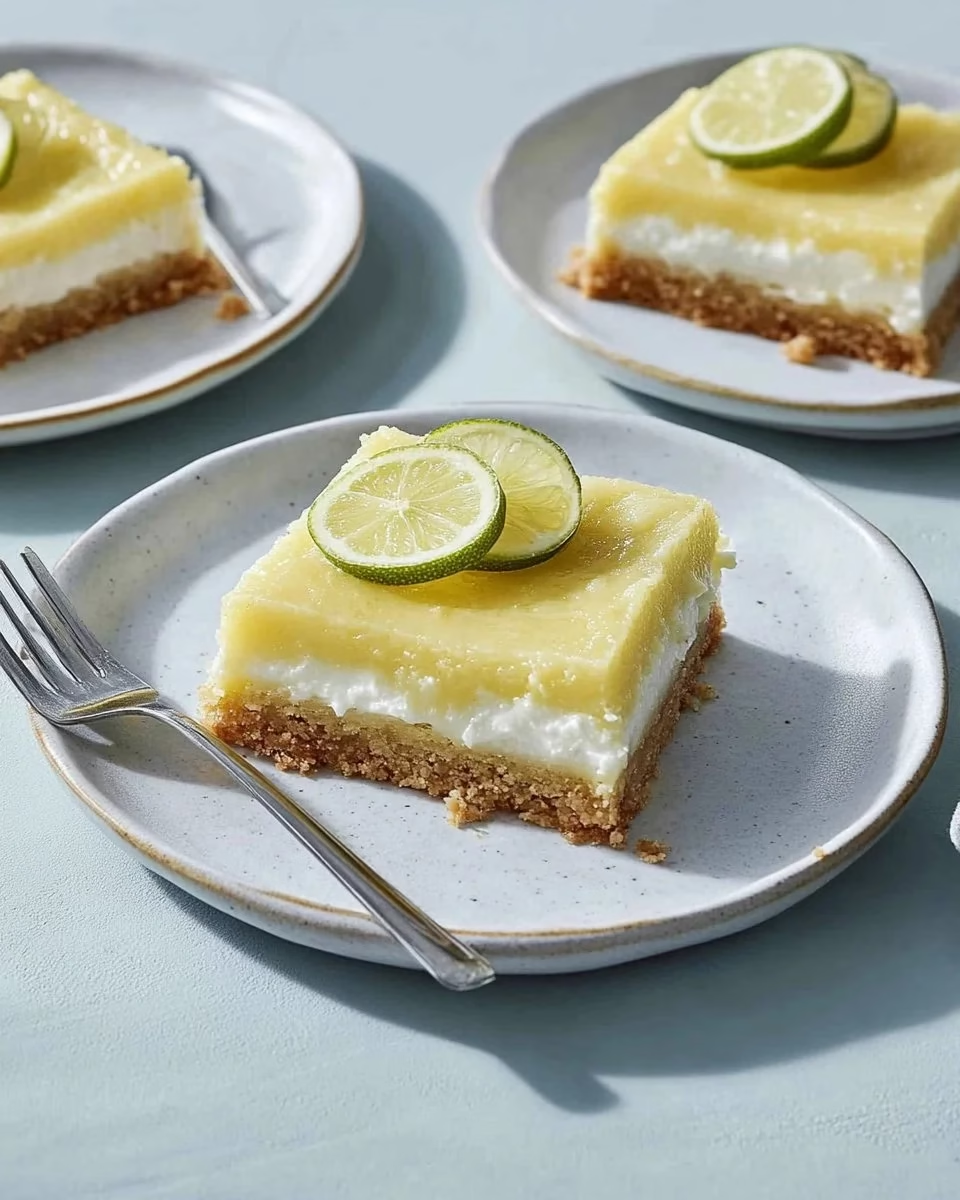
I like to present these bars in a simple way so the flavors can speak quietly. A small square on a plain plate, a dusting of powdered sugar, and a thin twist of lime make each serving feel like a small kindness. They pair well with coffee in the afternoon or a cool glass of milk for children who love the tang.
When I bring them to a potluck, I cut them into small pieces so everyone can taste a piece. They warm conversation and make someone slow down long enough to enjoy a bite. If you are sharing them at a larger gathering, consider a tray lined with parchment to keep the crust intact and to make serving easier.
For a different idea, you can serve the bars alongside richer, fall desserts to balance sweet warmth. They stand up well next to desserts with caramel or cinnamon notes, and they offer a bright contrast that guests often appreciate. If you like exploring pairings, try them with a creamy, apple-based bar like a soft caramel apple cheesecake bar to see how the flavors play together.
Storing Key Lime Bars for Later
These bars keep their charm when stored with a little care. Wrap the cooled and cut pieces in an airtight container or cover the pan tightly with plastic wrap. In the fridge they will stay fresh for up to five days and will keep their bright flavor and soft texture.
If you need to make them further ahead, the bars freeze well. Wrap each piece in plastic and place them in a freezer bag. They can stay frozen for a month or two. Thaw them in the refrigerator overnight for the best texture before serving.
When you take them out of the fridge, allow a few minutes at room temperature before serving. That short time brings back a little of the softness and lets the flavor open up. These small moments make the experience feel gentle and homey.
Mary’s Baking Notes
Use fresh Key lime juice when you can. It offers a bright, clean taste that bottled juice cannot fully match. If you only have bottled juice, add a touch more zest to bring back some of the fresh oils.
Room temperature eggs and slightly cooled melted butter give a smoother filling and a better crust texture. Cold eggs can make the filling take longer to set, and piping hot butter can change the crumb.
Press the crust firmly but not too tight. You want it compact enough to hold together, but not so dense that it turns hard after baking. A pleasing crust will give just a little when you press it.
Don’t overbake. The center should feel set but still tender. A little wobble in the middle is fine, because it will firm up while cooling.
Clean your knife between cuts for neat squares. Run it under warm water and dry it to make each slice look as lovely as the first.
Family Variations on Key Lime Bars
One of the nicest things about this recipe is how it welcomes small changes. If your family likes a bit more texture, add a handful of finely chopped toasted coconut to the crust. That gives a whisper of chew and another layer of flavor without changing the heart of the bars.
For those who love a richer finish, a thin layer of whipped cream can sit on top just before serving. I sometimes fold a little lime zest into the cream so it echoes the filling. It is a gentle upgrade that keeps the bars feeling homely and comforting.
If you want a holiday twist, try adding a sprinkle of ground ginger to the crust. It pairs well with the tart lime and brings a warm note that feels seasonal. Keep the change small so the bars remain familiar and reassuring to people who know the original.
You can also serve the bars with a small spoon of fresh berries on the side. Raspberries or sliced strawberries offer a sweet contrast that children often enjoy. These small variations keep the recipe feeling like a living thing, one that fits into different moments and tastes.
FAQs About Key Lime Bars
Can I make this ahead of time?
Yes, and it often holds up beautifully, especially when stored properly and allowed to rest overnight. The flavors settle and the texture becomes even more pleasant after a day in the fridge.
Can I use regular lime instead of Key lime?
You can. Regular limes will work well and provide a bright taste. Key limes have a slightly different aroma, but the bars will still be delicious with ordinary limes.
What if my filling cracks on top?
A small crack is more a sign of timing than failure. Make sure the oven is not too hot and allow the bars to cool gently. A crack does not affect the taste, and a little powdered sugar can hide it if you prefer.
How thin or thick should the crust be?
Aim for an even layer that is about a third of the total height of the finished bar. This gives a pleasant contrast to the filling without overwhelming it. Press it firmly so it holds together when sliced.
Can I halve or double the recipe?
Yes, this is an easy recipe to scale. Halve the ingredients for an 8-inch square pan or double them for a larger pan. Keep an eye on bake time, which may change a bit with a different pan size.
More Sweet, Seasonal Treats You’ll Love
When you’re craving something soft and nostalgic, Marshmallow Fluff Fudge is a simple, old-fashioned sweet that melts just as easily into family moments. For playful comfort, Banana Pudding Rice Krispie Treats carry that familiar pudding flavor in a no-bake form everyone loves.you can always find me sharing from my kitchen on Pinterest and over on Facebook.