I can still smell the sugar and jam when I close my eyes, as if the kitchen remembers every small movement my hands have made over the years. The Homemade Jam Tart always brings a gentle hush to the room, a slow pause where the oven warmth and the sweet scent make long afternoons feel like safe places. Sometimes I set a plate on the windowsill and watch neighbors walk by, thinking that a simple tart can say hello in its quiet, familiar way, much like the little treats I have tucked into the recipe box for years, and even a sweet idea like tart cherry gummies lives in that same gentle family of sweets.
Why This Homemade Jam Tart Feels Comforting
This recipe has lived on my counter for decades because it asks for patience and gives back warmth. The crust is simple and forgiving, the jam carries memories of summers and school lunches, and the top browns in a way that makes everyone slow down. I first made a tart like this when my children were small and wanted something sweet after a rainy day of playing in puddles.
Over the years it stayed close because it is easy to share and it does not demand fancy tools. It fits into small moments and big ones. When friends visit, I take out the tart, slice it, and place it on the table as a quiet invitation for conversation and company.
A homemade tart reminds me of the way care travels through food. The jam is a small jar of sunshine, and the crust holds it like a warm hand. Baking this tart is not about rushing to the finish, but about making time feel kind.
The Story Behind This Homemade Jam Tart
There is a steady rhythm to the way I make this tart now. I roll the crust with the same patience as I did early on, and I do not mind smoothing the jam slowly. Every family has a recipe like this, one that is simple enough for children to help with and full enough in flavor to feed grown people with big appetites for comfort.
I learned the method from my mother, who learned from her mother before her. The directions are not complicated. They are a set of small acts that together make something steady and good.
I have served this tart at birthdays and at nights when the house felt empty and needed a quiet smile. It has a way of stretching sweet moments into something that feels like home.
Bringing Homemade Jam Tart Together
“Some recipes just feel right the moment they come together.”
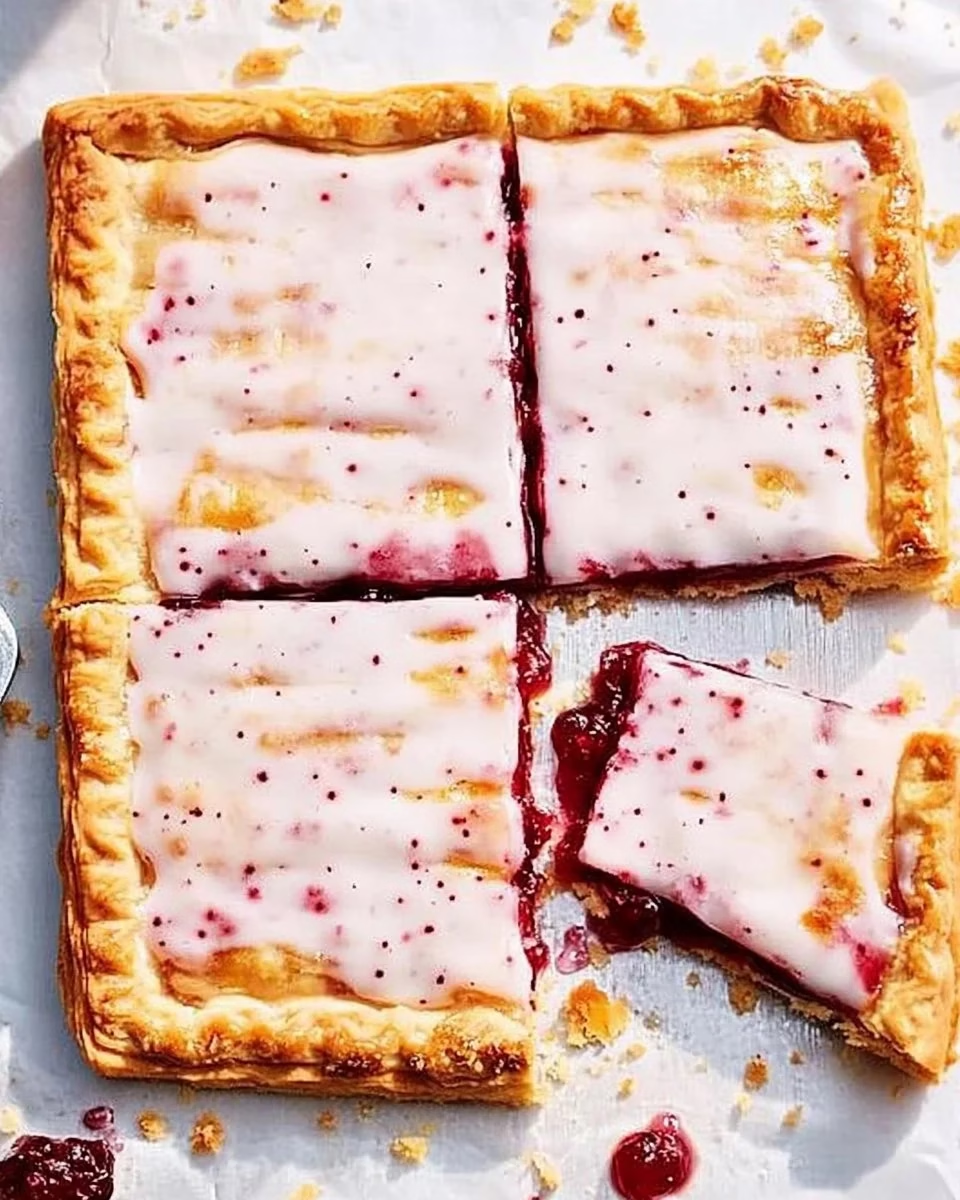
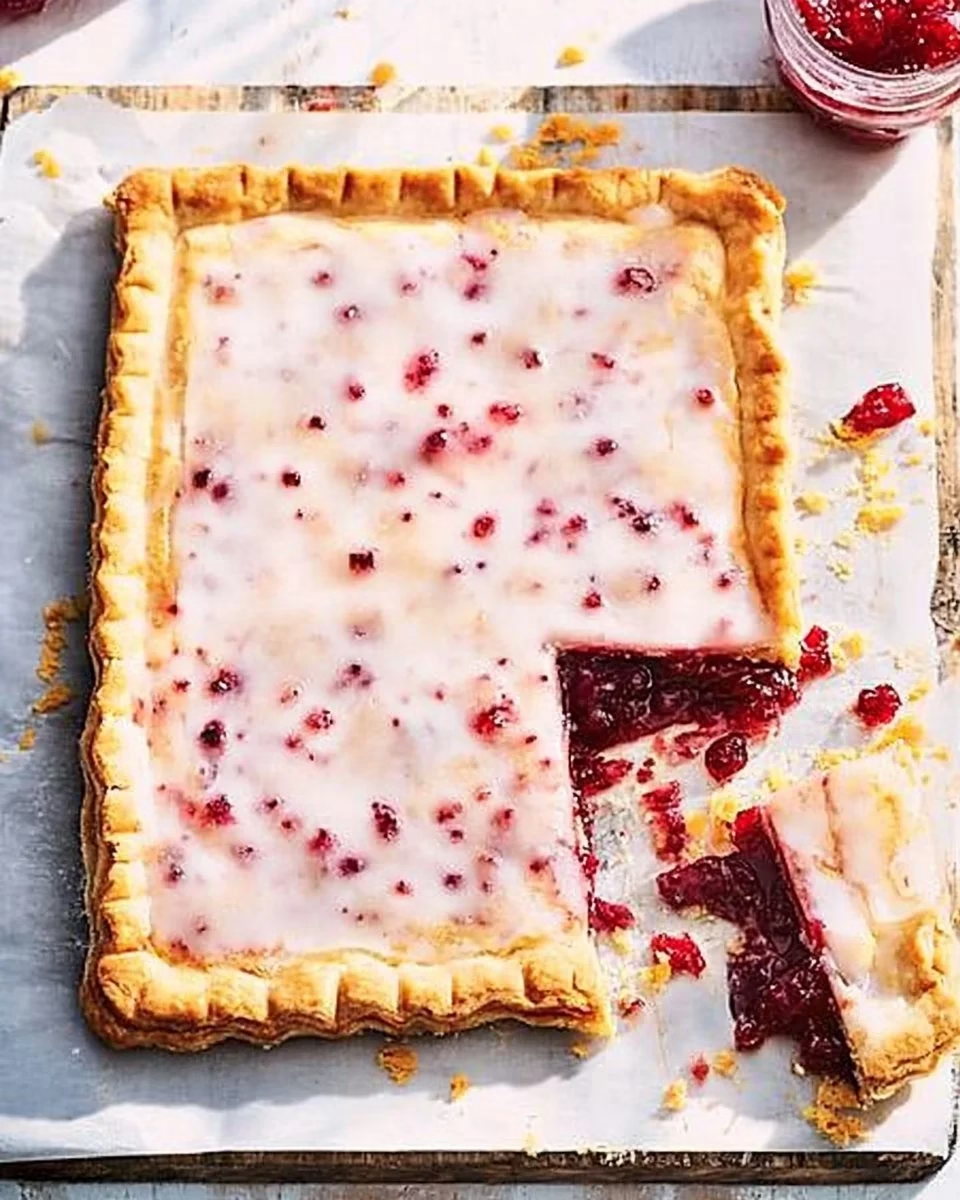
The process is calm and sure, the kind that rewards attention rather than haste. I lay the crust with care and spread the jam slowly so that every corner meets a thin, even layer. Once the top is on and the edges are crimped, the oven does the rest, turning the pastry into a golden shell and the jam into a soft jewel.
When you make this tart, watch for cues. Feel the dough as you roll it, note the way the jam settles on the crust, and listen for the gentle crackle of pastry starting to turn golden at the edges. These small signals are what tell you the tart is moving from early to finished in a trustworthy way.
Ingredients You’ll Need
2 sheets of pie crust (store-bought or homemade)
1 cup of jam (any flavor)
1 egg (for egg wash)
Sugar (for sprinkling)
- 2 sheets of pie crust, room temperature helps with texture.
- 1 cup of jam, any flavor you love; this adds familiar sweetness and color.
- 1 egg, beaten, this adds a classic richness and gives the top a soft shine.
- Sugar for sprinkling, choose coarse or fine to taste and for extra sparkle.
I like to keep my ingredients simple and ready. The jam can be strawberry, apricot, or raspberry, whatever you have in the pantry or whatever reminds you of summer. If you want to make the crust from scratch, that is fine, but the store-bought sheets are a steady friend when time is short.
How to Make Homemade Jam Tart
-
Preheat your oven to 375°F (190°C).
Preheat early enough so the oven is steady and warm by the time the tart goes in. A well warmed oven gives the crust an even rise and a steady golden color. -
Roll out one sheet of pie crust and place it in a tart dish.
Roll with gentle, even pressure until the crust covers the dish without being stretched thin. Ease it into the dish so it rests naturally and rests against the sides without tearing. -
Spread a layer of jam evenly over the crust.
Spoon the jam into the center and use the back of a spoon to smooth it toward the edges in a thin, even layer. Watch for any gaps or thick puddles and gently nudge them so everything sits level. -
Roll out the second sheet of pie crust and place it on top of the jam.
Roll the top crust until it matches the size of the bottom and lift it carefully to avoid smudging the jam. Place it gently so the two crusts meet evenly and the jam stays mostly in the middle. -
Crimp the edges to seal the tart.
Use your fingers or a fork to press the edges so the jam stays inside during baking. Make a neat, simple pattern with your fingers if you like; it makes the tart feel finished and friendly. -
Beat the egg and brush it over the top crust.
Lightly beat the egg with a fork and brush the top in a thin, even coat so the crust will brown with a soft, warm shine. Watch for any drips, and smooth them away with a brush. -
Sprinkle sugar on top for sweetness and shine.
Dust the top with a light sprinkle of sugar so that the surface catches a little glitter as it bakes. The sugar adds a sweet crust that cracks slightly when you cut into a slice. -
Bake in the preheated oven for 25-30 minutes, or until golden brown.
Bake until the top is a steady golden color and the edges are lightly browned, and the jam looks set but still glossy. The timing can change with different ovens so check toward the end and trust the color. -
Let it cool before slicing and serving.
Once you remove the tart, set it on a rack and let it rest until the jam is just set and the pastry is cooler to the touch. A little patience here helps the slices hold their shape and makes serving neater.
Serving Homemade Jam Tart With Care
When the tart is ready, I slice it with a warm, sharp knife and place the pieces on simple plates. I like to serve it with a cup of tea in the morning or a small scoop of cream in the evening. The tart is at its most comforting when shared slowly with someone you like to talk to.
At family gatherings, I usually put the tart on a low stand in the center of the table so everyone can help themselves. People reach across, take what they need, and the room fills with small compliments and quiet smiles. I often set aside a slice on a small plate for someone who needs a little extra comfort.
If you want a small change in texture, try serving the tart with a spoonful of plain yogurt or a small sliver of sharp cheese on the side. These quiet contrasts bring out the sweet and the buttery in small, satisfying ways, and sometimes a savory counterpoint can feel just right for a late afternoon.
In a pinch, this tart goes well with a strong coffee or a glass of milk. For a guest who likes a softer finish, warm a slice for ten seconds in the microwave just before serving so the jam loosens and the crust feels tender.
I sometimes find that a second internal link fits here well when I speak of savory neighbors to sweet tarts, and I recommend a tried family favorite for when you want a richer filling without the sugar, such as this caramelized onion tart. It lives in the same kitchen as this jam tart and brings a different kind of comfort to the table.
Storing Homemade Jam Tart for Later
If you have leftovers, cover them loosely with a clean cloth for short term storage or place the tart in a container with a lid. At room temperature, a slice will keep well for a day or two, and the flavors will settle and mellow. If you plan to keep it longer, wrap the tart tightly and refrigerate.
When chilled, the crust becomes firmer and the jam sets more solidly, which some people prefer for neat slices. To refresh a chilled slice, let it come to room temperature or warm it gently in a low oven for a few minutes. Avoid reheating too long or the jam may become overly soft.
For longer storage, you can freeze whole tarts or slices. Wrap the tart well and place it in a sturdy box. Thaw it slowly in the refrigerator before bringing it back to room temperature and serving.
Mary’s Baking Notes
Take the crust out a little before you need it so it eases flat rather than cracking. A cold crust will tear, and an overly warm one will be sticky and hard to handle.
Spread the jam thinly and evenly. A heavy layer can make the crust soggy as it bakes, while a modest layer keeps the pastry crisp and the flavor balanced.
If your jam is very thick, you can warm it slightly to loosen it, then cool it a bit before spreading. Warm jam spreads more easily, but cool it enough so it does not melt the crust.
Watch your oven. Ovens vary, and the color of the crust is your best guide to doneness. Look for a steady golden tone and slightly deeper color at the edges.
Use a sharp knife for slicing and wipe it between cuts for cleaner pieces. The jam will pull a little, and a clean blade makes serving gentler and more pleasing.
Family Variations on Homemade Jam Tart
We keep the core of this tart steady and change small things to suit seasons or moods. In spring, I choose a light lemon jam to bring a fresh lift. In late summer, a deep plum or rhubarb preserves gives the tart a richer, almost tart edge.
Some nights I fold thinly sliced apples into the jam before placing the top crust to add a soft texture and a hint of spice. This stays close to the classic taste while giving a little extra interest when the family wants something heartier.
I also sometimes sprinkle a few sliced almonds on the top just before baking for a little crunch. It is a small change, but it keeps the spirit of the tart intact while adding a quiet, nutty note.
For holiday mornings, I press a few tiny stars into the top crust with a small cutter and dust a little sugar in the indent. It is a simple gesture that feels festive without being fussy and keeps the tart feeling like it belongs at any table.
FAQs About Homemade Jam Tart
Can I make this ahead of time?
Yes, and it often holds up beautifully, especially when stored properly and allowed to rest overnight. Make it the day before and bring it to room temperature before serving for the best texture.
What kind of jam is best?
Choose a jam you love and one with a bright, clear flavor, like strawberry, apricot, or raspberry. Thicker preserves can work but warm them slightly so they spread smoothly.
Can I use a different crust?
Yes, use a shortcrust or a puff pastry if you prefer a flakier top. Keep in mind that a very buttery crust may brown faster so watch the oven.
How do I avoid a soggy bottom?
Spread the jam evenly and do not overfill. A thin, consistent layer lets the pastry bake through. Pre-baking the base a little can help, but for this simple tart the regular method usually works well.
Can I make mini tarts instead?
Absolutely. Divide the jam and crust into smaller tins and reduce baking time a little, checking for a golden top and set jam. Mini tarts are a lovely way to share in small bites.
Little Lessons From Years of Baking
One lesson I share with friends is to trust the simple cues of the kitchen. The smell of butter toasting at the edge of the crust, the way a top glows a soft gold, and the gentle hold of a slice are all signals that you can read. They tell you more than a timer alone.
Another small lesson is to let the tart cool more than you think. It will feel like a test of patience the first few times, but the reward is cleaner slices and a settled jam. The tart looks more composed and tastes steadier after a short rest.
I also remind home bakers that small hands help in the best way. Children can help spoon the jam, brush the egg, or press the edges. These acts make the recipe part of the day and pass a quiet skill along the table.
Finally, keep a jar of your favorite jam close. When the urge to bake comes, an open jar often means a quick, true comfort and a chance to make something that feels like a hug.
Classic Twists We Love
A thin dusting of powdered sugar after baking can make the tart feel lighter for afternoon tea. It melts slightly into the top and adds a soft sugar bloom.
A ribbon of lemon zest mixed into the jam brightens the flavor when you want a fresher taste. Use it sparingly so it lifts rather than overwhelms the jam.
A few drops of vanilla in the beaten egg wash gives a faint warm note to the crust. It is a small change that brings the tart closer to a pastry you might find at a quiet morning market.
For a subtle spice, add a pinch of cinnamon to the jam before topping for an autumnal twist. It pairs especially well with apple or plum preserves.
A Final Thought
I hope this Homemade Jam Tart brings a little comfort to your kitchen, the same way it has in mine over the years. When you bake it, take the small pleasures of the method: the slow smooth of jam, the careful crimping of edges, the hush while it cools. These gentle acts make a simple tart into something that holds stories, and I am glad to share this one with you.
Homemade Jam Tart
Ingredients
Crust ingredients
- 2 sheets sheets of pie crust (store-bought or homemade) Room temperature helps with texture.
- 1 egg egg (for egg wash) Beaten to add richness and shine.
- Sugar Sugar (for sprinkling) Choose coarse or fine to taste and for extra sparkle.
Filling ingredients
- 1 cup jam (any flavor) The flavor you love; adds familiar sweetness.
Instructions
Preparation
- Preheat your oven to 375°F (190°C).
- Roll out one sheet of pie crust and place it in a tart dish.
- Spread a layer of jam evenly over the crust.
- Roll out the second sheet of pie crust and place it on top of the jam.
- Crimp the edges to seal the tart.
- Beat the egg and brush it over the top crust.
- Sprinkle sugar on top for sweetness and shine.
Baking
- Bake in the preheated oven for 25-30 minutes, or until golden brown.
- Let it cool before slicing and serving.
