The kitchen always seems to come alive with memories when I’m making something special, like my Hibiscus Homemade Gummies. The sweet, slightly tart aroma wafts through the air, wrapping me in a cozy hug as I prepare this batch. It reminds me of lazy weekends spent with my family, laughter echoing as we share stories and savor little bites of joy. Each gummy is more than just a treat; it’s a sprinkle of light in our day, bringing the warmth of home closer with every delightful chew.
Why These Hibiscus Homemade Gummies Mean So Much
Hibiscus Homemade Gummies have a special place in my heart. When I first made these delightful treats, it was a sunny afternoon in early summer. The kids were playing outside, and I had an idea to turn our favorite tea into something playful and fun. The vibrant colors of hibiscus, the playful jiggle of the gummies — they became a family favorite almost instantly. Every bite transports me back to those sun-drenched days, reminding me that joy can be found in the simplest moments.
What makes them truly remarkable is not just their taste but the shared experiences they create. We often gather around the table, laughing and joking while we enjoy these little chewy delights. It’s become a tradition to make them during holidays and celebrations, a symbol of togetherness that speaks to our hearts.
How to Make Hibiscus Homemade Gummies
“Every time I stir this pot, it smells just like Sunday at home.”
The process of making these gummies unfolds like a gentle dance in the kitchen. First, I gather my ingredients, feeling the texture of the gelatin and the vibrancy of the hibiscus tea. The water bubbles softly in the pot, and as the tea bags steep, the room fills with a warm, inviting aroma. There’s something magical about watching the deep, ruby red liquid transform as it brews. My heart swells as memories flash by; it feels like a hug in a cup, promising sweetness to come.
As I measure out the steeped tea and sprinkle gelatin atop it, I remember each time I’ve done this. The gentle stirring, as it combines into a glossy mixture, is soothing. It’s a rhythm that speaks to anyone who has cooked with love. I pour the blended liquid into molds, and though it seems simple, I know it holds the promise of joy for later.
Ingredients You’ll Need
To create your own Hibiscus Homemade Gummies, gather these ingredients:
- 1 3/4 cups / 420 ml hot water
- 3 bags of Tazo Passion tea
- 6 tbsp unflavored gelatin powder
- Optional: 2 – 3 tbsp honey
As you gather these ingredients, think about how each one plays a role in the magic of the final treat. The hibiscus brings a touch of tartness and a beautiful color, while the gelatin creates the perfect chewy texture. If you prefer a bit of extra sweetness, a drizzle of honey can enhance the flavor beautifully.
Step-by-Step Directions
-
In a saucepan with a pourable lip, add the water and passion fruit tea bags. Let steep for 10 minutes, breathing in that enchanting aroma as the tea deeply infuses.
-
Measure out about 1/2 cup of the steeped tea into a bowl and sprinkle the unflavored gelatin powder over the surface of the liquid. Set aside as it begins to soften and bloom.
-
Gently heat the rest of the tea (with the tea bags still in the liquid) until warm — do not bring it to a boil or simmer. The steam curling upwards should feel like an invitation.
-
Carefully remove the tea bags, letting the last drops of flavor drip back into the pot, a small reminder of the goodness we’re creating.
-
Add the unflavored gelatin powder and water mixture into the brewed tea. Stir until the liquid and gelatin are combined, without any lumps. Watch as it transforms, becoming a silky blend.
-
Remove the pan from the heat and add the honey, if using; whisk until dissolved and combined. Skim any white foam from the top and discard, knowing you’re left with perfection.
-
Pour the gelatin mixture into a heatproof jug and then into molds or a refrigerator-safe pan. The vibrant color should bring a smile as you fill each cavity.
-
Chill until set, about 1 hour, and then either remove from the mold or slice it into pieces. Enjoy the anticipation as you wait for the flavors to fully meld.
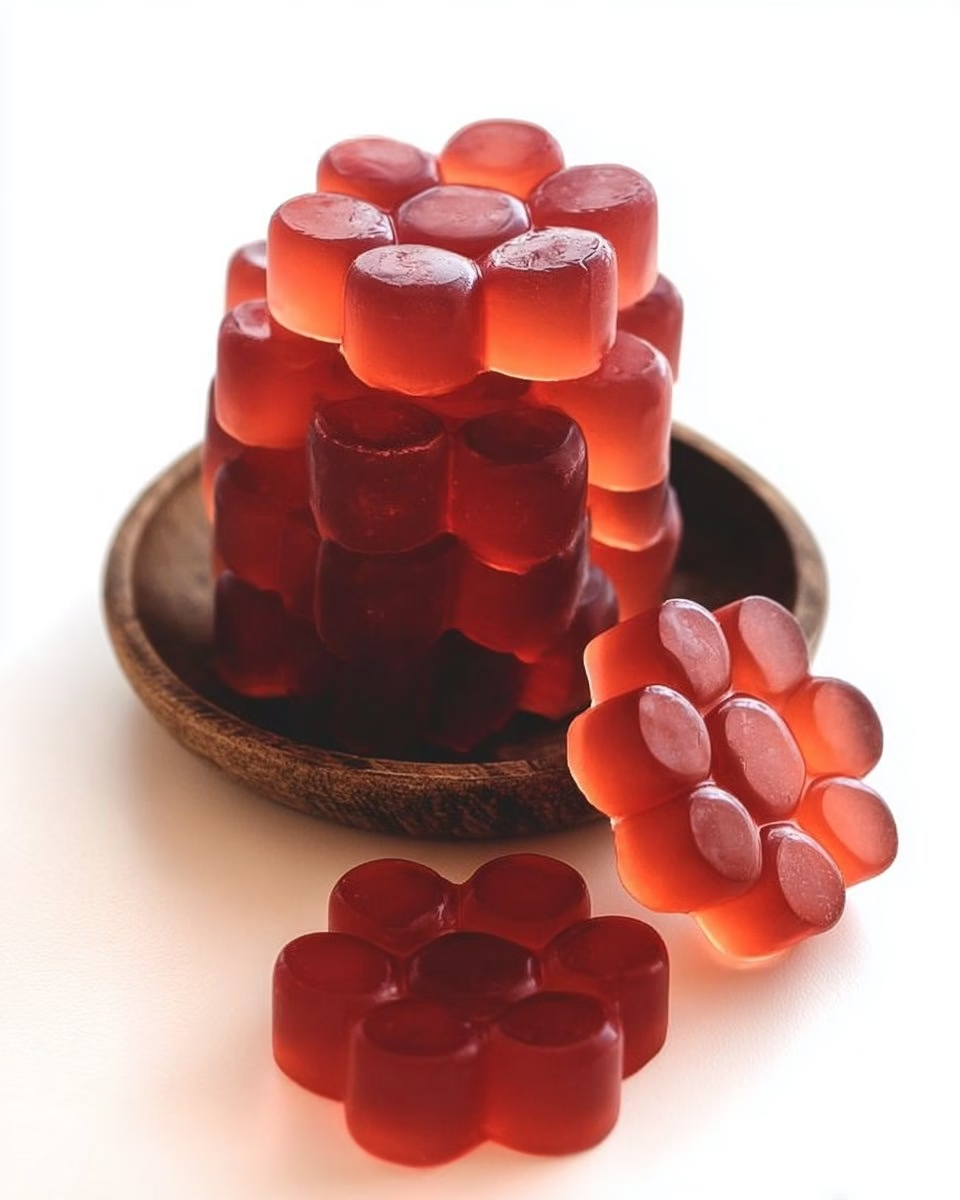
Serving Hibiscus Homemade Gummies With Family Warmth
Now that your Hibiscus Homemade Gummies are ready, it’s time to bring them to the table. I love placing them in a colorful bowl and inviting everyone to gather around. Each person helps themselves, delighting in the sight of those jewel-toned treats.
We often enjoy these treats during family brunches or cozy movie nights. The kids giggle as they savor the fruity flavor, letting their imaginations run wild. Each gummy becomes a little moment of joy, sparking laughter and shared stories. I often find that these simple, beautiful snacks help to create lasting memories that linger long after the last gummy is gone.
Storing Hibiscus Homemade Gummies for Tomorrow
With any leftovers, there comes the gentle art of storage. To keep your gummies fresh and comforting, cover them in an airtight container once they’ve cooled. You can enjoy them for up to a week, but trust me, they rarely last that long in our house.
What I love most is how the flavors deepen overnight, melding together beautifully as they rest in the fridge. If you find some leftover — and that often feels like a surprise treat — you might notice that the taste becomes even smoother, a testament to their ability to surprise and delight.
Amelia’s Kitchen Notes
In my years of making Hibiscus Homemade Gummies, I’ve learned a few things that might help you:
-
For a touch of extra depth, add a splash of vanilla extract to the mixture. It will wrap everything in a layer of comforting aroma that feels like a hug.
-
You can substitute the honey with agave syrup or even maple syrup for a different flavor profile. It’s fun to experiment and find what suits your family best.
-
Cleanup doesn’t have to be a hassle. I always soak the molds in warm, soapy water right after use. It makes it much easier to remove any residual stickiness later.
Family Variations on Hibiscus Homemade Gummies
We’ve had a blast experimenting with different flavors and variations over time. One of our favorites is adding fresh fruit puree — such as mango or raspberry — to the base before pouring into molds. The bright colors and flavors add a burst of creativity to the routine.
Sometimes I even mix in bits of fruit at the bottom of the molds for a delightful surprise. Each variation feels like an adventure, making the recipe feel new and exciting each time we make it.
FAQs About Hibiscus Homemade Gummies
Can I make this ahead of time?
Yes, and honestly, it might taste even better the next day once the flavors have settled and come together. You could whip up a batch on Sunday to enjoy throughout the week, if they last that long.
What if I do not have passion tea?
You can certainly substitute it with any fruit-flavored tea that you love. Experimenting with flavors can lead to delightful discoveries that suit your taste buds perfectly.
Are these gummies healthy?
While they are a treat, they do have the added benefit of being made from real ingredients. You control the sweetness and can even leave out any added sugar if you prefer a more natural version.
A Final Thought
As I share this recipe with you, I hope these Hibiscus Homemade Gummies bring a little warmth and inspiration to your kitchen, the same way they do in mine. Cooking is about connection, joy, and sharing what we love with those around us. Here’s to many family moments bursting with laughter and those oh-so-delicious gummies that hold the magic of home. May your kitchen always be filled with love and comfort, just as mine is.
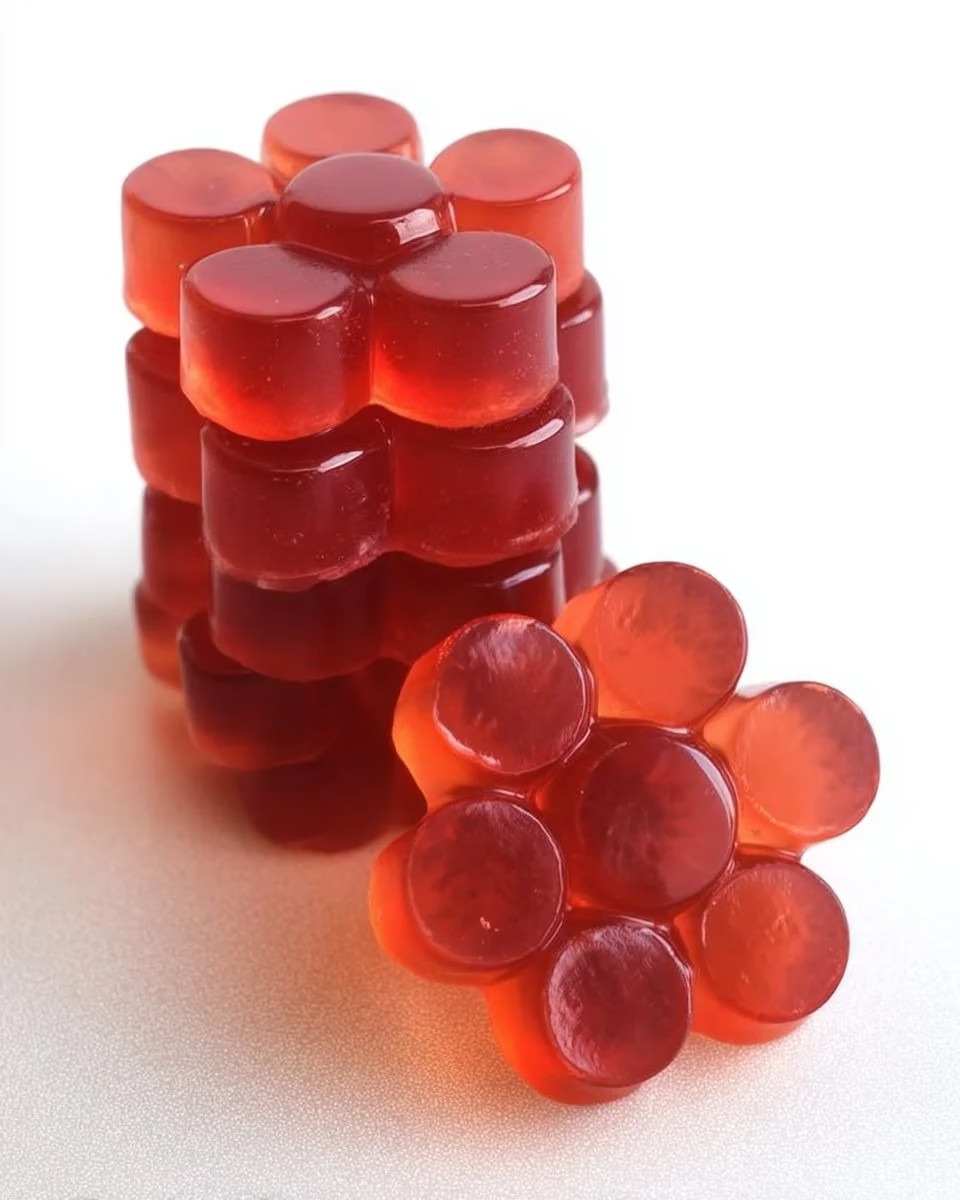
Hibiscus Homemade Gummies
Ingredients
Gummy Base Ingredients
- 1 3/4 cups hot water
- 3 bags Tazo Passion tea
- 6 tbsp unflavored gelatin powder Sprinkle over steeped tea to bloom.
- 2 – 3 tbsp honey Optional for extra sweetness.
Instructions
Preparation
- In a saucepan with a pourable lip, add the hot water and Tazo Passion tea bags. Let steep for 10 minutes.
- Measure out about 1/2 cup of the steeped tea into a bowl and sprinkle the unflavored gelatin powder over the surface. Set aside to bloom.
Cooking
- Gently heat the remaining steeped tea until warm, ensuring it does not boil or simmer.
- Carefully remove the tea bags from the pot.
- Add the bloomed gelatin mixture to the warm tea and stir until completely combined.
- Remove from heat and whisk in honey until dissolved.
- Pour the mixture into molds and chill for about 1 hour until set.
Serving Suggestions
- Once set, remove from molds. Serve in a colorful bowl and enjoy with family.
