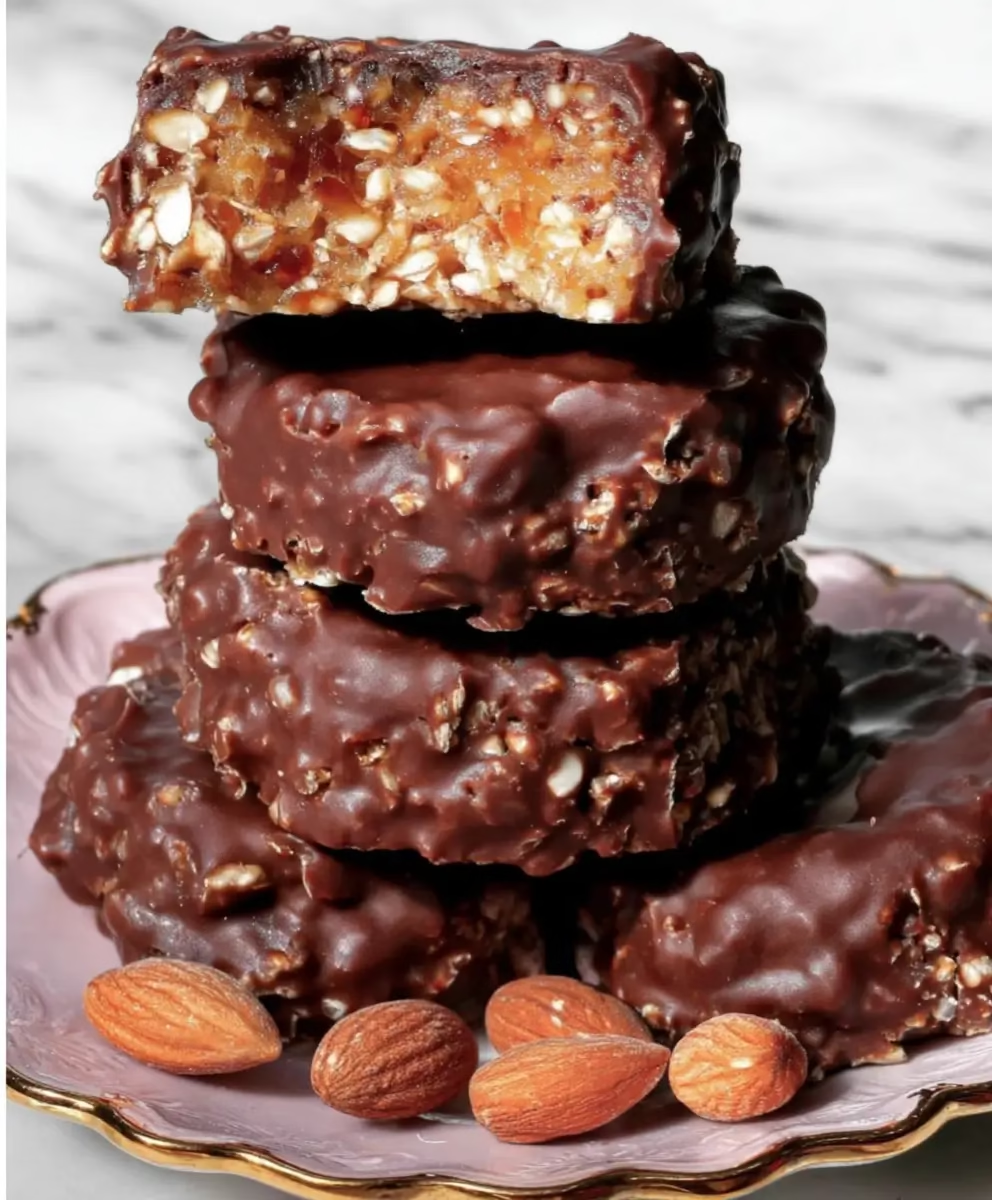
I still remember the late afternoon light through my kitchen window the first time I made these Fruit and Nut Bars for a family visit.
The smell of toasted oats and warm honey filled the room while my daughter set the table with mismatched plates.
If you like the steady comfort of nutty sweets and plain pleasures, you may also enjoy the moist rich date and walnut cake I keep on the counter for slow weekend mornings.

Fruit and Nut Bars
Ingredients
Main Ingredients
- 1 cup dried fruits (e.g., apricots, raisins, cranberries) Chop larger pieces for even bites and soak very dry fruit briefly if needed.
- 1 cup mixed nuts (e.g., almonds, walnuts, pecans) Rough chop or leave whole for texture. Toasting gently gives warmth.
- 1/2 cup nut butter (e.g., almond butter, peanut butter) Room temperature helps with texture and makes mixing easier.
- 1/4 cup honey or maple syrup Honey gives a classic warmth. Maple brings a mellow, woody sweetness.
- 1 cup rolled oats Old fashioned oats give the best chew and a familiar, hearty texture.
- 1 teaspoon vanilla extract Vanilla brightens the flavors and is a small but important comfort.
- a pinch salt Salt brings balance and cuts through sweetness in the softest way.
Instructions
Preparation
- Preheat the oven to 350°F (175°C) and line a baking pan with parchment paper.
- In a large mixing bowl, combine dried fruits, mixed nuts, rolled oats, and a pinch of salt. Stir them together.
- In another bowl, mix the nut butter, honey or maple syrup, and vanilla extract until smooth.
- Pour the wet mixture over the dry ingredients and stir until well combined.
- Spread the mixture evenly in the prepared baking pan, pressing it down firmly.
Baking
- Bake for 15-20 minutes or until golden brown.
- Allow to cool completely before cutting into bars.
Serving
- Store in an airtight container for up to a week.
- Serve with a warm cup of tea or coffee.
Notes
Nutrition
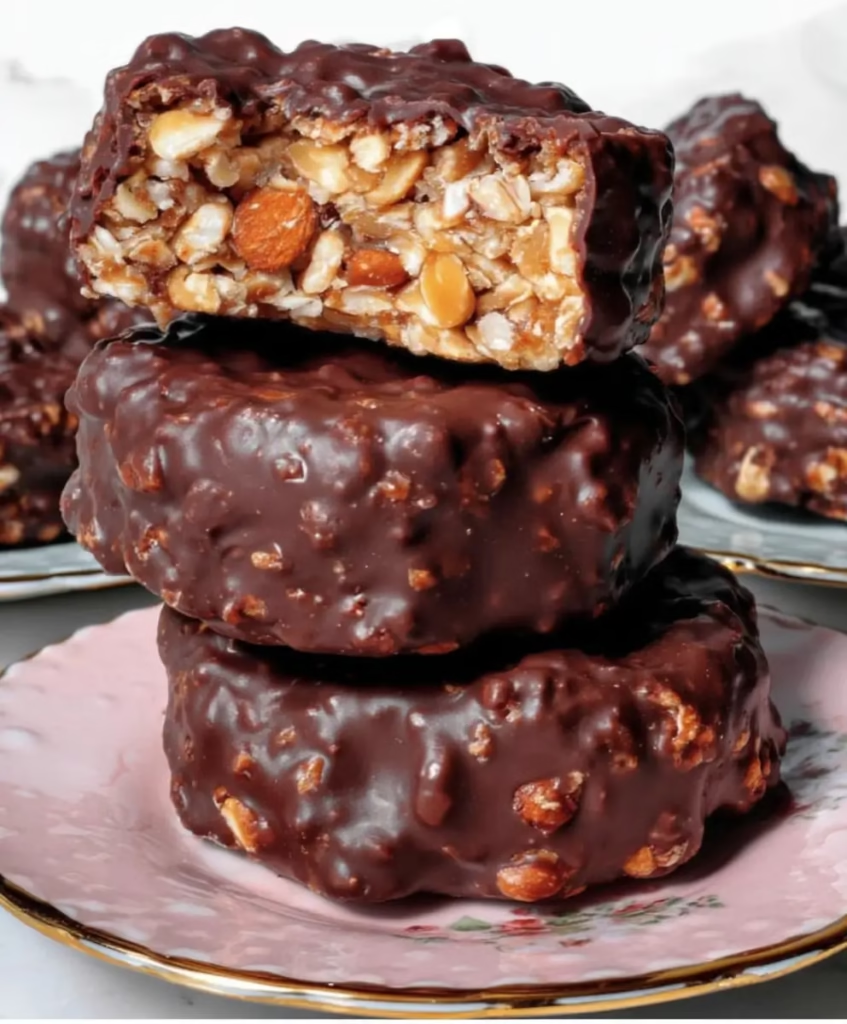
Why This Fruit and Nut Bars Has Always Been a Favorite
These bars arrived in my kitchen like a friendly neighbor, practical and full of kindness.
They are not flashy and they never try to be. They are simple, honest, and dependable.
Over the years they became my go to when I wanted a small gift of care, something to tuck into a lunch box or offer with tea.
What keeps this recipe in our rotation is the way it holds memory.
A mix of dried fruits and nuts makes each bite a little different and familiar, like a well loved story retold.
Every family seems to have its version, and this one has settled gently into ours.
I first made this for a chilly school concert evening, when we needed snacks that would travel and stay satisfying.
They browned a little at the edges and cut clean after cooling, which felt like a small triumph.
Since then they have been a quiet companion at picnics, church bake sales, and kitchen surfaces that needed a friendly plate.
These bars also give room for small decisions.
Use almonds for a crisp lift or walnuts for a softer, deeper taste.
Sometimes I add a touch of cinnamon in winter, and sometimes I skip it and let the fruit sing.
The Story Behind This Fruit and Nut Bars
In my family baking has always been less about strict measures and more about rhythm.
I watch, I learn, and I pass along what is steady and true. That is the heart of this recipe.
It was never written down at first. It lived in a mixing bowl and in little notes tucked into my apron.
The recipe is patient and forgiving, suited to a kitchen where things are made with hands and time.
It teaches you to pay attention to texture more than timers alone.
When the mixture comes together and holds shape in the pan, you know you are close.
These bars have been a way to carry warmth to others.
They travel well and keep their ease when shared among neighbors or friends.
There is a modest pride in a homemade treat that tastes like home.
The Gentle Process Behind It
“Some recipes just feel right the moment they come together.”
I like to gather everything first and set the scene, a small act of calm before I start.
The process is short, honest, and rooted in touch. Bring the dried fruits and nuts together, and listen for the small crackle as they meet the oats.
When the nut butter and honey warm into a smooth ribbon, you know the mixture will bind.
Pressing the mixture into the pan is a quiet, satisfying step.
I use the back of a spoon or a small spatula and press until the surface is even and compact.
Keep an eye on the oven. When the edges start to blush golden, the bars are telling you they are ready.
After they cool, the bars firm up and slice with friendly, neat edges.
Let them rest until just set. Then cut them with patience and care.
They are at their best when served with a warm cup of tea or a small conversation.
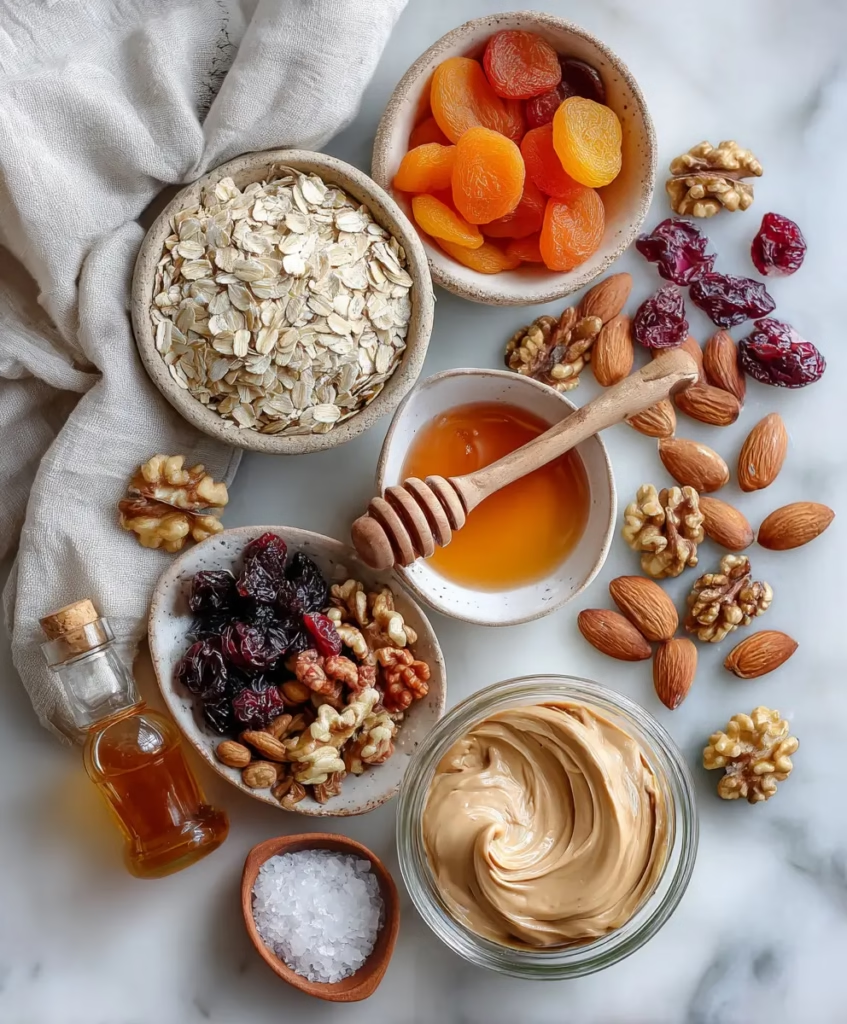
Ingredients You’ll Need
1 cup dried fruits (e.g., apricots, raisins, cranberries)
Note: Chop larger pieces for even bites and soak very dry fruit briefly if needed.
1 cup mixed nuts (e.g., almonds, walnuts, pecans)
Note: Rough chop or leave whole for texture. Toasting gently gives warmth.
1/2 cup nut butter (e.g., almond butter, peanut butter)
Note: Room temperature helps with texture and makes mixing easier.
1/4 cup honey or maple syrup
Note: Honey gives a classic warmth. Maple brings a mellow, woody sweetness.
1 cup rolled oats
Note: Old fashioned oats give the best chew and a familiar, hearty texture.
1 teaspoon vanilla extract
Note: Vanilla brightens the flavors and is a small but important comfort.
A pinch of salt
Note: Salt brings balance and cuts through sweetness in the softest way.
These are pantry ready items in most kitchens.
They come together like old friends. Measure gently and pay attention to texture.
How to Make Fruit and Nut Bars
Preheat the oven to 350°F (175°C) and line a baking pan with parchment paper.
Set the rack to the middle so the heat is even and the bars brown gently.
A lined pan makes lifting and cutting much easier when the bars are cool.In a large mixing bowl, combine dried fruits, mixed nuts, rolled oats, and a pinch of salt.
Stir them together so the pieces mingle and the oats take on the scent of the fruit.
This is where you notice sizes and make small adjustments.In another bowl, mix the nut butter, honey or maple syrup, and vanilla extract until smooth.
Warm the nut butter a little if it is stiff so it blends easily into the sweet syrup.
Mix until the surface is glossy and the aroma is sweet and gentle.Pour the wet mixture over the dry ingredients and stir until well combined.
Use a wooden spoon or spatula and fold until the oats and fruits are coated.
The mixture should hold together when pressed lightly between your fingers.Spread the mixture evenly in the prepared baking pan, pressing it down firmly.
Press hard enough that it will hold its shape but not so hard that it gets flat and dense.
An even thickness helps the bars bake uniformly.Bake for 15-20 minutes or until golden brown.
Watch for lightly golden edges and a toasted scent that fills the kitchen.
Avoid overbaking so the center stays tender and chewy.Allow to cool completely before cutting into bars.
Let the pan rest until the mix is just set and easy to lift from the parchment.
Cut with a sharp knife, wiping it between slices for clean edges.Store in an airtight container for up to a week.
Layer sheets of parchment between bars to keep them neat and easy to grab.
They keep well at room temperature or lightly chilled for longer freshness.
Serving Fruit and Nut Bars With Care
These bars are good at a table or in a small wrapped parcel for someone who needs cheering.
I like to serve them in a shallow bowl or on a small wooden board with a warm drink.
A little pat of butter is unnecessary. They are satisfying as they are.
At family gatherings they are a simple dessert and a nod to tradition.
Children reach for them with sticky fingers and adults do the same with fondness.
They pair beautifully with black tea, milky coffee, or a glass of cold milk.
For a quiet afternoon, I slice them thinner and offer half a bar with fruit.
For a more generous gesture, cut thick bars and tuck them into a tin for sharing.
They are modestly sweet and comforting, the sort of treat that keeps conversations gentle.
If you have guests who like textures, present a plate with an extra bowl of chopped nuts.
An extra sprinkle of flaky sea salt over the top after baking is a small, welcome contrast.
These little extras turn a simple bar into something felt and remembered.
While these bars stand well on their own, I sometimes lay a thin smear of cream cheese for a small indulgence.
It does not need much. A little cream cheese softens the bite and adds a cool richness.
Serve it on the side so each person can choose.
Storing Fruit and Nut Bars for Later
Store the bars in an airtight container and they will stay pleasant for up to a week.
If your kitchen is warm, keep them in the refrigerator to keep the nut butter steady.
Bring them back to room temperature before serving for the best flavor.
You can freeze these bars for longer keeping.
Wrap individual bars in parchment and place them in a freezer safe container.
Thaw at room temperature or warm gently for a few minutes.
Flavors settle over time. The fruits soften and the flavors blend into something rounded.
This is a quiet advantage. A rested bar tastes like itself and a little more relaxed.
If you like a softer texture, allow them to sit for a day before serving.
When reheating, a few seconds in a warm oven or a short zap in the microwave brings them back to life.
Warm bars release aromas that feel comforting and familiar.
Take care not to heat them too long so they do not dry out.
Mary’s Baking Notes
Measure with a light hand on the oats.
Packing oats too tightly can make the mixture dry and heavy.
Scoop and level gently for the best texture.Use room temperature nut butter.
If it is too firm, warm it gently with the honey so it mixes smoothly.
A smooth wet mixture helps bind the dry ingredients without overworking them.Chop large fruits evenly.
Bigger pieces can make the bars uneven and harder to slice.
Smaller, uniform pieces give a pleasant, consistent bite.Press firmly but not harshly into the pan.
The bars should hold together after baking, but pressing too hard makes them dense.
Aim for evenness and a little give when pressed.Watch the oven closely in the final minutes.
The color around the edges tells most of the story.
A golden edge and a fragrant oven are your best cues.
These notes come from years of making small adjustments and learning what matters.
They are meant to guide, not burden. Baking is about being steady and present.
Keep your hands warm and your heart patient.
Classic Twists We Love
Sprinkle with toasted coconut lightly after baking for a gentle, sweet finish.
It adds a crisp whisper of flavor that pairs well with the nuts.
This small change nods to tropical warmth.
Stir in chopped dark chocolate chips after removing the pan from the oven so they melt slightly.
They add a soft, comforting richness without overpowering the fruit.
Chocolate is a quiet luxury that everyone notices.
Swap the nuts for seeds in part if you prefer a lighter chew.
Pumpkin seeds and sunflower seeds keep the texture interesting and are a nice choice for nut free variations.
When I make them this way, I mention it so guests know what to expect.
Add a pinch of cinnamon or cardamom in cooler months for a warming note.
These spices are gentle and familiar, like a soft scarf around a recipe.
I use them sparingly, just enough to suggest a season.
If you want a chewier bar, replace half the oats with quick oats.
Quick oats soften more in the bake and give a denser texture.
It is a small trade that some family members prefer.
Family Variations on Fruit and Nut Bars
Little changes keep this recipe alive in our family.
My sister likes cranberries and pumpkin seeds with a splash more maple syrup.
My neighbor prefers apricots and dark chocolate, cutting the sweetness back with a pinch more salt.
For school lunches, I cut the bars into smaller squares and wrap them simply.
They keep well and travel easily without fuss.
Children tend to like a sweeter bar, so I might use honey for a warmer taste.
When guests come who are vegan, I choose maple syrup and a nut like almond butter.
The texture is much the same and the result is just as comforting.
It is a reminder that small choices can make a recipe welcome to more people.
Sometimes I add a handful of toasted oats on top before baking for a rustic look.
It gives the top a little crunchy suggestion and looks like care.
Presentation can be a small act of kindness.
Helpful Notes Before You Begin
Choose good quality ingredients when you can.
The flavors are simple, so each item has room to be noticed and appreciated.
But do not worry if you do not have everything perfectly matched; the recipe forgives.
Line your pan before you start.
It makes lifting the whole slab easier and keeps slicing neat.
A strip of parchment that hangs over the edge is the most useful trick.
Prepare a sharp knife for cutting and a clean board.
A warm knife will help with sticky bars so wipe it between cuts.
Take your time and cut with a steady hand.
If your nut butter is grainy, give it a short stir before measuring.
Separation can happen in jars and a smooth texture helps the mix come together.
A gentle stir is all that is needed to make it work.
FAQs About Fruit and Nut Bars
Can I make this ahead of time?
Yes, and it often holds up beautifully, especially when stored properly and allowed to rest overnight.
A rested bar develops a softer, more settled flavor that many of us prefer.
Can I use different dried fruits?
Absolutely. Mix and match what you have on hand.
Smaller pieces and similar moisture levels help the bars bake evenly.
Are these bars gluten free?
If you choose gluten free rolled oats, then yes, they can be gluten free.
Always check your oat package if you need a strict gluten free pantry.
Can I press them more firmly to make them chewy?
You can press a bit firmer if you want a denser bar.
Just remember that pressing too hard can make them compact rather than pleasantly chewy.
How long will they keep in the freezer?
Wrapped and stored well, they are good for up to three months.
Thaw overnight at room temperature for the best texture.
Why Fruit and Nut Bars Feels Comforting
There is a human comfort in the combination of fruit, nuts, and oats.
They feel honest and straightforward, like a conversation with someone you trust.
They are not loud. They do the quiet work of feeding and comforting.
Making these bars is a small ritual that can calm the day.
Measure, stir, press, and bake. The steps are steady and kind.
You can feel good about offering them because they are made from whole items you can name.
They are also a lesson in patience.
Waiting for the pan to cool teaches a small restraint and a little reward.
The cutting and sharing are parts of the day that make ordinary time gentle.
From My Kitchen to Yours
I hope this Fruit and Nut Bars brings a little comfort to your kitchen, the same way it has in mine over the years.
There is a quiet joy in making something simple and sharing it with someone who will be glad to receive it.
Take your time, trust your hands, and let these bars become a small tradition in your home.
you can always find me sharing from my kitchen on Pinterest and over on Facebook.
