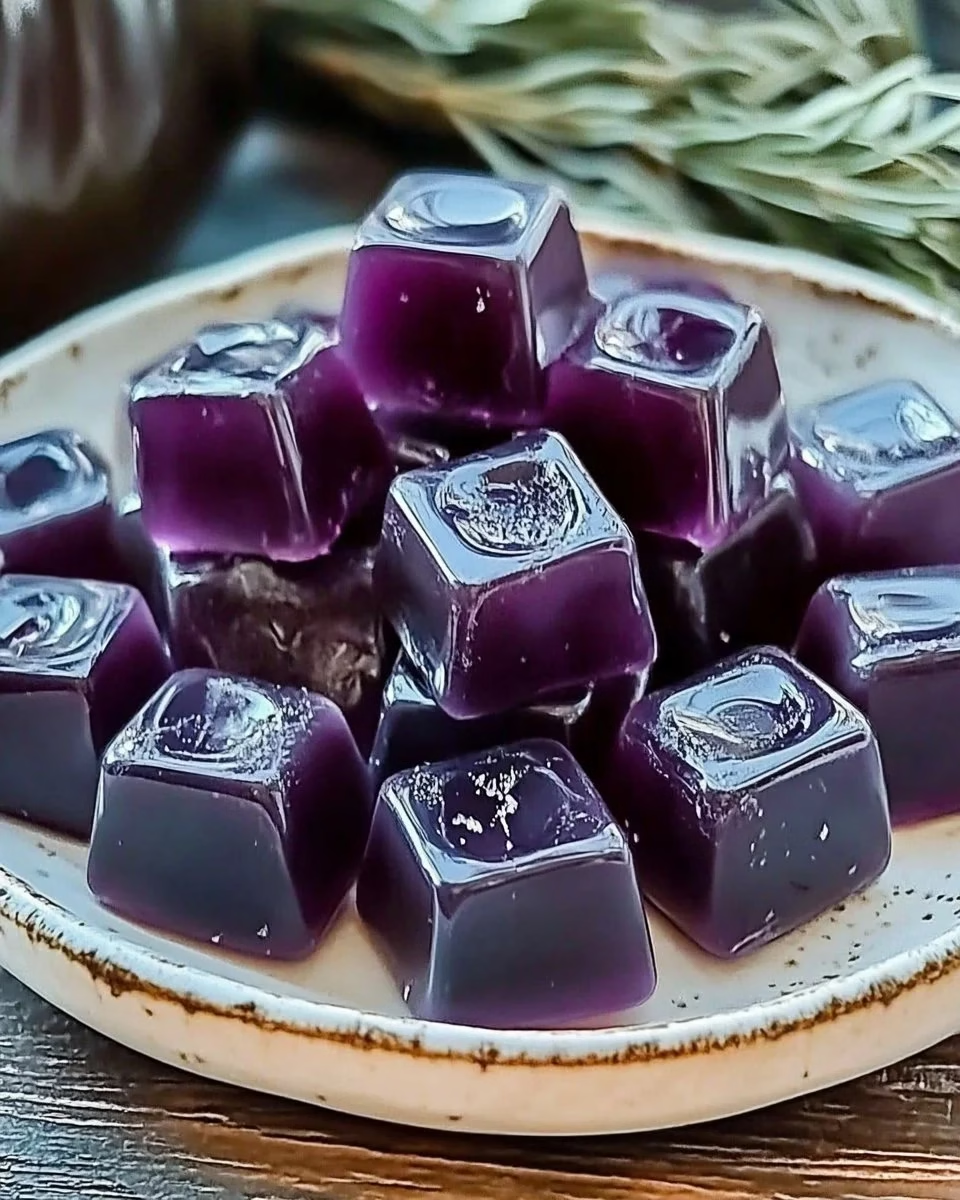
I pulled the first small batch from the fridge just as the kitchen light hummed and the house smelled faintly of lemon and warm berries. The gummies had a soft sheen, and when I pressed one gently it gave with a quiet firmness that felt like a tiny, cheerful surprise. I loved that hush of satisfaction, that moment when a simple recipe becomes more than the sum of its parts. If you enjoy friendly kitchen experiments, you might like how making homemade raspberry pectin gummies taught me to read textures and trust small changes in technique.
Why This Easy Homemade Elderberry Gummies Became a Favorite
There is a gentle reason I come back to this recipe. It is forgiving, quick, and playful, and yet it rewards a little attention with a neat texture and true elderberry flavor. I tested tiny batches on different days, in different molds, and under different chill times until the mouthfeel felt just right.
Making these gummies felt like putting together a soft puzzle. The balance between the juice, the water, and the gelatin is simple, but it asks for a light hand and a watchful eye. Once the texture set how I wanted, each bite carried a dark berry note with bright lemon, and that contrast made the whole thing sing.
I also love that this is a small-batch recipe. It invites curiosity. You can try a splash more lemon one day, a teaspoon less honey the next, and still end up with a dependable treat. That steadiness is what convinced me to share it as one of my kitchen go-to recipes.
The Story Behind This Small-Batch Easy Homemade Elderberry Gummies
I first started testing these because I wanted a treat that felt wholesome and seasonal. Elderberries have that deep, almost molasses-like berry note that feels both cozy and a little wild. I remembered an old syrup my neighbor made and wanted a shelf-stable, snackable version that captured that flavor.
My tests began with wide pans and big gelatin doses. I learned quickly that too much gelatin makes a gummy too firm and a single tablespoon makes it wobble like jelly. The sweet spot, for me, was about three tablespoons in this small batch, where the gummies hold shape but still melt pleasantly on the tongue.
I kept the honey optional because sweet preferences vary. Some days I like a hint of honey for warmth, and other times I want the elderberry to shine on its own. Leaving the honey optional made this recipe more approachable and meant the results were always honest.
The Rhythm of Making Easy Homemade Elderberry Gummies
“The moment the texture shifts, you know it’s ready.”
Making these gummies has a rhythm to it. You begin with liquid, warm it gently, add gelatin and watch the mixture knit together. It changes from a flat pool of juice to a glossy, thick ribbon when you lift the spoon. That ribbon is the first visual cue that the gelatin has hydrated properly.
While stirring, you will see tiny clouds of gelatin dissolve, then the surface smooth. When the mix glows with a soft sheen and you can draw a line through it that slowly closes, you know the gelatin has done its work. From there, gently sweeten and pour into molds without hurry.
If you have tried other small-batch projects, like DIY green apple ginger gummies, you will recognize how small shifts in temperature and timing nudge texture. These little lessons make the process playful and teach you to listen to the mixture.
What Goes Into Easy Homemade Elderberry Gummies
1 cup elderberry juice
2 tablespoons honey (optional) — this adds warmth without overpowering
3 tablespoons gelatin powder — this helps with structure
1/2 cup water — helps the gelatin dissolve evenly
1 tablespoon lemon juice — brightens and balances the berry note
Each of these ingredients plays a clear, simple role. The juice is the voice of the recipe. The gelatin gives it form. The water and lemon help the texture and flavor land where they should. Honey is for those who like a soft sweetness and a touch of depth.
Step-by-Step Directions
-
In a small saucepan, combine the elderberry juice, water, and lemon juice.
Warm the pan gently so the liquids join and the lemon unfolds its brightness.
Watch the surface as the liquids begin to shimmer and blend. -
Heat the mixture over low heat until warm.
Keep the heat gentle so the juice does not bubble or lose fresh taste.
Stop when you feel a steady warmth and the aroma lifts from the pan. -
Gradually whisk in the gelatin until fully dissolved.
Sprinkle the gelatin in slowly and whisk in small circles to avoid lumps.
Look for a clear, glossy surface and a smooth texture when it is done. -
If desired, stir in honey for sweetness.
Add a little at a time and taste as you go to find your balance.
Notice how the honey adds warmth and tames sharp edges. -
Remove from heat and pour the mixture into molds.
Work steadily and pour into small silicone molds or a lined pan.
Tap the molds gently to release any air bubbles and even the surface. -
Refrigerate for at least 2-3 hours until set.
Let the molds rest on a steady shelf in the fridge where they will chill evenly.
The mixture will firm from glossy liquid to soft, springy gummies. -
Once set, remove the gummies from the molds and store them in an airtight container in the fridge.
Pop each gummy out carefully; if they stick, press the bottoms first for a clean release.
Keep them chilled and enjoy within a week for best texture and flavor.
Watching It Transform
There is a small, lovely change that happens in the fridge. At first the mixture looks cloudy and uncertain. After an hour it has a gentle give. By two to three hours it has that satisfying bounce that feels like success.
Texture is everything here. I learned to trust the feel of a gummy more than a stopwatch. When a gummy yields to gentle pressure and then springs back slowly, it is telling you it is ready. If it holds its shape but feels dry at the edges, give it more time.
A visual cue I watch for is a clean surface with a slight sheen, not wet, not dull. That sheen signals the right balance between the liquid and the gel. When the light catches the top and you can see a jewel-like hint, you are close.
When I Serve Easy Homemade Elderberry Gummies
These gummies are small and friendly snacks. I like to pull a batch for an afternoon tea or to tuck into a little dish when friends drop by. They also make a bright finish to a casual meal, especially when you want something not too sweet.
For a weekend treat, plate them on a small white saucer with a few fresh berries or a thin lemon slice for contrast. They sit well beside a warm cup of herbal tea or a tall glass of water for a light, tidy dessert moment.
If I bring them to a gathering, I label them gently — elderberry is distinct, and friends often appreciate knowing what they are tasting. They disappear fast, so plan for repeat batches if you are hosting.
Keeping Easy Homemade Elderberry Gummies Fresh
Store your gummies in an airtight container in the fridge. Cold keeps the gelatin firm and the flavor bright. They will keep for about a week, though I often find they are best within three to five days.
Over time they may lose a little shine and become firmer. This is normal. If they feel too firm after a few days, let them sit at room temperature for five to ten minutes before eating to soften slightly.
Avoid freezing these gummies. Freezing changes the texture and can make them crumbly. If you want longer storage, consider a syrup-based candy that freezes well, but for this recipe, the fridge is the friendliest place.
What I Learned While Testing
-
Patience makes all the difference.
Heating gently and letting gelatin hydrate slowly avoids grainy bits and keeps the flavor true.
I learned to stir with a light steady hand rather than hurried whisking. -
Measure, then taste.
Use the given amounts to start, then adjust small things like lemon or honey in future batches.
A teaspoon of extra lemon can brighten a whole batch, while too much hides the elderberry. -
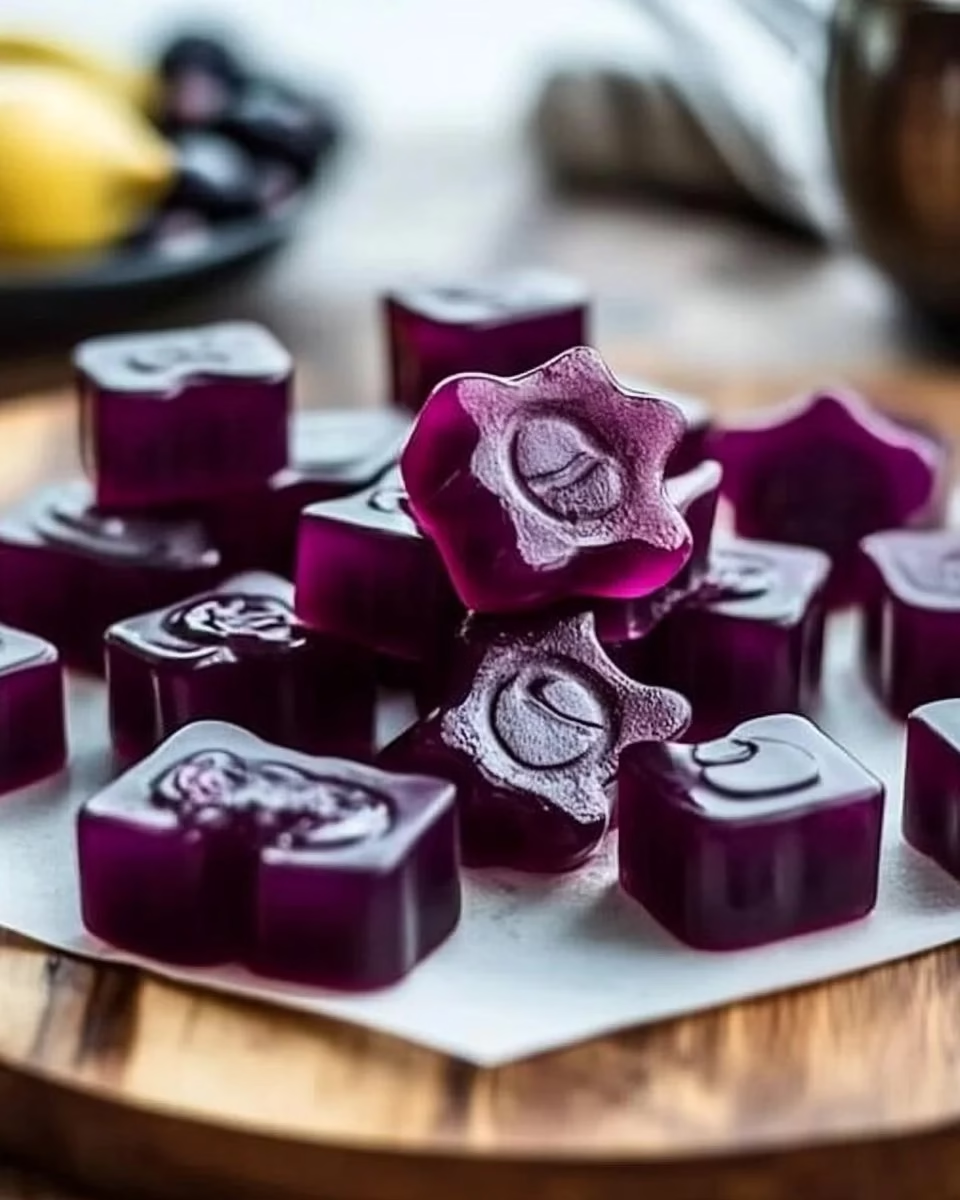
Molds matter.
Silicone gives a clean release and gentle shapes, while metal pans can be trickier to unmold.
I prefer small shapes that invite one or two bites. -
Make small test batches first.
I tried half batches to test new flavor twists and it saved time and ingredients.
If you want to try herbs or spices, test with one or two gummies first. -
Keep extra gelatin on hand.
A little more or less changes the mouthfeel in noticeable ways, and I like having options.
If your first batch is too soft, add a bit more gelatin next time.
Small Twists That Work
Try swapping the lemon for a splash of orange juice for a softer citrus note. The elderberry will blend with orange differently, creating a rounder finish.
A small pinch of ground ginger can add a warming note and pair well with honey. Use tiny amounts and test, as ginger can be bold.
For a floral touch, add a few drops of elderflower water or a very small amount of lavender syrup. These are subtle and should be tested in a single batch before making more.
If you want a vegan option, pectin-based recipes work differently and require more precise sugar levels and cooking. I have notes from other gummy tests that can help, but this particular recipe is built around gelatin for its simple reliability.
FAQs About Easy Homemade Elderberry Gummies
Can I make this ahead of time?
Yes, you can make these a day or two ahead. They actually hold their texture well after an overnight rest and sometimes taste more melded the next day. Keep them refrigerated in an airtight container and bring to room temperature briefly before serving if they feel too firm.
Can I use fresh elderberries instead of juice?
You can, but fresh elderberries should be cooked into a syrup first and strained to make a smooth juice. Elderberries are best when cooked and strained; raw elderberries are not recommended. Once you have a smooth juice, follow the recipe as written.
What if my gummies are too soft?
If they are too soft, warm and reheat the mixture gently and add a touch more gelatin dissolved in a little warm water. Pour back into molds and chill again. Start with a half tablespoon and test so you do not overcorrect.
Will they stick to the molds?
If gummies stick, silicone molds usually release more easily than rigid ones. Rubbing a very light coating of neutral oil on metal molds can help. Also, letting the gummies chill fully and resting at room temperature for a few minutes before unmolding makes release cleaner.
Can I reduce the sugar?
Yes, the honey is optional. If you use less sweetener, the elderberry will be more tart and focused. Taste before you set and add small amounts of honey or another sweetener until it sings to you.
Variations I’ve Tried
Elderberry and lemon remain a favorite, but I explored a few other directions that worked well. A honey and thyme version made for a herbal note that matched the berry nicely. I added a small rosemary sprig to steep in the warm mixture and strained it out before adding gelatin. The hint of rosemary was subtle but lovely.
I also tried blending a few elderberries with raspberry juice to create a layered berry flavor. Using a 50-50 mix kept the elderberry distinctive while softening its intensity. This is a nice option for picky tasters.
Another variation was to make smaller, lozenge-shaped gummies with a thin dusting of cornstarch to stop sticking. The cornstarch gives a slightly different mouthfeel but works if you want stackable candies for travel.
For a lighter, less gelatinous feel, I tried cutting gelatin by a third and adding a small amount of pectin from a tested recipe. The texture shifted toward a softer gel that almost melts instantly. It takes a little more technique, but it can be worth trying after you are comfortable with the base recipe.
Helpful Answers Before You Start
Think of this recipe as a chance to learn how gelatin behaves. It likes gentle heat, steady stirring, and time in the cold to finish. When you treat it kindly, the reward is a clean, reliable texture.
Make sure your elderberry juice is smooth and free of pulp for the best clarity and texture. If you press your own juice, strain carefully. Tiny solids can affect the set and can make release from molds uneven.
Choose molds you enjoy using. Small silicone shapes are forgiving and fun. If you prefer a large slab to cut later, line a pan with parchment for easy removal and neat slicing.
From My Kitchen to Yours
I hope this Easy Homemade Elderberry Gummies encourages you to try a hands-on, small-batch dessert that is both gentle and bold. These gummies invite tiny experiments and honest tasting, and they reward a little attention with bright flavor and satisfying texture.
Make a batch on a quiet afternoon, taste along the way, and let the kitchen teach you small lessons about texture and balance. I will be in my kitchen, testing the next shape and scratching down notes, delighted that simple ingredients can make such a joyful snack.
Elderberry Gummies
Ingredients
For the gummies
- 1 cup elderberry juice Ensure it is smooth and free of pulp.
- 2 tablespoons honey (optional) Adds warmth without overpowering.
- 3 tablespoons gelatin powder Helps with structure.
- 1/2 cup water Helps the gelatin dissolve evenly.
- 1 tablespoon lemon juice Brightens and balances the berry note.
Instructions
Preparation
- In a small saucepan, combine the elderberry juice, water, and lemon juice.
- Warm the pan gently so the liquids join and the lemon unfolds its brightness.
- Watch the surface as the liquids begin to shimmer and blend.
Heating
- Heat the mixture over low heat until warm.
- Keep the heat gentle so the juice does not bubble or lose fresh taste.
- Stop when you feel a steady warmth and the aroma lifts from the pan.
Adding Gelatin
- Gradually whisk in the gelatin until fully dissolved.
- Sprinkle the gelatin in slowly and whisk in small circles to avoid lumps.
- Look for a clear, glossy surface and a smooth texture when it is done.
Sweetening
- If desired, stir in honey for sweetness.
- Add a little at a time and taste as you go to find your balance.
- Notice how the honey adds warmth and tames sharp edges.
Molding
- Remove from heat and pour the mixture into molds.
- Work steadily and pour into small silicone molds or a lined pan.
- Tap the molds gently to release any air bubbles and even the surface.
Chilling
- Refrigerate for at least 2-3 hours until set.
- Let the molds rest on a steady shelf in the fridge where they will chill evenly.
- The mixture will firm from glossy liquid to soft, springy gummies.
Storing
- Once set, remove the gummies from the molds and store them in an airtight container in the fridge.
- Pop each gummy out carefully; if they stick, press the bottoms first for a clean release.
- Keep them chilled and enjoy within a week for best texture and flavor.