The kitchen light hummed softly as I dipped the first Oreo into the warm white chocolate, watching the glossy coat settle and thin ribbons drip back into the bowl. That small, quiet moment felt like a discovery, like finding a new note in an old song, and I kept testing until the shine and snap felt just right. I know how a simple idea can spiral into a beloved treat, and that is how these Easter Oreo Bunny Cookies became a room-filling ritual. If you like playful cookie ideas, you might also enjoy a twist on crunchy sweets like the Cookie Monster Fudge recipe with Oreos and chocolate chip cookies which grew from the same kind of curious kitchen tinkering.
The Story Behind This Small-Batch Easter Oreo Bunny Cookies
I started with one question: can a store-bought favorite turn into something that feels homemade and special with just a little attention? That question led to a few late afternoons of dipping, decorating, and tasting. I wanted a recipe that leaned on the comfort of a classic Oreo yet played like a holiday treat.
At first the chocolate was too thick and hid the Oreo shape, and the candy eyes slipped off like shy guests. I tried thinning the melts with a touch of neutral oil and waited to place eyes until the chocolate had lost its hottest sheen. Slowly, the balance came together and the cookies had the right snap, the right gloss, and a face that made me smile.
This is a small-batch recipe on purpose. It feels friendly for testing, for making with a child, or for giving away. It is not about perfection. It is about a few clear choices that make the simple feel thoughtful.
The Rhythm of Making Easter Oreo Bunny Cookies
“The moment the texture shifts, you know it’s ready.”
There is a quiet rhythm to this recipe. You melt, you dip, you decorate, and you pause. Watch the chocolate as you stir. It starts matte, then becomes glossy and smooth, and finally it settles into a pourable silk that clings to the cookie without swallowing it.
As you dip an Oreo, notice how the melted chocolate hugs the biscuit. Too warm and it slips clean off. A little too cool and it clings in ropes. I learned to tilt the bowl and move slowly, letting the excess drip back into the bowl. That little pause is where you find the right weight of coating.
Decorating is playful and fast. Once the chocolate feels tacky but not hot, the sprinkles anchor and the eyes sit nicely. If you place them immediately when the chocolate is hottest, they sink. Wait until the sheen dulls just a touch and they will stay proud and upright.
Ingredients You’ll Need
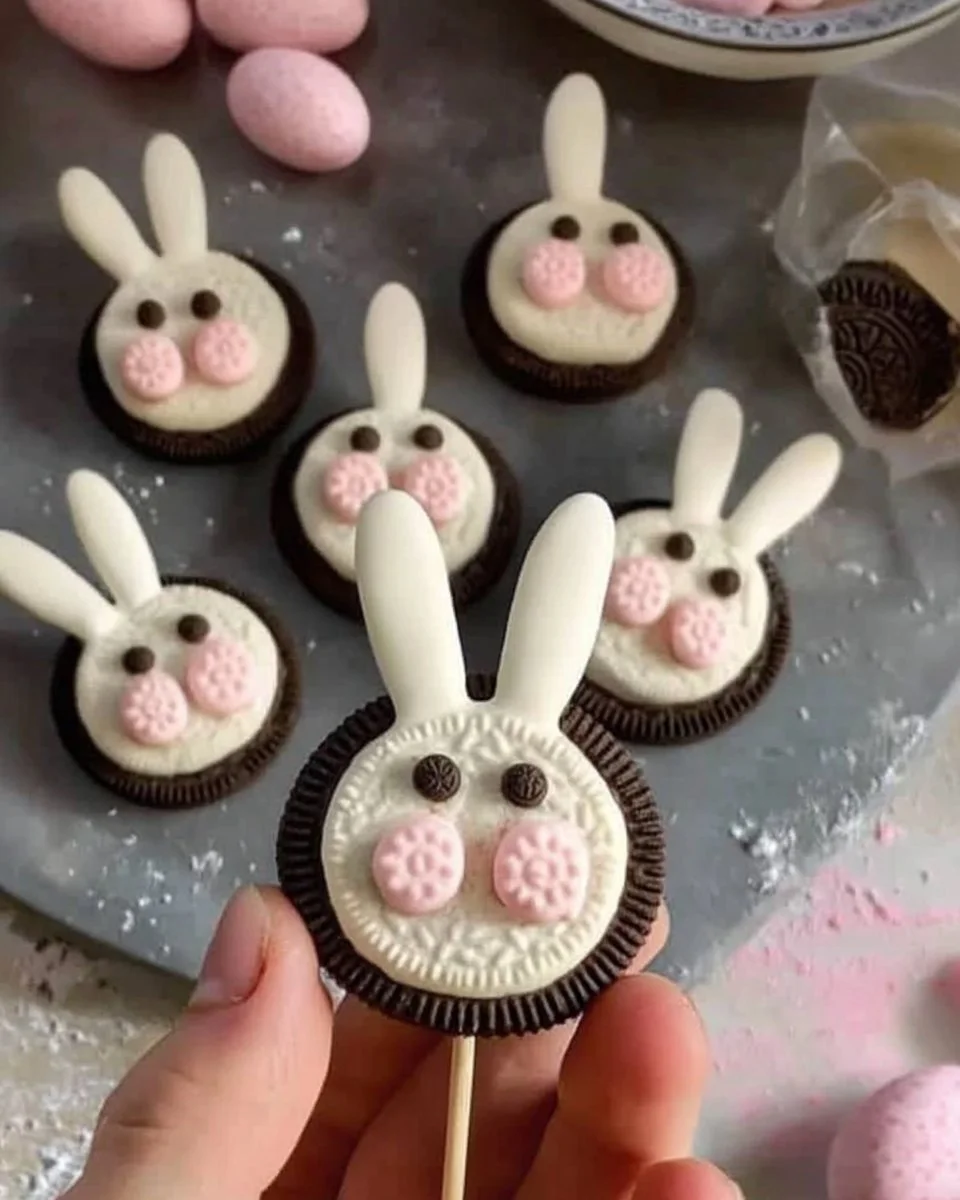
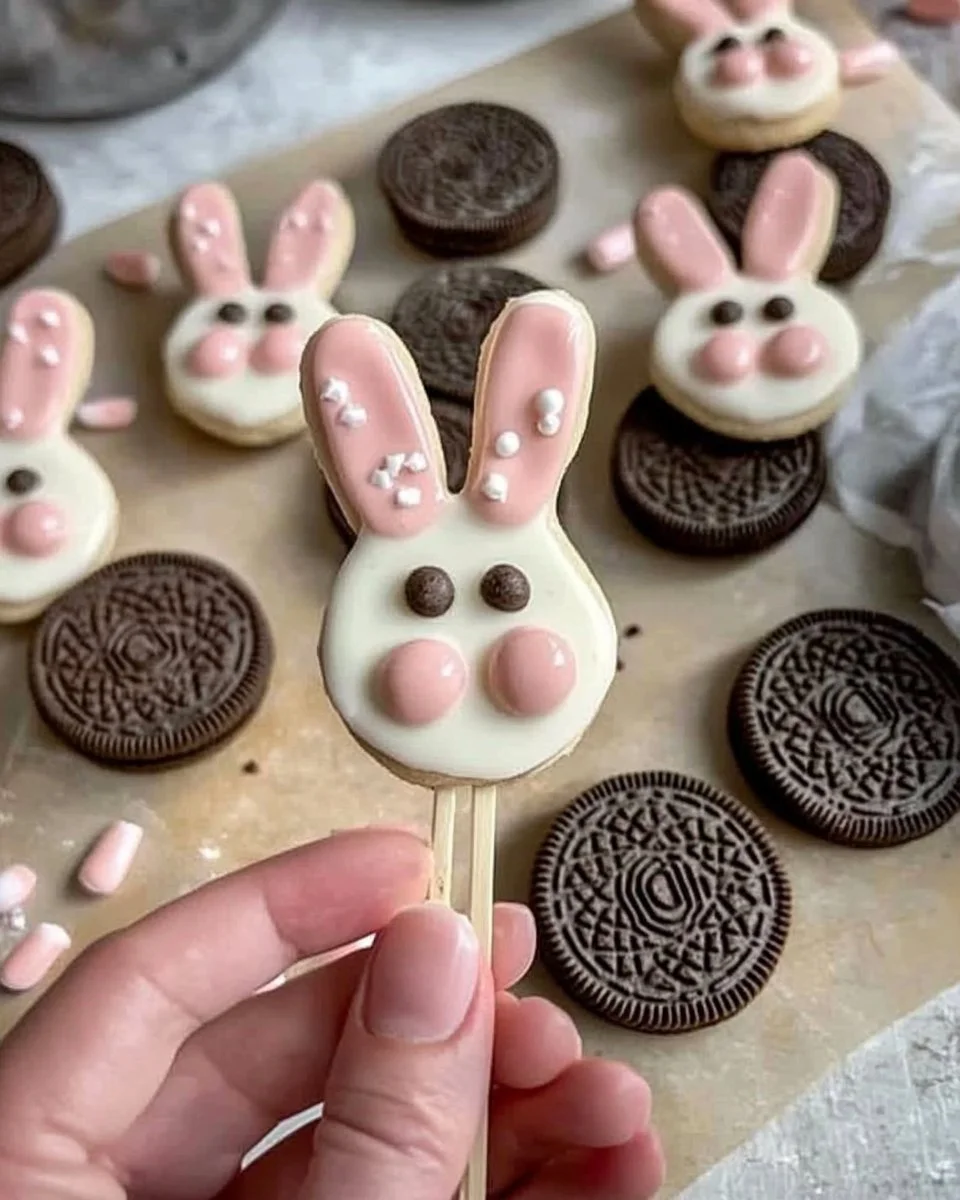
1 package Oreo cookies, this is the heart of the cookie and gives that rich chocolate sandwich texture.
White chocolate or candy melts, this gives the coating a shiny finish and sweet milky contrast.
Colored sprinkles, this adds festive color and a bit of crunch on top.
Candy eyes, these bring the bunnies to life and are a small charm that makes people smile.
Pink icing or sprinkles for ears, this helps shape the ear detail and adds a touch of candy brightness.
Each ingredient is simple on its own, and together they create a playful dessert that feels more thoughtful than its parts. The white chocolate gives richness without overpowering, while the sprinkles add crunch and color that read as celebration.
Step-by-Step Directions
-
Melt the white chocolate or candy melts in a microwave-safe bowl. Heat in short 20 to 30 second bursts, stirring between, and stop when the shine is smooth and the last bits melt with a stir. Watch for a smooth sheen that should be pourable but not runny.
-
Dip each Oreo cookie halfway into the melted chocolate, then allow excess to drip off. Hold each cookie over the bowl for a few seconds and tilt slightly to let ribbons fall back. Notice how the chocolate clings and stop once it feels soft but set around the cookie edge.
-
Place the cookies on a parchment-lined baking sheet and immediately decorate with colored sprinkles for a festive touch. Press sprinkles lightly so they catch in the tacky chocolate and do not scrape them hard. The contrast between glossy white and bright sprinkles feels cheerful and deliberate.
-
Use the candy eyes and pink icing or sprinkles to create bunny faces and ears. Set the eyes once the chocolate has lost a hot sheen, and pipe or place pink sprinkles for the ear center while the coating is still slightly soft. Gentle pressure with a fingertip or a small tool helps keep them in place.
-
Let the cookies set for a few minutes until the chocolate hardens. You can leave them at room temperature or chill briefly for a crisper finish. Watch for the chocolate to dull slightly and give a soft tap test to the edge to know they are ready.
-
Enjoy your Easter Oreo bunny cookies! Arrange them on a simple platter, breathe in that sweet vanilla scent, and share with someone who likes to smile at small, homemade surprises. These cookies are best enjoyed soon, while the contrast of textures is lively and fresh.
When I Serve Easter Oreo Bunny Cookies
These cookies feel right for a slow weekend morning snack or a lively holiday table. I often set them out on a low tray with a few napkins and let people help themselves. They work well with coffee, tea, or a cold glass of milk, and the playful faces are an easy icebreaker at a family gathering.
For a spring party, I like to scatter pastel paper grass on a platter and nestle the bunnies among it. For a quieter night, I pair two on a small saucer beside a cup of herbal tea. If you are gifting, wrap a few in cellophane and tie with a ribbon. They travel well for short trips, just avoid heavy stacking.
These cookies are not fussy. Let them sit out for 10 or 15 minutes before serving if they were chilled so they soften slightly and become easier to bite. The thin white coating should give a satisfying snap while the Oreo center remains familiar and creamy.
Keeping Easter Oreo Bunny Cookies Fresh
To store these cookies, place them in an airtight container with parchment between layers to prevent sticking. At room temperature they keep well for a few days, though the coating can soften slightly in warm spaces.
If you want them crisper, store the container in a cool area but avoid excess refrigeration because moisture can make the chocolate bloom or the filling feel a bit waxy. For a longer hold, chill in the fridge in a tightly sealed box and let them sit at room temperature for a little while before serving.
Be mindful of humidity. If the day is very humid, the sprinkles can lose their crispness faster. A simple note: if the shiny finish dulls with time, it usually does not affect flavor, only appearance.
Carol’s Baking Notes: What I Learned While Testing
-
Thin your melts cautiously. A teaspoon of neutral oil can help if the candy melts thicken during cooling, but add it in small amounts and stir until the sheen returns. This keeps the coating glossy without watering down flavor.
-
Temperature matters for decorations. I found that placing eyes and sprinkles when the chocolate is slightly cooled keeps them anchored. Too hot and they slide, too cool and they do not stick as well.
-
Use a gentle hand for dipping. Resting the cookie on the edge of the bowl before pulling out reduces drips and keeps the bottom clean. It gives you more control and a neater edge.
-
Have a small tray for misplaced decorations. When children help, eyes and sprinkles end up in unexpected spots. A bowl next to your work area keeps things moving and reduces stress.
-
Test one or two cookies first. I always dip a test cookie to check the chocolate’s thickness and the timing for decoration. That small trial saves time and keeps the rest of the batch consistent.
These notes came from small-batch testing in my kitchen. They are the kind of practical tips I wish someone had told me when I first played with candy melts.
Variations I’ve Tried: Small Twists That Work
-
Swap the white chocolate for pastel-colored candy melts. I tried soft blue and light yellow, and the cookies read as playful and themed. Keep the coating thin to preserve the Oreo silhouette.
-
Sprinkle crushed freeze-dried strawberries or raspberries over the still-tacky coating for a fruity snap. This adds a tart note and a crunchy, slightly chewy texture that I found delightful.
-
Use hollow chocolate bunny pieces for ears instead of pink icing when you want a three-dimensional look. Press them gently into the chocolate while it is tacky, and they stay upright if not too heavy.
-
Make mini versions using sandwich cookie minis for bite-sized treats. They work well for a party platter and encourage sampling without full commitment to a large bite.
-
For a less sweet option, dust the white coating with finely chopped toasted nuts before it sets. The toasted oil from the nuts cuts through the sweetness and adds an adult-friendly flavor.
Each variation keeps the basic method intact but allows you to explore texture and flavor. I encourage small experiments and note the one or two adjustments that matter most to your taste.
FAQs About Easter Oreo Bunny Cookies
Can I make this ahead of time?
Yes, and in some cases it actually sets better after resting, especially once the texture has fully settled. Store them in an airtight container and let them come to room temperature before serving for the best mouthfeel.
What if my candy melts seize or get grainy?
If the chocolate becomes grainy from overheating, stop heating and stir to see if it smooths. If it stays grainy, you can try adding a tiny bit of neutral oil and stirring gently until the shine returns. If that does not help, start a fresh batch to keep the coating smooth.
Can I use homemade sandwich cookies instead of Oreos?
Absolutely. Homemade sandwich cookies work well and give you more control over sweetness and filling. Keep the cookie size similar so the coating and decoration proportions remain balanced.
How do I stop sprinkles from sliding off?
Place sprinkles when the chocolate is tacky rather than very hot. If your kitchen is warm, consider chilling the cookies for a minute in the refrigerator so the surface becomes sticky rather than wet. That helps sprinkles anchor quickly.
Are these safe for children to help with?
Yes, this recipe is great for kids with supervision. Let children place sprinkles and eyes on cookies while adults handle the hot melts. Use child-safe tools and keep a clean area for decorations.
Sharing Easter Oreo Bunny Cookies
I love to share these cookies because they carry a small surprise in each bite. When I bring them to a neighbor or tuck a few into a lunchbox, they act like tiny celebrations. For a casual brunch I place them on a wide board with pastel napkins and a few fresh flowers so the display feels effortless and alive.
Sometimes I pair them with other treats and themes. A simple pairing of mini cupcakes or a bowl of fresh berries balances the sweetness and adds variety to the plate. If you are building a small dessert table, consider a soft backdrop of paper doilies and let the cookies be the playful focal point.
If you want a visual companion, I often look at other spring cookie ideas and borrow small styling cues. For instance, a nest-like presentation with shredded paper and a few eggs made me think of other playful bakes such as the Easter Birds Nest Cookies that share the same holiday spirit and craft-friendly approach. Sharing these cookies is about the moment: an invitation to smile, take a bite, and linger a little.
A Final Thought
I hope making these Easter Oreo Bunny Cookies invites you into a kind of quiet curiosity in the kitchen. They are forgiving and immediate in a way that encourages small experiments, and they reward attention with simple, honest joy. Try one small tweak, test a tiny variation, and share what you discover. I will be doing the same, still chasing that shiny finish and the perfect little bunny face.
Easter Oreo Bunny Cookies
Ingredients
Main Ingredients
- 1 package Oreo cookies The heart of the cookie and gives that rich chocolate sandwich texture.
- 8 oz White chocolate or candy melts Gives the coating a shiny finish and sweet milky contrast.
- 1/4 cup Colored sprinkles Adds festive color and a bit of crunch on top.
- 12 Candy eyes Brings the bunnies to life.
- 2 tbsp Pink icing or sprinkles Helps shape the ear detail.
Instructions
Preparation
- Melt the white chocolate or candy melts in a microwave-safe bowl. Heat in short bursts of 20 to 30 seconds, stirring in between, until smooth and shiny.
- Dip each Oreo cookie halfway into the melted chocolate, allowing excess to drip off before placing them on a parchment-lined baking sheet.
- While the chocolate is still tacky, decorate with colored sprinkles, pressing lightly to anchor them in place.
- Use the candy eyes and pink icing or sprinkles to create bunny faces and ears, allowing the chocolate to cool slightly for better adhesion.
- Let the cookies set for a few minutes until the chocolate hardens. You can leave them at room temperature or chill briefly for a crisper finish.
