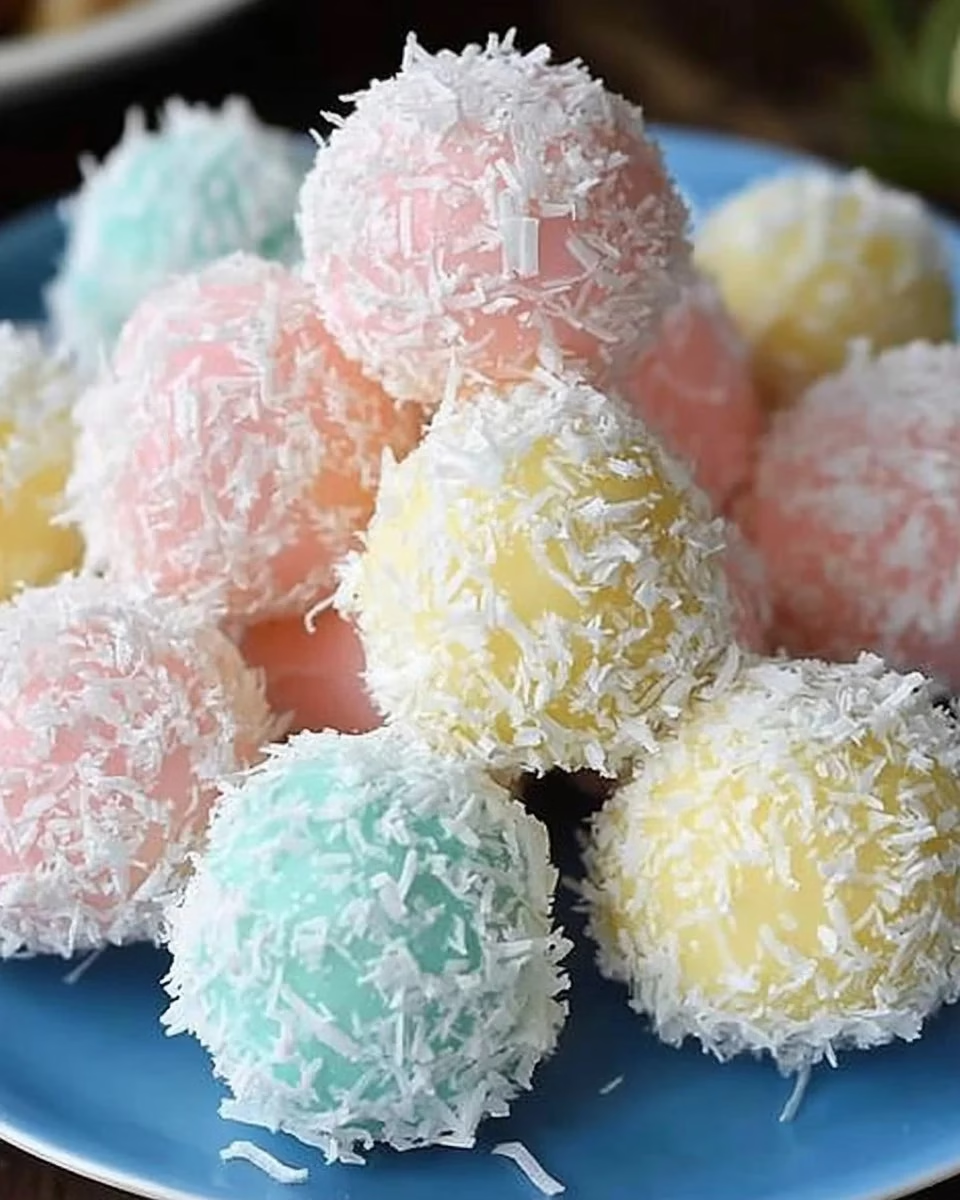
The kitchen smelled faintly of vanilla and toasted coconut as I mixed the last spoonful of sweetened condensed milk into a pile of shredded coconut, and in that quiet hour I felt like a curious rabbit hunting for small delights. The idea for Easter Bunny Coconut Tails – A Sweet No-Bake Treat! began as a playful experiment one spring evening when I wanted something pastel, tender, and simple to share with family. I chased a particular texture, the moment when the mixture held together without being sticky, and I found it in small chilled morsels that tasted like childhood and sunshine. If you want another coconut idea that travels well to a picnic or party, you might also enjoy my pineapple coconut no-bake balls, which share the same easy spirit and friendly approach.
Why This Easter Bunny Coconut Tails – A Sweet No-Bake Treat! Became a Favorite
This recipe matters because it is honest and forgiving, two qualities I respect in a dessert. I kept testing small batches until the mixture behaved predictably, and the one moment it finally felt right was when the balls held their shape without feeling dry. It became a favorite because the pastel coating adds charm without fuss and because the center is tender enough to melt on the tongue while still holding a gentle bite. There is comfort in a recipe that welcomes small mistakes and still delivers a pile of pretty, tasty treats.
The Story Behind This Small-Batch Easter Bunny Coconut Tails – A Sweet No-Bake Treat!
The first time I made these I was thinking about texture more than appearance, and yet the colors sang as soon as I rolled the balls in the dyed coconut. I trimmed the recipe to a small batch deliberately so that testing felt manageable and not wasteful, and that made every tweak feel meaningful. Small-batch testing let me try slightly different amounts of condensed milk and find the balance between too wet and too dry. After a few quiet trials I had a reliable method that produces consistent results even for cooks who are trying no-bake treats for the first time.
The Rhythm of Making Easter Bunny Coconut Tails – A Sweet No-Bake Treat!
“The moment the texture shifts, you know it’s ready.”
There is a gentle rhythm to this recipe that I love: whisk, fold, chill, color, roll, and chill again. Watch for the batter to develop a smooth sheen and loosen from the sides of the bowl when you stir; that is a visual cue you are close. When you scoop and roll the mixture, it should feel soft but not sticky, slightly tacky to the touch and easy to shape into small tails. The pastel coconut should look airy and dry, so it clings without clumping.
Ingredients You’ll Need
✔ 5 cups unsweetened coconut (medium shred) this gives body and chew so the tails are pleasantly textured.
✔ 2 cups unsweetened coconut (fine shred) this finer shred is what you dye and use for the coating, creating a soft, pastel finish.
✔ 14 oz sweetened condensed milk the sweet binder that brings everything together and keeps the interior tender.
✔ 2 tbsp butter, melted & cooled this adds richness and helps the mixture hold its shape without being greasy.
✔ 1 tsp vanilla extract for a familiar warm note that pairs beautifully with coconut.
✔ ¼ cup confectioner’s sugar a touch of dusting sweetness that offers a subtle structure boost.
✔ Liquid food coloring (for pastel magic!) a few drops create gentle, springtime colors without changing flavor.
Step-by-Step Directions
-
In a large bowl, whisk condensed milk, melted butter and vanilla. Stir until the mixture looks glossy and smooth, with the condensed milk fully incorporated and no streaks of butter. The aroma should be creamy and faintly vanilla-scented.
-
Stir in medium-shred coconut and confectioner’s sugar. Fold gently until the coconut is evenly moistened and the mixture feels slightly tacky but not runny. Chill the bowl in the fridge for 15 minutes so the blend firms up and becomes easier to shape.
-
Meanwhile, color the fine-shred coconut. Mix 1/2 cup of the fine coconut with 3 to 4 drops of food coloring and blend with a fork until the color is uniform and soft. Repeat for each color you want, keeping the dyed coconut loose and dry rather than damp.
-
Scoop chilled mixture into 1 1/2 teaspoon portions, roll into balls, then coat in colored coconut. Use a small cookie scoop or two spoons to portion, then roll between your palms until the surface is smooth and the shape is compact. Gently press the ball into the dyed coconut so the fine shreds cling and form a soft coat.
-
Place on a baking sheet and chill for 1 hour to set. Arrange the tails at least a little apart so air can circulate and they firm evenly, and stop chilling when they feel set to the touch. Once the balls have developed a faint give but hold their shape, they are ready to serve or store.
-
Keep refrigerated until serving and enjoy these sweet little bites. Let them sit at room temperature for 5 to 10 minutes before serving if you want a softer texture, and always return extras to the fridge to preserve shape and freshness. These little treats travel well in a covered container if you need to bring them to a gathering.
Watching It Transform
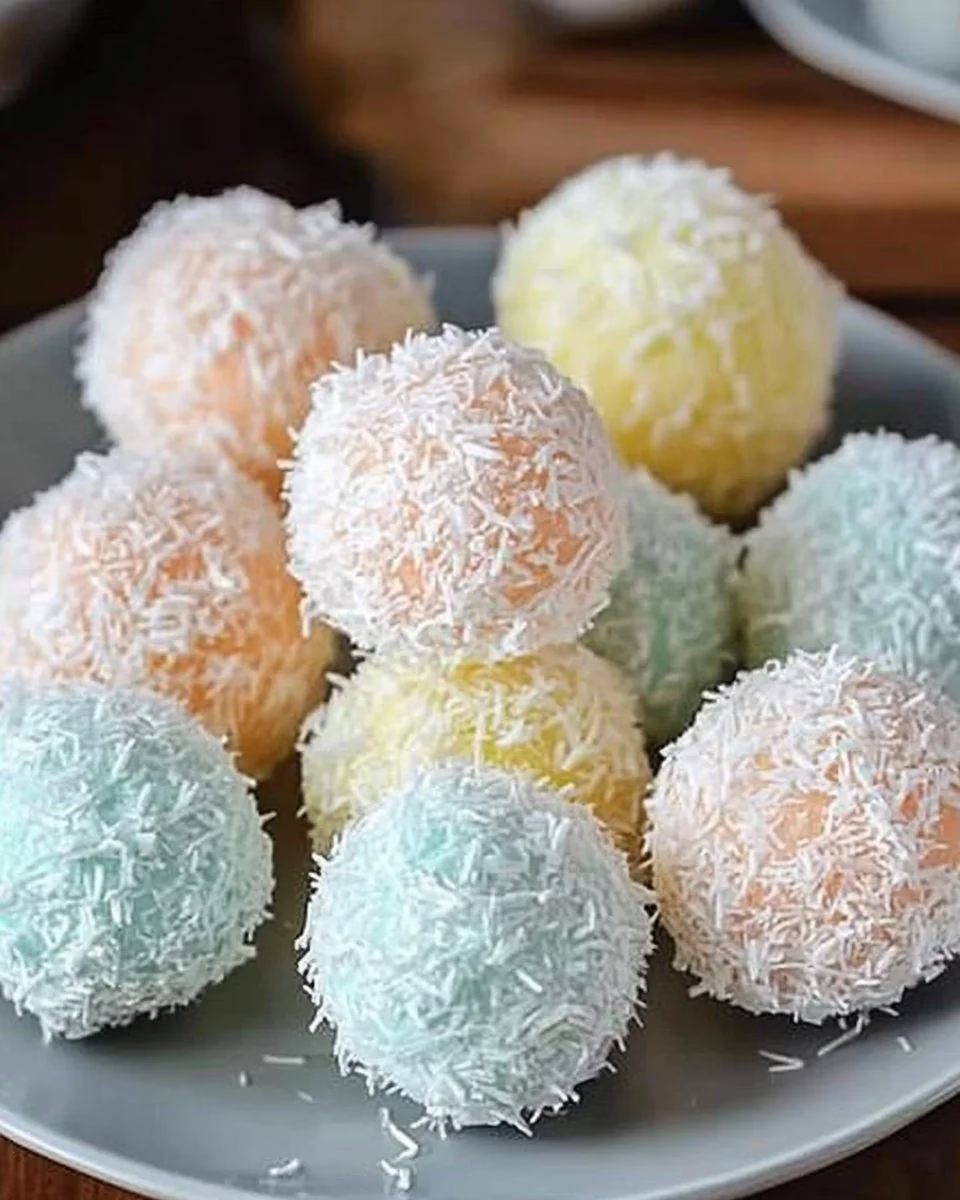
When you first mix the condensed milk into the medium-shred coconut, the texture is glossy and slightly heavy, and that is where the magic begins. As the mixture chills, it tightens and takes on a firmer hold, but it remains tender when you press a portion between your fingers. Rolling the balls changes the experience again, smoothing the surface until each tail looks neat and inviting. The final coating in pastel coconut gives a dry, feathery finish that contrasts nicely with the soft center.
How I Judge the Right Texture
I look for a few things when testing no-bake coconut treats. First, the mixture should be cohesive enough to roll without crumbling, and that means the condensed milk has to be evenly distributed. Second, the balls should not be slick or greasy; a small sheen is fine but too much means the butter or condensed milk is excessive. Third, when chilled, they should have a tender bite, not a hard core, because that chew is what makes them feel homemade and satisfying.
When to Make These
These are perfect for an afternoon of casual baking when you want a quick, festive treat without turning on the oven. They are also great for making the day before a gathering because the flavors meld and the texture settles overnight. I often prepare them for small holiday trays and simple dessert spreads that call for a pretty bite-sized sweet. They are good to make with children because the steps are hands-on and the colors add an element of play.
When I Serve Easter Bunny Coconut Tails – A Sweet No-Bake Treat!
I like to arrange them on a shallow platter with a few sprigs of fresh mint or edible flowers for spring visual appeal. For a child friendly spread, I place them in cupcake liners clustered by color so each guest can choose a pastel shade. For an adult plate I pair them with small squares of dark chocolate and a scattering of roasted nuts to balance the sweetness. Serving at room temperature for a few minutes softens them slightly and enhances the coconut aroma.
Keeping Easter Bunny Coconut Tails – A Sweet No-Bake Treat! Fresh
Store the tails in an airtight container in the refrigerator and expect them to stay good for up to a week. The texture may firm a bit more after a few days, so allow 5 to 10 minutes at room temperature before serving for a softer bite. If you need to freeze them, layer parchment between rows and thaw gently in the refrigerator overnight to preserve shape. Note that the dyed coconut will stay bright if kept sealed away from moisture.
Storing Tips That Matter
Avoid storing them near strong odors in the fridge because sweetened condensed milk can absorb other scents. If you plan to transport the tails, pack them in a shallow box with a small ice pack to keep them firm. When you plan to display them, keep the container covered until the last moment to keep the pastel coating crisp. These simple habits help maintain both texture and color.
Carol’s Baking Notes
- Use unsweetened coconut for both the mix and the coating to avoid overly sugary results, since the condensed milk is already quite sweet.
- If the mixture seems too loose after chilling, add a tablespoon or two more medium-shred coconut and test one ball to feel the balance.
- Melt the butter and cool it slightly before adding so it blends smoothly without warming the condensed milk too much.
- For softer balls, let them sit at room temperature for a short time before serving, but do not leave them out for more than a few hours.
- Use a small scoop for consistent size and even chilling.
What I Learned While Testing
Three small trials taught me the most about balance in this recipe. First, too much coloring liquid can make the coated coconut clump, so use only a few drops and mix well. Second, the ratio of medium to fine coconut matters because the medium shred builds structure while the fine shred gives a pretty finish. Third, chilling twice makes a huge difference; the first chill firms the mix enough to shape, and the second chill helps the balls set so they do not flatten when plated.
Little Things That Made a Difference
Using a fork to fluff the dyed coconut prevented clumps and kept the color even without oversaturating any one area. Rolling quickly between slightly damp palms kept the surface smooth without sticking, and that touch kept the tails neat. Measuring the sweetened condensed milk by weight or ounce rather than guessing produced consistent batches. Finally, working in a cool kitchen helped maintain texture while shaping.
Variations I’ve Tried
I like to keep the base method intact while trying small shifts that change flavor and character. Adding a teaspoon of finely grated lemon zest to the main mixture brightens the coconut without changing texture. Folding in a handful of toasted coconut flakes at the end adds a toasty note and a contrasting crunch. If you want to change the coating, try rolling in finely chopped toasted pistachios or crushed freeze dried strawberries for different textures.
If you enjoy coconut-based no-bake sweets, another simple idea to explore is my take on a four ingredient coconut raspberry fudge, which pairs well with pastel treats and keeps the same friendly, small-batch spirit four ingredient coconut raspberry fudge.
Ways to Make It Your Own
Keep the structure constant and change one element at a time so you can tell how each tweak affects the final result. Swap vanilla for almond extract in a small batch to see how the aroma changes. Use coconut extract sparingly if you want a stronger coconut note without adding texture. And experiment with coating colors that reflect seasons or celebrations while sticking to a light hand on the food coloring.
Serving Suggestions That Feel Real
Place the tails on a simple white platter to let the pastel colors be the focus, or layer them in small paper cups for a grab-and-go dessert box for guests. For a tea party, arrange them around a small bowl of citrus curd or fruit jam so guests can take a little spread. They also pair nicely with a small scoop of lightly sweetened mascarpone if you want a richer accompaniment. Keep serving practical and relaxed, as these are best when people can reach in and enjoy without fuss.
A Note on Ingredients
I prefer unsweetened shredded coconut because the condensed milk supplies the sweetness, and it keeps the overall taste balanced. If the only coconut available is sweetened, reduce the confectioner’s sugar slightly and test a small batch. Choose good quality sweetened condensed milk for the cleanest flavor and a smooth finish. Use fresh vanilla rather than imitation if possible because the aroma will be clearer and more inviting.
Tools That Help
A small cookie scoop is one of the most useful tools for consistent portions and even chilling. A pair of small bowls for dyeing coconut keeps colors separate and clean. A baking sheet lined with parchment is all you need for chilling and storing during assembly. None of these tools are essential, but they make the process neater and faster, especially when you are making multiple colors.
Troubleshooting
If your mixture is too crumbly, you likely need a little more condensed milk; add a teaspoon at a time and test. If it is too wet and sticky, fold in a tablespoon of medium-shred coconut and chill again. If dyed coconut clumps, spread it on a tray and air dry for a short time, then fluff it with a fork before using. When in doubt, chill longer; firmness after chilling is the best indicator that the balance is right.
FAQs About Easter Bunny Coconut Tails – A Sweet No-Bake Treat!
Can I make this ahead of time?
Yes, and it often tastes better after resting because the flavors meld and the texture sets fully. Store in an airtight container in the refrigerator for up to a week, or freeze in a single layer with parchment between layers for longer storage.
Can I use different types of coconut?
You can, but keep the structure in mind; medium-shred gives chew and body while fine-shred works best for coating. If you only have one texture, adjust the moisture carefully and test a small batch first.
How do I get pastel colors without strong dye taste?
Use gel or paste food colors sparingly since they are more concentrated and need fewer drops. Mix dye into a small amount of coconut and taste a small pinch; if it tastes like dye, ease back and add more plain coconut.
What if the balls flatten after chilling?
They may have been too soft when plated; chill longer before moving them to a serving tray. Also check your chill time and consider slightly reducing the butter if you live in a warm kitchen.
From My Kitchen to Yours
I hope these steps make Easter Bunny Coconut Tails – A Sweet No-Bake Treat! feel accessible and friendly the first time you try them. This recipe taught me to pay attention to small changes and to trust texture as much as measurements, and that kind of learning makes every batch better. Treat the process as playful and low stakes so you can enjoy experimenting with colors and tiny additions. When you come away with a tray of small pastel treats, you will know you followed a simple, honest method that rewards curiosity.
A Final Thought
I will make these again because they are cheerful, dependable, and a gentle invitation to try no-bake desserts at home. I hope this recipe encourages you to experiment a little and trust your instincts the way I have learned to trust mine, and that you find the joy in small, thoughtful batches. Thank you for letting me share this corner of the kitchen with you, and I look forward to hearing about the little changes you try and the moments you share them.
Easter Bunny Coconut Tails
Ingredients
Main Ingredients
- 5 cups unsweetened coconut (medium shred) This gives body and chew.
- 2 cups unsweetened coconut (fine shred) Used for coating.
- 14 oz sweetened condensed milk Acts as the sweet binder.
- 2 tbsp butter, melted & cooled Adds richness.
- 1 tsp vanilla extract For a warm flavor.
- 1/4 cup confectioner’s sugar Dusting sweetness.
- as needed liquid food coloring For coloring the fine coconut.
Instructions
Preparation
- In a large bowl, whisk together the condensed milk, melted butter, and vanilla until smooth and glossy.
- Stir in the medium-shred coconut and confectioner's sugar until gently combined. Chill the mixture in the fridge for 15 minutes.
- Color the fine-shred coconut by mixing with a few drops of food coloring until the color is uniform. Repeat for each desired color.
Forming the Tails
- Scoop the chilled mixture into 1 1/2 teaspoon portions and roll into balls.
- Coat the balls in the colored fine-shred coconut, pressing gently to adhere.
- Arrange on a baking sheet and chill for 1 hour to set.