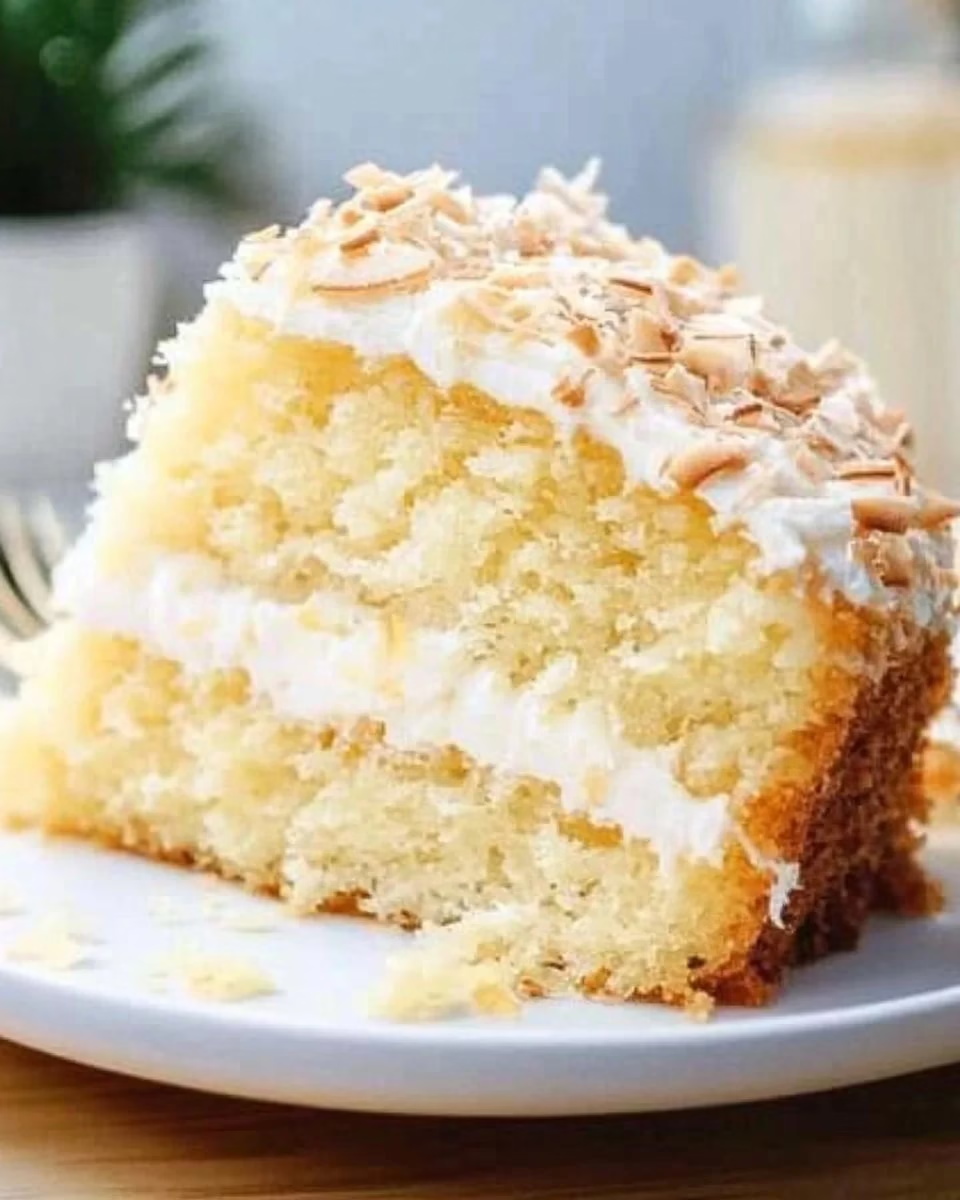
The first time I pulled this Coconut Cake from the oven it felt a little like finding a note tucked into an old cookbook, warm and familiar and full of possibility, with the air in the kitchen turning sweet and slightly floral from the coconut as the pans cooled on the rack. If you love coconut in different forms, you might also enjoy the way coconut can sing in breakfasts and simple sweets, as I do in my take on coconut cream pancakes, which helped me think differently about texture and cream. I want this cake to feel like a friendly experiment you can try tonight, with clear cues and small tricks to help each bite land just right.
Why This Coconut Cake Became a Favorite
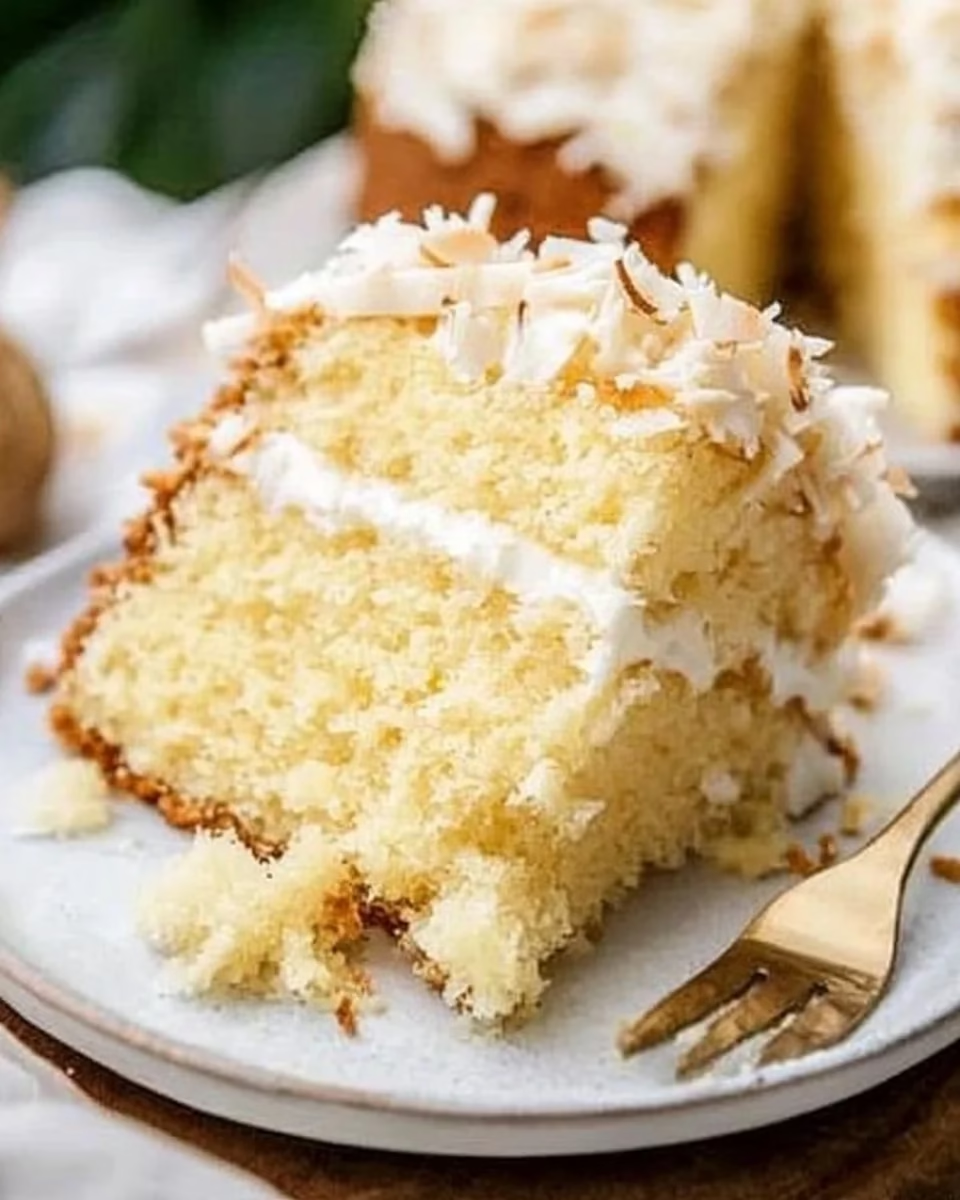
This cake matters because it grew from many small tests, each one teaching me something about how coconut plays with crumb and cream. I baked in small batches, adjusting the fat and the liquid until the center felt tender but not wet, and the crumb held together when sliced. The moment it finally felt right was quiet and simple: a fork slid through a slice and the cake held its shape while still feeling soft and yielding.
I kept the recipe approachable for a beginner while leaving room for a curious baker to make small changes. The balance here is intentional; the cake is rich enough to satisfy but light enough that the cream cheese frosting can be more playful than heavy. That push and pull between texture and sweetness is what keeps this Coconut Cake on my regular rotation.
How This Coconut Cake Comes Together
“The moment the texture shifts, you know it’s ready.”
Baking this cake is like listening to a song with familiar verses and a small, satisfying bridge. You start with butter and sugar, and as you cream them, watch the mixture go from dull to glossy and slightly pale. That change is a gentle signal that your air has been folded in and the cake will lift evenly.
Once the eggs are in, you will feel the batter move from thick to more fluid and glossy. The coconut milk adds a subtle silkiness that keeps the crumb tender, and the shredded coconut gives each bite a soft chew. When the two pans go into the oven, you will smell coconut and butter and know you are close to that golden pull of readiness.
When you test for doneness, use both a toothpick and the wobble test. A toothpick should come with a few moist crumbs, not batter, and the center should give under a fingertip but not sink. That small wobble means a tender cake that will finish setting as it cools.
Ingredients You’ll Need
2 cups all-purpose flour (this helps with structure)
2 cups granulated sugar (for even, classic sweetness)
1 cup unsalted butter, softened (adds richness and a tender crumb)
4 large eggs (they add lift and help bind the cake)
1 cup coconut milk (for coconut flavor and silkiness)
1 teaspoon vanilla extract (this rounds flavors without taking over)
1 tablespoon baking powder (this is the gentle lift your cake needs)
1/2 teaspoon salt (this balances sweetness and brightens flavors)
1 cup shredded coconut (adds texture and a coconut note in every bite)
1 cup cream cheese, softened (for a tangy, smooth frosting)
1 cup powdered sugar (to sweeten the frosting without grain)
1/2 cup heavy cream (whipped in for a light, silky frosting)
Step-by-Step Directions
- Preheat the oven to 350°F (175°C). Grease and flour two 9-inch round cake pans. Place a rack in the center of the oven and let your pans warm slightly so the batter spreads evenly when poured. Watch for a gentle sheen on the buttered surface as a sign you prepared the pans well.
- In a large mixing bowl, cream together the butter and sugar until light and fluffy. Use a hand mixer or stand mixer on medium speed and scrape the sides as you go. Look for a pale, airy texture and a soft ribbon when you lift the paddle.
- Add the eggs one at a time, beating well after each addition. Stop and scrape the bowl between eggs so everything blends evenly. The batter will become smoother and more glossy; that is your cue to move on.
- Mix in the vanilla extract and coconut milk. Pour the coconut milk in slowly and stir until the batter looks uniform and slightly fluid. The batter should feel silky but not runny, with a gentle gloss.
- In a separate bowl, whisk together the flour, baking powder, and salt; gradually add to the wet ingredients until combined. Add the dry mix in two or three additions and fold gently to avoid overworking the batter. Stop once you see no streaks of flour and the batter still looks soft and cloud-like.
- Stir in the shredded coconut. Use a spatula to fold the coconut in with gentle turns so the pieces stay distributed. You want the extra texture evenly spread, not clumped in spots.
- Divide the batter evenly between the prepared pans. Tap each pan lightly on the counter to remove large air pockets and smooth the tops with a spatula. The batter should fill the pans about two-thirds full and have a slightly domed surface.
- Bake for 25-30 minutes, or until a toothpick inserted in the center comes out clean. Keep an eye on color; the tops should be golden, not too dark. Use the wobble test as well; a slight give in the center means a tender crumb.
- Allow cakes to cool completely. Let them rest in the pans for 10 minutes, then turn out onto a rack to cool fully. Cooling all the way through helps the crumb set and makes frosting easier to spread without tearing.
- For the frosting, beat the cream cheese and powdered sugar until smooth, then add the heavy cream and beat until fluffy. Start slow so the sugar blends into the cheese, then increase speed to whip the cream into a light texture. Look for a silky, spreadable frosting that holds soft peaks.
- Place one cake layer on a serving plate, spread some frosting on top, then add the second layer and frost the top and sides of the cake. Use a thin layer as a crumb coat first if you want very clean sides, then chill briefly and finish with a thicker top layer. Stop once the frosting looks smooth and slightly glossy.
- Garnish as desired and serve. Sprinkle a few extra toasted coconut flakes, or press a ring of shredded coconut around the edge for contrast. Slice with a sharp knife warmed under hot water and wiped dry for neat slices.
Sharing Coconut Cake
This cake is happiest when shared over a casual weekend gathering or a slow afternoon with coffee. It carries well to a picnic if you pack the layers flat and keep the frosting chilled until you arrive. When I bring it to friends, I cut thin slices so everyone can taste without feeling weighed down, which keeps the mood light and the conversation flowing.
For plating, I like a simple approach: a small smear of frosting on the plate to anchor the slice, a dusting of toasted coconut, and a few fresh berries for contrast. The bright fruit cuts the richness and brings a pop of color that looks effortless. Serve with a small spoon of extra coconut milk on the side if someone wants a little splash over their slice.
If you are taking this cake to a gathering and want to simplify serving, keep the layers unfrosted and bring the frosting in a sealed container so you can finish it in the host’s kitchen. It keeps the cake from getting smushed and gives you control over texture at the last minute.
In thinking about other coconut desserts I love, I often look to different styles for ideas and inspiration. If you want to explore a denser, toasted coconut treat for a different kind of gathering, I recommend the texture and flavor of Indonesian sticky coconut cake Wingko Babat, which shows another side of coconut that is chewy and bold.
Keeping Coconut Cake Fresh
Store this cake covered at room temperature if serving within 24 hours, and keep it away from direct sun or heat. The frosting will be soft, and the crumb stays tender when wrapped in a cake dome or loosely tented with foil. If the kitchen is warm, move the cake to the fridge after a few hours to keep the frosting stable.
In the refrigerator, the cake will keep for 3 to 4 days without significant loss of texture. The coconut flavor settles and sometimes tastes even more pronounced after a day. When chilled, let slices come to room temperature for 20 to 30 minutes before serving so the crumb regains its softness.
For longer storage, freeze the unfrosted layers wrapped tightly in plastic and foil for up to one month. Thaw in the fridge overnight and then bring to room temperature before frosting. Frosting frozen cake can trap condensation, so always frost after the cake has fully thawed.
Carol’s Baking Notes
- Balance the coconut milk and butter carefully. Too much liquid can make the center heavy, so I tested batches where I reduced milk by a few tablespoons and found the crumb held up better without losing silkiness. Small changes here make a big difference.
- Toast your shredded coconut lightly for a deeper, nuttier flavor. Ten to twelve minutes at 325°F on a sheet pan, stirring once, gives you a nice color without burning. I often reserve a few toasted flakes for garnish for visual contrast.
- Don’t overmix after adding the flour. I learned this the hard way when my cake came out tight and dry. Fold until the flour disappears and stop. The batter should still look slightly airy and soft before baking.
- Chill the frosting slightly before finishing the cake if your kitchen is warm. It helps you get cleaner sides and stops the frosting from sliding. A 10 minute chill after a crumb coat can make the final layer much easier.
- Use a sharp, warmed knife for slicing. Wipe it clean between cuts for neat slices, especially when the frosting is soft. This tiny step makes plating feel professional without fuss.
Variations I’ve Tried
Coconut and lime: Add the zest of one lime to the batter and fold lime zest into the frosting for a citrus-laced version that brightens the whole cake. It is a nice counterpoint to the richness.
Brown butter twist: Brown the butter and let it cool before creaming with the sugar. The nutty notes that emerge pair beautifully with the coconut and deepen the cake’s flavor. I reduced the oven temperature by 10 degrees when I tried this to prevent over-browning.
Coconut rum soak: Brush the layers with a small amount of rum or a rum-coconut syrup after they cool for a boozy, restaurant-style finish. Use sparingly so the cake remains tender and not sodden.
Toasted coconut crunch: Fold in half a cup of toasted coconut mixed with chopped macadamia nuts for pockets of texture. The nuts add a salty-sweet counterpoint that I reach for when I want crunch.
Mini cupcakes: Bake the batter in a muffin tin for 18 to 20 minutes for portable single servings. Adjust baking time and keep an eye on color; the smaller cakes brown faster.
FAQs About Coconut Cake
Can I make this ahead of time?
Yes, and in some cases it actually sets better after resting, especially once the texture has fully settled. Bake the layers a day ahead, wrap them well, and assemble on the day you plan to serve to keep the frosting fresh.
Can I substitute regular milk for the coconut milk?
You can, but you will lose some coconut flavor and silkiness. If you must, add a teaspoon of coconut extract to get closer to the intended flavor, but avoid using too much extract or the taste will feel artificial.
How do I prevent the shredded coconut from sinking?
Fold the coconut in at the end of mixing and toss it lightly with a tablespoon of flour before adding if your batter feels particularly thin. That light coating will help the pieces stay suspended through baking.
Is the cream cheese frosting stable for a party table?
It is stable for a few hours at room temperature, but if the event lasts longer or the room is warm, keep the cake chilled until just before serving. The texture softens over time but often tastes better after a short rest.
Can I make this gluten-free?
I have not fully tested a gluten-free swap for this exact batter, but a cup-for-cup gluten-free flour blend with xanthan gum may work with careful handling. Expect differences in crumb and possibly a shorter bake time.
A Final Thought
I hope this Coconut Cake encourages you to peel back the steps and enjoy a little experimenting, the way I do when I test a new batch late into the afternoon. Baking this cake is a small, satisfying ritual that rewards gentle attention and invites tiny tweaks. From my kitchen to yours, take the cues, trust the textures, and have fun with the coconut.
Coconut Cake
Ingredients
Cake Ingredients
- 2 cups all-purpose flour this helps with structure
- 2 cups granulated sugar for even, classic sweetness
- 1 cup unsalted butter, softened adds richness and a tender crumb
- 4 large eggs they add lift and help bind the cake
- 1 cup coconut milk for coconut flavor and silkiness
- 1 teaspoon vanilla extract this rounds flavors without taking over
- 1 tablespoon baking powder this is the gentle lift your cake needs
- 1/2 teaspoon salt this balances sweetness and brightens flavors
- 1 cup shredded coconut adds texture and a coconut note in every bite
Frosting Ingredients
- 1 cup cream cheese, softened for a tangy, smooth frosting
- 1 cup powdered sugar to sweeten the frosting without grain
- 1/2 cup heavy cream whipped in for a light, silky frosting
Instructions
Preparation
- Preheat the oven to 350°F (175°C). Grease and flour two 9-inch round cake pans.
- In a large mixing bowl, cream together the butter and sugar until light and fluffy.
- Add the eggs one at a time, beating well after each addition and scraping the bowl between eggs.
- Mix in the vanilla extract and coconut milk until the batter looks uniform and slightly fluid.
- In a separate bowl, whisk together the flour, baking powder, and salt; gradually add to the wet ingredients until combined.
- Stir in the shredded coconut and fold gently to distribute evenly.
- Divide the batter evenly between the prepared pans and tap each pan lightly on the counter to remove air pockets.
Baking
- Bake for 25-30 minutes, or until a toothpick inserted in the center comes out clean.
- Allow cakes to cool completely in the pans for 10 minutes, then turn out onto a rack to cool fully.
Frosting and Assembly
- Beat the cream cheese and powdered sugar until smooth, then add the heavy cream and beat until fluffy.
- Place one cake layer on a serving plate and spread some frosting on top before adding the second layer.
- Frost the top and sides of the cake, using a thin layer as a crumb coat first if desired.
- Garnish as desired and serve.
