Christmas Red Velvet Cheesecake: A Delight of Flavor and Tradition
The aroma of cocoa mingling with sweet cream fills the air as I gather around the kitchen with my family. It’s that time of year again when the world outside turns chilly, but inside, warmth wraps around us like a cozy blanket. This is when I know it’s time to make my Christmas Red Velvet Cheesecake. The vibrant red hue, the rich, creamy texture, and the playful sprinkles on top transport me to memories of family gatherings filled with laughter and joy. Each bite carries an echo of the past, reminding me of holidays spent together, stories shared, and traditions lovingly carried on from one generation to the next.
The Story Behind Our Favorite Christmas Red Velvet Cheesecake
Every family has its signature desserts, and in ours, Christmas Red Velvet Cheesecake holds a cherished place. I remember the first time I tried to make it. I had just gotten married, and my husband’s eyes lit up at the mention of red velvet, a dessert he grew up with. I was determined to impress him and thought, what could be better than adding a creamy cheesecake layer to a classic favorite? That mix of chocolatey goodness with the smooth cream cheese filling felt both celebratory and comforting, just like the holidays themselves.
The tradition grew from there. With each Christmas, I found myself perfecting the recipe, adding little touches of my own and sharing the experience with my children. The bright red color soon became a staple on our dessert table. It drew eyes and smiles, making our family dinners even more special. The moment our loved ones take their first bite, you can almost feel the magic of the holidays—it’s a celebration all on its own.
Bringing Christmas Red Velvet Cheesecake Together
“Every time I stir this pot, it smells just like Sunday at home.”
The process of making Christmas Red Velvet Cheesecake is a rhythm of its own. It begins with the gentle sound of a mixer whirring, turning soft cream cheese into a fluffy canvas. Each ingredient is added with intention, from the rich cocoa powder to the vibrant red food coloring that brings it to life. As I blend the mixture, the stunning hue deepens with each stir, and I can’t help but feel excited about how the cheesecake will transform.
The crust is equally delightful. Crushing those Oreo cookies reminds me of the good times—the chaos of family movie nights with crumbs scattered everywhere, exploring new flavors of ice cream and sweet treats together. There’s a satisfaction in pressing down the crumbly mixture into the springform pan, and breathing in the sweet aroma of butter and chocolate. Each layer tells a story, and I often pause to appreciate how food connects us.
Ingredients You’ll Need
To make this decadent Christmas Red Velvet Cheesecake, here’s what you’ll need:
- 24 Oreo cookies (about 2 cups crumbs)
- ⅓ cup butter, melted
- 4 (8-ounce) blocks cream cheese, softened to room temperature
- ½ cup white sugar
- 2 cups heavy whipping cream
- 1 teaspoon vanilla extract
- 2 tablespoons cocoa powder
- Red food coloring, as needed for desired shade
- ¼ cup Christmas sprinkles (for the filling)
- Whipped cream (for topping)
- Mini Oreos (for garnish)
- Extra Christmas sprinkles (for garnish)
Each component plays a vital role in the overall experience of the dessert. The cookies offer a crunchy base, while the cream cheese filling brings a luxurious creaminess. Feel free to pick up a little bit of extra vanilla if you love a cozy aroma—it truly enhances the entire cheesecake.
Step-by-Step Directions
1. Prepare Pan & Oven
Preheat your oven to 350°F (175°C). Wrap a 9-inch springform pan tightly with heavy-duty aluminum foil to prevent water from seeping in. This will ensure a smooth baking process.
2. Make the Red Velvet Crust
Crush the Oreo cookies finely in a food processor or a plastic bag. In a bowl, combine the crumbs with melted butter and 2 tablespoons of white sugar. Press the mixture firmly into the bottom of the prepared springform pan. Bake for about 8-10 minutes, just until you notice the edges turning golden. Once baked, let it cool completely on a wire rack, soaking in those delicious smells.
3. Prepare Cheesecake Filling
In a mixer, beat the softened cream cheese until smooth and creamy. Gradually add in ½ cup of white sugar, mixing until just combined—stop as soon as you see a beautiful creamy texture. Stir in the vanilla extract, cocoa powder, and red food coloring until the mixture is evenly vibrant.
In a separate bowl, whip 1 cup of the heavy whipping cream until soft peaks form, feeling the texture change as it gets lighter and fluffier. Gently fold the whipped cream into the cream cheese mixture until just combined. Once that gorgeous blend is achieved, fold in ¼ cup of Christmas sprinkles to add that festive touch. Pour the filling over the cooled crust, smoothing it out lovingly.
4. Bake the Cheesecake
Reduce the oven temperature to 325°F (160°C). Now, here comes the tricky part—place the foil-wrapped springform pan into a larger roasting pan. With care, pour hot water into the roasting pan, reaching halfway up the sides of the springform pan. This method creates a nice steam while baking. Bake for 1 hour to 1 hour and 15 minutes, or until the edges are set, but the center still jiggles slightly, much like a sweet promise waiting to be unveiled.
5. Cool & Chill
Once done, turn off the oven and leave the cheesecake inside with the door ajar for 1 full hour. This slow cooling helps avoid cracks. After that, remove it from the oven and the water bath; let it cool completely on a wire rack for 2-3 hours. Run a knife around the edge to loosen, then cover it loosely and refrigerate for at least 6-8 hours or overnight. This long rest time is when the flavors mingle beautifully.
6. Decorate & Serve
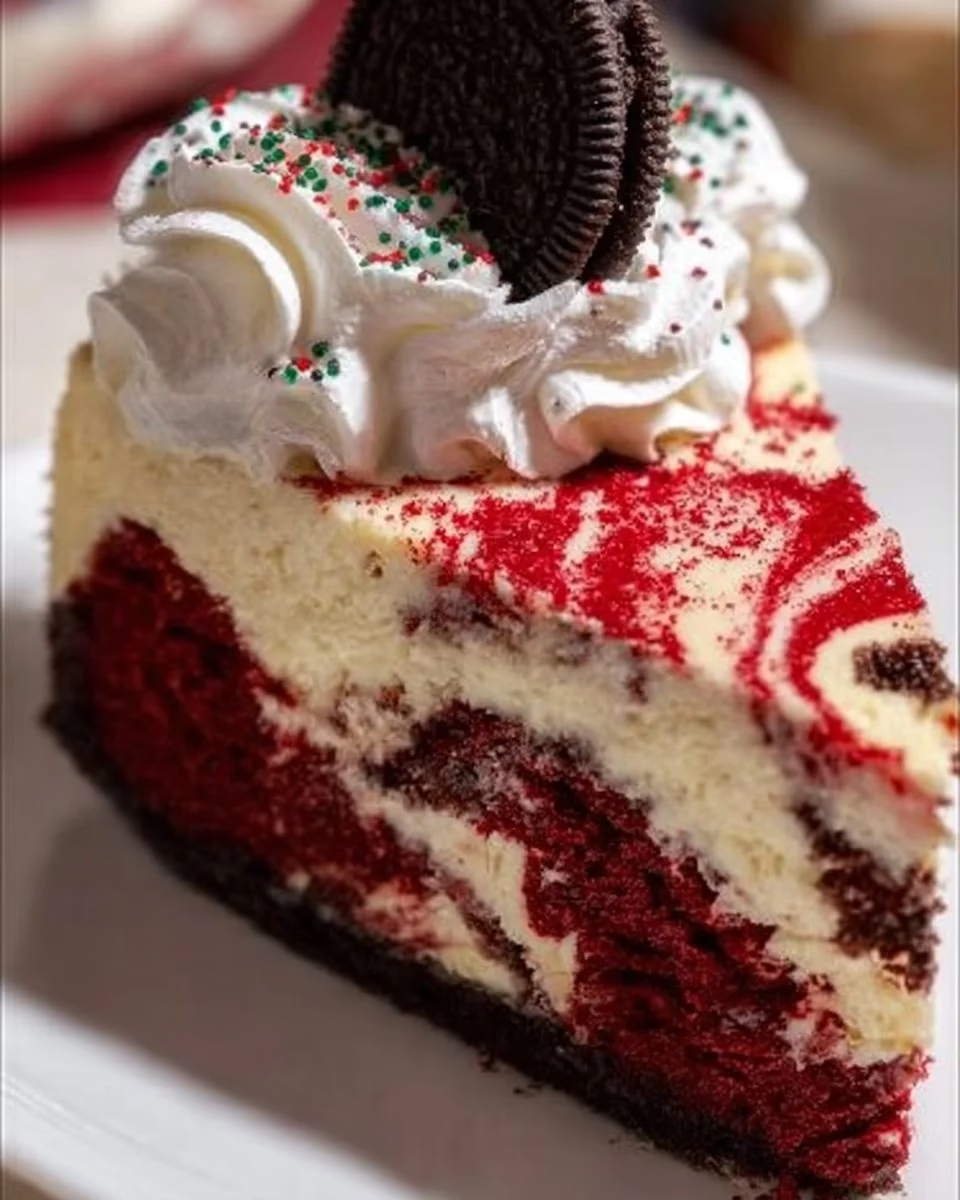
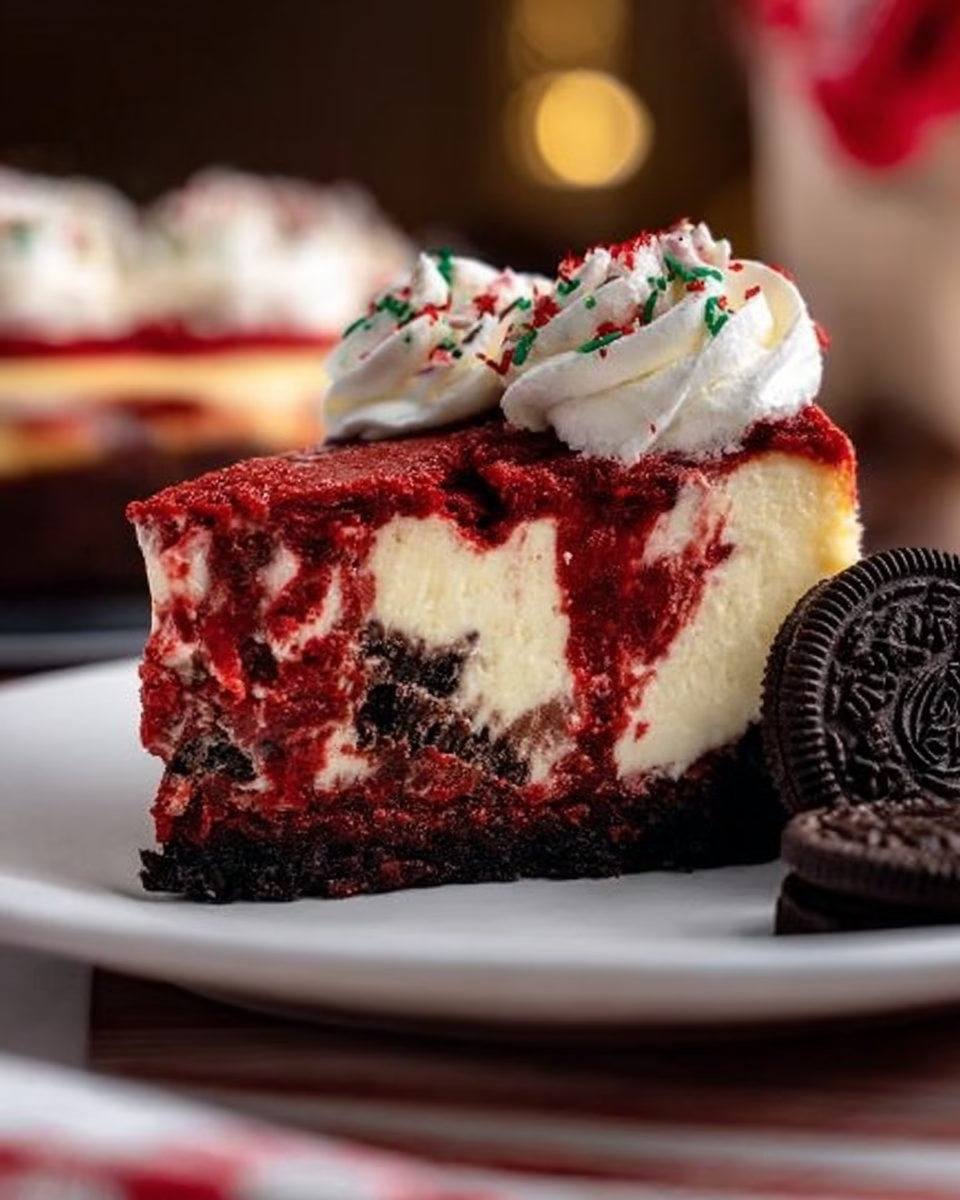
When you’re ready to enjoy your creation, carefully remove the springform pan sides. Top the cheesecake with a generous layer of whipped cream, letting it spill slightly over the edges. Garnish with mini Oreos and a sprinkle of festive decorations for that extra touch. For clean slices, a sharp, hot knife that you wipe clean between cuts works wonders. Don’t forget to store any leftovers in the refrigerator, but I have a feeling there won’t be much left to save.
Bringing Christmas Red Velvet Cheesecake to the Table
Gathering around the table with our Christmas Red Velvet Cheesecake is a joy that transcends the meal itself. It becomes a centerpiece of connection and laughter, drawing family and friends close. The vibrant red slice contrasts beautifully against the white whipped cream, creating a dessert that feels just right for the holiday season.
As we serve it, the room fills with ooohs and aaahs. Each slice reveals the luxurious layers within, inviting everyone to pause in appreciation. Often, we share old stories and memories as the cheesecake disappears, each bite igniting conversations about our past Christmases. It feels almost sacred, that moment when everyone takes their first taste—a small tradition that binds us together.
Storing Christmas Red Velvet Cheesecake for Tomorrow
If you happen to have any leftovers (though I doubt it!), storing your cheesecake is simple and kind. Just cover the cheesecake with plastic wrap or transfer individual slices to an airtight container. Kept in the refrigerator, it will remain fresh and tasty for several days.
The beauty of this cheesecake is that the flavors continue to deepen overnight. Each bite on the following day holds a little more comfort, as the flavors settle gently. It might even taste better as the rich cream cheese melds with that chocolaty goodness.
Amelia’s Kitchen Notes
-
Use Room Temperature Ingredients: Be sure to let your cream cheese come to room temperature before mixing. This helps achieve that smooth texture we all crave.
-
Substitutions: If you want to lighten it up a bit, you can use Greek yogurt instead of some cream cheese. It brings a tangy flavor while keeping it creamy.
-
Experiment with Sprinkles: Feel free to change up the sprinkles to match other holidays or birthdays. Who says you have to save it just for Christmas?
-
Quick Cleanup Trick: A quick soak of your mixing bowls and whisks in warm soapy water right after use makes cleanup a breeze.
-
Testing for Doneness: Remember that the cheesecake will continue to set as it cools, so don’t overbake! Look for that slight jiggle in the center.
Family Variations on Christmas Red Velvet Cheesecake
Our family loves playing with this recipe, making it our own over the years. One favorite variation is to add a layer of chocolate ganache on top before adding the whipped cream. The glossy chocolate adds a delightful contrast that everyone enjoys.
Another twist we’ve experimented with involves layering in crushed peppermint candies with the sprinkles for a holiday minty feel. It adds a refreshing taste celebrated during family gatherings, giving the classic recipe a seasonal spin.
Sometimes, I swap out a part of the cream cheese for flavored varieties—imagine a raspberry or espresso cream cheese swirling within that gorgeous red layer. Those little tweaks keep the cheesecake exciting and new for everyone, even pulling in friends and family to share their own versions.
Common Questions From My Readers
Can I make this ahead of time?
Absolutely! In fact, it’s often best made the day before serving. The flavors meld beautifully overnight, giving the cheesecake a chance to set perfectly.
What if I don’t have a springform pan?
If you don’t have one, a regular 9-inch round cake pan will work just fine. Just be careful when removing the cheesecake, as it may not come out as easily.
Can I freeze the cheesecake?
Yes, you can! Simply wrap slices tightly in plastic wrap and then place them in an airtight container. Thaw it in the refrigerator when you’re ready to enjoy it again.
A Warm Note From My Kitchen
Creating a Christmas Red Velvet Cheesecake feels like a warm hug, a delightful way to embrace the magic of the season. I encourage you to try making it in your own kitchen, taking the time to share stories and laughs as you prepare. Whether it’s for a special gathering or a quiet night at home, I hope this cheesecake brings joy to your table and fills your hearts with delicious memories.
As you gather around to share in the experience, I find myself wishing you love and laughter in every bite, just as I enjoy in my own home. Each time I create this cheesecake, it reminds me that cooking is about more than just the food—it’s about connection, warmth, and the sweet moments we share together.
Christmas Red Velvet Cheesecake
Ingredients
For the Crust
- 24 pieces Oreo cookies About 2 cups crumbs
- ⅓ cup butter Melted
- 2 tablespoons white sugar
For the Filling
- 4 blocks cream cheese 8-ounce blocks, softened to room temperature
- ½ cup white sugar
- 2 cups heavy whipping cream
- 1 teaspoon vanilla extract
- 2 tablespoons cocoa powder
- as needed red food coloring For desired shade
- ¼ cup Christmas sprinkles For the filling
For the Topping
- whipped cream For topping
- Mini Oreos For garnish
- Extra Christmas sprinkles For garnish
Instructions
Preparation
- Preheat your oven to 350°F (175°C). Wrap a 9-inch springform pan tightly with heavy-duty aluminum foil to prevent water from seeping in.
- Crush the Oreo cookies finely in a food processor or a plastic bag. In a bowl, combine the crumbs with melted butter and 2 tablespoons of white sugar.
- Press the mixture firmly into the bottom of the prepared springform pan. Bake for about 8-10 minutes, then let it cool completely on a wire rack.
- In a mixer, beat the softened cream cheese until smooth. Gradually add in ½ cup of white sugar, mixing until combined. Stir in vanilla, cocoa, and red food coloring.
- In a separate bowl, whip 1 cup of heavy whipping cream until soft peaks form. Fold the whipped cream into the cream cheese mixture and then fold in ¼ cup of Christmas sprinkles.
- Pour the filling over the cooled crust and smooth it out.
Baking
- Reduce the oven temperature to 325°F (160°C). Place the foil-wrapped springform pan into a larger roasting pan and pour hot water into the roasting pan halfway up the sides of the springform pan.
- Bake for 1 hour to 1 hour and 15 minutes until the edges are set, but the center still jiggles slightly.
Cooling & Chilling
- Once done, turn off the oven and leave the cheesecake inside with the door ajar for 1 hour. After that, remove it, let it cool completely for 2-3 hours, then refrigerate for at least 6-8 hours or overnight.
Decoration & Serving
- Remove the springform pan sides, top the cheesecake with whipped cream, and garnish with mini Oreos and extra sprinkles.
- Use a sharp, hot knife for clean slices and store leftovers in the refrigerator.
