I can still smell the warm, buttery steam that used to curl up from the sheet pan on my grandmother’s kitchen table, and that small, steady ritual has followed me into my own mornings for decades. There is a comfort in making Cathead Biscuits the old way, with simple hands and patient time, and sometimes when I am teaching a new baker the rhythm of the dough I will point them toward an air fryer biscuits recipe for a gentle, modern twist on speed and convenience. These biscuits have a habit of grounding people, of turning a hurried morning into a slow one, and that is why I keep the recipe simple and sure.
The Story Behind This Cathead Biscuits
I first learned this biscuit when my mother set a wooden bowl on the counter and said we would take our time. She had a calm way of measuring that felt like counting small blessings, and each ingredient was gone over like a familiar story. It was never rushed. We cut in the butter the way a pair of hands remembers, and the dough always felt forgiving, never demanding.
Over the years, I have made these for birthdays, slow Sundays, and for neighbors who needed a warm loaf of kindness. The name Cathead comes from the large, rustic size these biscuits take, as if each one has its own little life and room to breathe. They are not showy. They are steady and honest, meant to be shared at a kitchen table where stories can stretch a little longer.
I like to tell new bakers that the process itself is part of the reward. The smell in the kitchen tells you much before the timer does. The crust, the soft inside, the way butter slips down the throat when the biscuit is warm, all of those things remind us of careful hands and patient cooking.
When I teach, I focus less on perfect shapes and more on familiar cues. A biscuit should be golden in the right places and tender where you bite. If you learn to listen to the dough, the results become reliable and calming. This is why the recipe has stayed with me and why families keep returning to it.
What Makes This Cathead Biscuits So Reliable
There is comfort in recipes that do not ask for gadgets or complicated steps. This biscuit calls for good flour, a reliable leavener, a little salt, cold butter, and buttermilk that brings a gentle tang and richness. These are pantry friends that most kitchens keep in one small cupboard.
The method is forgiving because it does not demand overworking the dough. Gentle kneading, a light pat, and a quick bake are all that stand between raw ingredients and a warm plate. The structure comes from the right balance of flour and buttermilk, and the technique comes from a practiced hand that knows when the dough has the right texture.
What surprises new bakers is how small details matter. Cold butter creates steam in the oven and lifts the biscuit tenderly. The biscuit cutter should not be twisted when cutting, since a straight press keeps the edges together and encourages a taller rise. And baking at a high temperature gives a quick lift and a browned, flaky crust.
These biscuits are not finicky. They reward care and patience rather than perfection. That is why I turn to this recipe when I want something that feels like home on a plate.
Bringing Cathead Biscuits Together
“Some recipes just feel right the moment they come together.”
When I begin to make these biscuits, I always set out my ingredients and take a deep breath. It helps to have a clear surface and a little music or a quiet radio playing, something soft to keep the pace relaxed. The dough itself is simple, and the cues are familiar: the flour should look airy, the butter should be cold and small, and the buttermilk should add just enough moisture to gather the pieces into a cohesive dough.
As you work, you will see the mixture look crumbly before it springs together into a tender ball. That is the point where you stop fussing and let the dough rest for a moment if needed. Patience here pays off. One careful fold or two of gentle kneading helps the flour hydrate evenly and keeps the biscuits light.
The oven will do the rest. It gives a quick rise and browns the edges, and when the biscuits come out they will be warm, slightly crisp on top, and soft inside. Butter on a warm biscuit will melt and make small, golden pools that feel like a quiet celebration.
Ingredients You’ll Need
2 cups all-purpose flour
1 tablespoon baking powder
1/2 teaspoon salt
1/4 cup unsalted butter — cold and cut into small pieces, room temperature helps with texture if you choose a softer butter
1 cup buttermilk — brings a gentle tang and moisture, this adds a classic richness
I list these plainly because this recipe asks for simple things done well. Measure carefully but gently, and pay attention to the temperature of the butter. Cold butter gives the best lift and texture.
If you do not have buttermilk, a simple swap is to add a tablespoon of lemon juice or vinegar to a cup of milk and let it sit for five minutes. It is not quite the same, but it keeps the spirit of the biscuit: familiar, tender, and reassuring.
Step-by-Step Directions
-
Preheat your oven to 450°F (232°C).
Make sure the rack is in the center so the heat surrounds the biscuits evenly. Preheating is important to get that quick rise and golden top. Take a moment to line a baking sheet or use a light dusting of flour. -
In a large bowl, mix together the flour, baking powder, and salt.
Use a whisk to combine them so the baking powder is evenly dispersed. The dry mix should look airy and uniform, which helps every biscuit rise the same way. Work calmly and take your time. -
Cut in the butter until the mixture resembles coarse crumbs.
Use a pastry cutter, two knives, or your fingertips, keeping the butter cold as you work. Small pea-sized bits of butter are the cue to stop, because those bits will steam and lift in the oven. If the butter gets too warm, chill the bowl for a few minutes. -
Stir in the buttermilk until just combined.
Add the buttermilk in one go or in two small pours and fold gently with a wooden spoon or spatula. The dough should come together without being sticky; stop as soon as it holds form. Overmixing will make the biscuits tough. -
Turn the dough out onto a floured surface and gently knead a few times.
Fold and press the dough just to bring it into one piece, maybe six to eight gentle motions. Keep your hands light so the dough stays tender and flaky. If it feels too wet, dust with a little flour; if it feels dry, pat in a teaspoon of buttermilk. -
Pat the dough to about 1 inch thick and cut out biscuits with a biscuit cutter.
Press down firmly with a straight up-and-down motion to cut, avoiding any twisting that seals the edges. Gather scraps together and repeat, but do not overwork the dough; a few rustic biscuits are better than many tight ones. A one inch thickness gives a good rise and soft interior. -
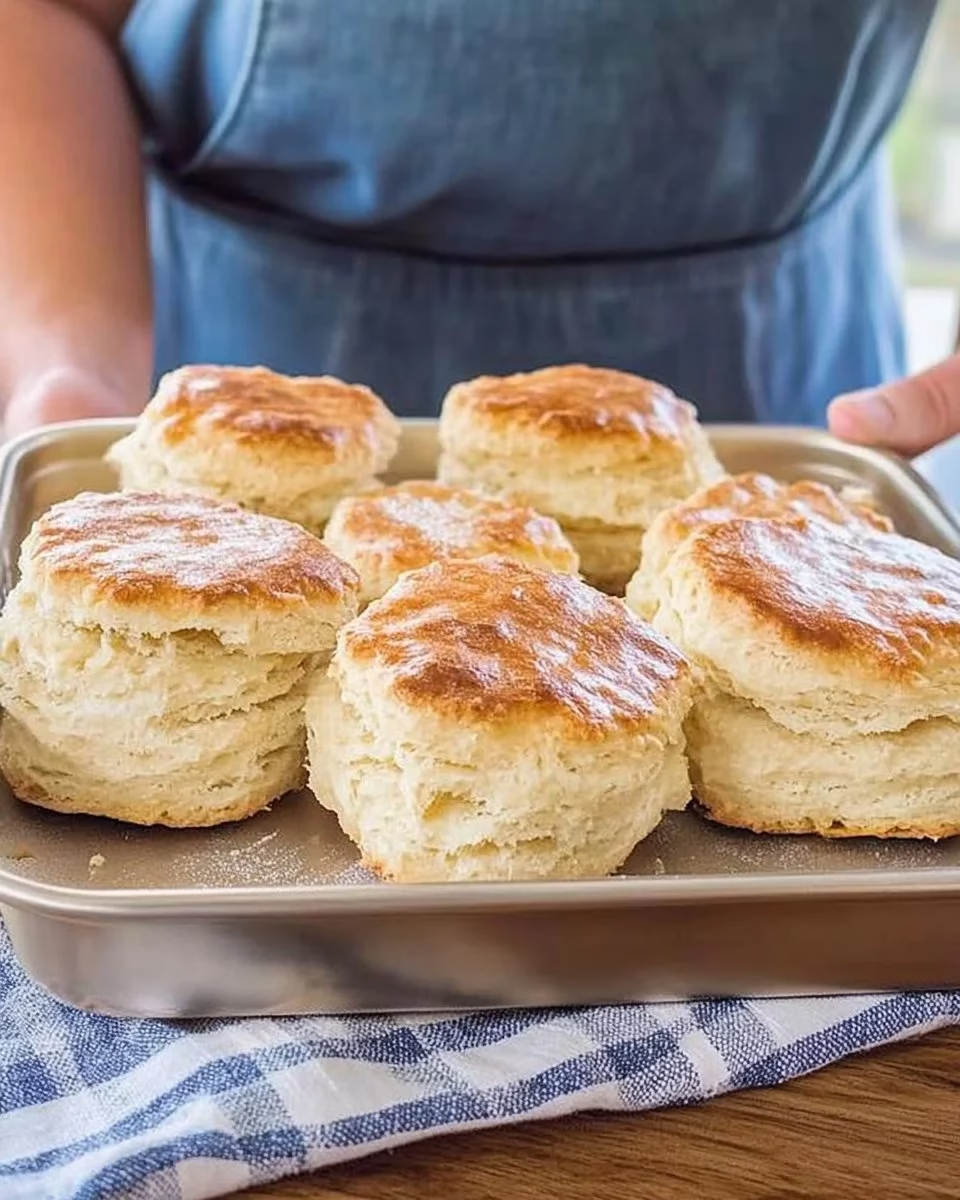
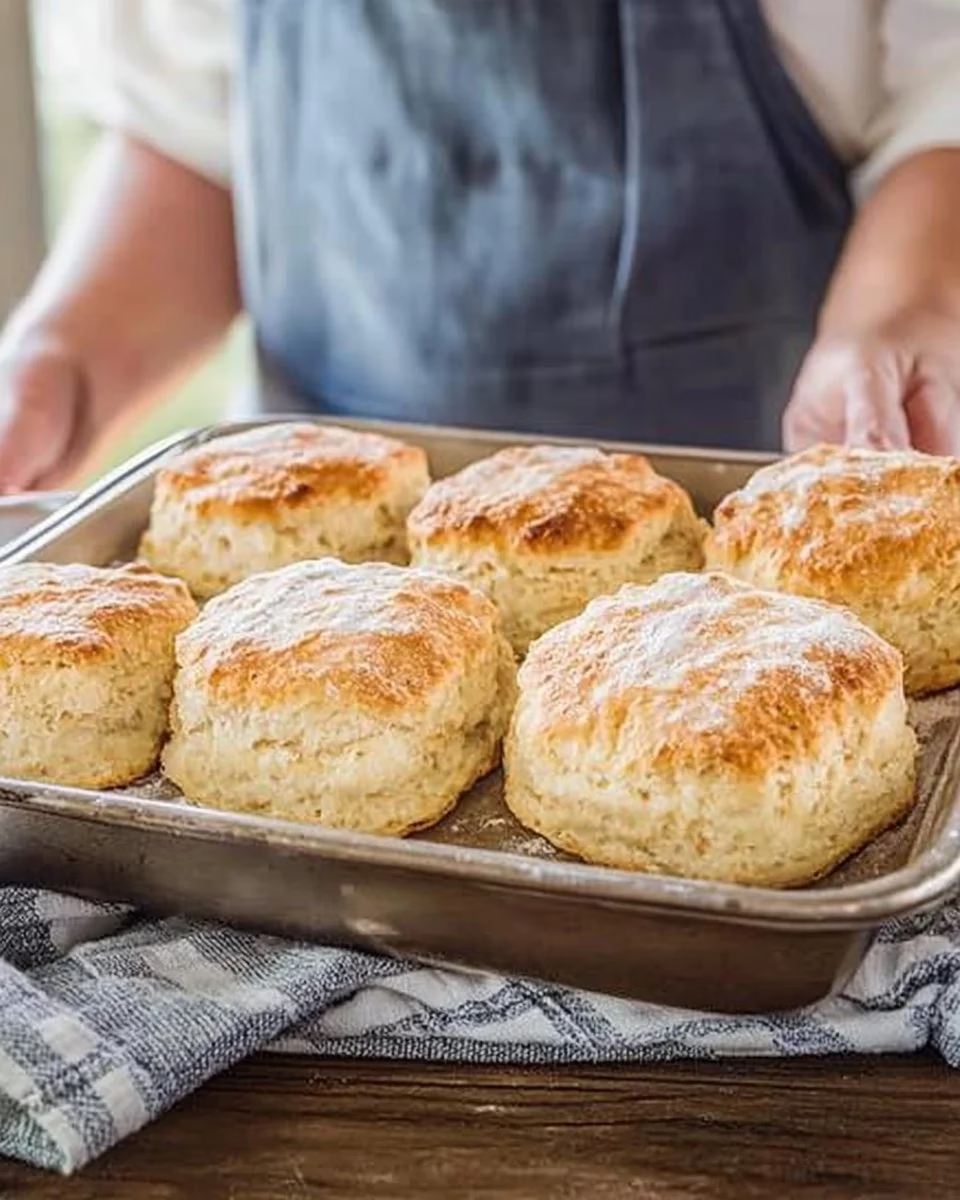
Place the biscuits on a baking sheet and bake for 12-15 minutes until golden brown.
Watch the tops and edges for a light, even golden color and a clean smell of baked butter and flour. The timing depends on your oven, so begin checking at the twelve minute mark. Let them rest on the sheet for a minute after you take them out to set. -
Serve warm.
Place them on a plate or a simple cloth to keep them cozy, and slide a knife through to add butter, jam, or honey as you like. The steam will keep the inside tender and the crust pleasantly crisp. Enjoy immediately for the best texture and warmth.
Serving Cathead Biscuits With Care
There is a particular joy in placing a warm biscuit on the table and watching people choose toppings. At our house we keep a small dish of salted butter and a few jars of preserves. Sometimes I serve them alongside a pot of strong coffee, and sometimes with a bowl of soup for a light supper.
When guests come by, I will often halve them and offer a smear of butter and honey. That simple combination feels like a quiet celebration. For a heartier breakfast, split them and add soft scrambled eggs or a slice of country ham. They are versatile, but their charm is in the modesty.
If you serve them at a gathering, warm the plate slightly before placing the biscuits so they stay comfortable longer. The warmth invites conversation and slows the pace in the best of ways. Small rituals like passing the plate or asking about the day make the moment feel homey.
Storing Cathead Biscuits for Later
If you have leftovers, they will keep for a day or two at room temperature in a sealed container. I like to place a small cloth in the container to absorb moisture so the crust stays pleasant and not soggy. For longer storage, freeze them in a single layer on a tray, then transfer to a freezer bag.
To reheat, let frozen biscuits thaw at room temperature or warm them in a low oven until they are heated through. You can also refresh them briefly in a skillet over low heat with a bit of butter to bring back a crisp exterior. The flavors deepen slightly after resting, and sometimes I find they taste even friendlier the next day.
If you want to try a quicker warm method, the oven is my preference for even revival. A few minutes at 350 F will warm the center and restore the crust. For guidance on cooking biscuits in alternative ways, I sometimes look at resources like a helpful piece about whether can biscuits be cooked in an air fryer and how cooks adapt traditional methods.
Mary’s Baking Notes
- Keep the butter cold. The small pieces create pockets of steam that lift the biscuit. If the butter softens too much, chill the dough for ten minutes before cutting.
- Do not twist the cutter. A straight press preserves the layered edges and helps the biscuits rise tall and tender. Twisting seals the layers and makes a denser crumb.
- Watch the oven rather than the clock alone. Oven temperatures vary, so look for a warm, even golden top and a pleasant baked aroma. Open the oven sparingly to keep the heat steady.
- Gentle kneading is enough. Fold the dough together a few times to bring it into a single mass. Overworking will develop gluten and change the texture from pillowy to chewy.
- Use a shallow bowl if you have space. A wide mixing bowl makes it easier to cut in butter and see the crumbly texture you need before adding liquid.
These are little habits more than rules. I say them gently because they have made my biscuits more consistent and because a calm approach makes the kitchen kinder.
Family Variations on Cathead Biscuits
My family likes small, simple shifts that keep the spirit of the biscuit. We have a favorite where a tablespoon of sugar is added to the dry mix for a slightly sweeter version that pairs well with jam. Another favorite is adding a pinch of cayenne to the dough for a savory twist that matches well with sharp cheese and ham.
In the fall, we fold in a small amount of cooked, cooled mashed sweet potato to the dough for a softer, slightly sweet biscuit. It keeps the texture and adds a warm color that pleases the eye. For holiday breakfasts we sometimes add a sprinkle of grated cheddar on top before baking for a golden crust and savory note.
All of these changes keep the method the same. We do not change the hands-on moments, because that is where the biscuits find their heart. Alter with small steps and taste as you go.
Helpful Notes Before You Begin
- Use a light dusting of flour to keep the dough from sticking when you turn it out. Too much flour will dry the dough, so add sparingly.
- If your kitchen is warm, pop the bowl with the mixed crumbs into the fridge for a few minutes before adding the buttermilk. Cold ingredients give a better rise.
- If you like a high crown, set the biscuits close together on the baking sheet so they support one another during baking. For a crisper exterior, place them with more space between.
- Keep a small bowl of flour nearby for the surface and your hands. It helps when gathering the scraps and keeps the dough tender.
These are the little comforts I keep written on a card near the counter. They help a new cook feel certain in steps that otherwise might seem small and mysterious.
FAQs About Cathead Biscuits
Can I make this ahead of time?
Yes, you can prepare the dough and store it in the refrigerator for up to 24 hours wrapped tightly. When you are ready to bake, gently pat and cut the biscuits cold from the fridge and add a minute or two to the baking time if needed.
What if I do not have buttermilk?
You may stir a tablespoon of lemon juice or white vinegar into a cup of milk and let it sit for five minutes to thicken slightly. This simple substitute gives the acidity needed to react with the baking powder and keeps the biscuit tender.
How do I know when the biscuits are done?
Look for a light golden color on top and a clean smell of baked butter. The edges should feel set and not doughy. A toothpick in the center will come out clean, and the biscuit will feel light for its size.
Can I make them smaller or larger?
Yes, the size is up to you. Smaller biscuits will bake more quickly and have more crisp edges, while larger ones take a bit longer and keep a soft interior. Adjust baking time and watch the color to be sure.
Do I need to worry about overworking the dough?
A little care goes a long way. Gentle folding and a few kneads are all you need. Overworking develops gluten and can make biscuits tougher. Keep your motions slow and confident.
Classic Twists We Love
We sometimes add a spoonful of fresh herbs like chopped chives or thyme into the dough for a fragrant lift. The herbs give a subtle background without stealing the show. For a sweeter take, fold in a spoonful of berries or a few chocolate chips, but do so sparingly so the structure remains.
Another tender twist is brushing the tops with melted butter as soon as they come from the oven. It gives a soft sheen and a warm buttered feel that families often ask for seconds over. For a rustic dinner, split them and use as a bed for roasted vegetables or a soft stew.
These small changes keep the biscuit familiar while offering a new way to enjoy a well-loved bread.
From My Kitchen to Yours
I hope you find the same ease in this Cathead Biscuits that I have found over the years. Baking is a patient kind of love, and these biscuits are a modest way to give it. They ask you to be present for a few minutes and then reward you with warm generosity.
Let the process be a small pause in your day. Start with good ingredients and a steady hand, and allow the oven to do the rest. I keep making them because of the simple joy they bring when a plate is placed on the table and someone smiles.
May this recipe bring warmth to your mornings and comfort to ordinary afternoons, the way it has for me and my family.
Cathead Biscuits
Ingredients
Dry Ingredients
- 2 cups all-purpose flour Good quality flour is essential.
- 1 tablespoon baking powder Ensure it is fresh for best rising.
- 1/2 teaspoon salt Enhances flavor.
Wet Ingredients
- 1/4 cup unsalted butter Cold and cut into small pieces (room temperature butter can be used for texture).
- 1 cup buttermilk Can be substituted with milk mixed with lemon juice or vinegar.
Instructions
Preparation
- Preheat your oven to 450°F (232°C) and position the rack in the center.
- Line a baking sheet with parchment paper or dust lightly with flour.
- In a large bowl, mix together the flour, baking powder, and salt using a whisk.
- Cut in the cold butter until the mixture resembles coarse crumbs.
- Stir in the buttermilk until just combined; do not overmix.
Kneading and Shaping
- Turn the dough out onto a floured surface and gently knead a few times to combine.
- Pat the dough to about 1 inch thick and cut out biscuits using a biscuit cutter.
- Avoid twisting the cutter to ensure proper rise.
Baking
- Place the biscuits on the prepared baking sheet and bake for 12-15 minutes until golden brown.
- Let them rest on the baking sheet for a minute before serving.
- Serve warm with butter, jam, or honey as desired.