Candy Cane Swirl Cookies
There’s something truly magical about the aroma of fresh cookies wafting through the house, especially during the holiday season. I recall one such afternoon spent in my cozy kitchen, where the sweet scent of peppermint mingled with the soft buttery notes of freshly baked cookies. My family gathered around the table, eagerly awaiting the cooling tray, their eyes bright with anticipation. This was the perfect moment of togetherness, filled with shared laughter and the joy of simple pleasures. It was during one of those cherished times that I first made Candy Cane Swirl Cookies, a delightful treat that captures the essence of the holidays.
The Story Behind Our Favorite Candy Cane Swirl Cookies
Every recipe tells a story, and Candy Cane Swirl Cookies are no exception. I first encountered this recipe at a neighborhood holiday gathering years ago. A dear friend brought a plateful, their colorful swirls dancing on the plate like tiny festive ornaments. One bite transported me back to the warmth of my childhood, where peppermint and sugar were woven into our family traditions. The memories came rushing back: decorating the tree, gathering with family and friends, and the comforting joy of baking together.
These cookies became a staple in our house, not just for their cheerful appearance but for what they represent: love, family, and the spirit of giving. Each swirl of red and white is a reflection of these joyful moments. They remind me that good food brings people together, fostering connection and celebration, especially during this magical time of year.
Bringing Candy Cane Swirl Cookies Together
“Every time I stir this pot, it smells just like Sunday at home.”
The process of making Candy Cane Swirl Cookies is as delightful as enjoying them. It starts with the gentle mixing of butter and sugar, creating a smooth, glossy batter that feels so comforting. The rhythm of creaminess envelops you, almost like a warm embrace. Whisking the eggs and extracts enhances the aroma that fills the kitchen, heralding the arrival of something special.
As I bring the ingredients together, I can see the vibrant colors start to develop. The mixture transforms into a dough, rich and fragrant, ready to take on its peppermint identity. I recall each moment—the way the dough comes together, the coolness of the chilled mixture, and the magical transformation as it prepares to be shaped. Each twist of the cookie dough as I create those beautiful spirals reflects my love for baking, an act of creativity and celebration.
Ingredients You’ll Need
For this joyful baking adventure, you will need:
1 cup (227g) Unsalted butter, softened
1 cup (200g) Granulated white sugar
1 large Egg
1 tsp Vanilla extract
1/2 tsp Peppermint extract
3 cups (375g) All-purpose flour
1 1/2 tsp Baking powder
1/4 tsp Salt
Red gel food coloring
1/2 cup Coarse sparkling sugar or sanding sugar
Let’s talk a moment about a few of these ingredients. Using fresh butter will give these cookies their rich flavor, creating that melt-in-your-mouth texture we all crave. A splash of extra vanilla is a personal touch that adds a cozy aroma, enveloping the kitchen in warmth. Don’t forget that peppermint extract, which is crucial; it gives your cookies that essential festive touch that defines these treats.
Step-by-Step Directions
-
In a large bowl, cream together the softened butter and granulated sugar until light and fluffy. Beat in the egg, vanilla extract, and peppermint extract until smooth. You want to mix until it feels airy, with that luscious, glossy texture calling your name.
-
Gradually add flour, baking powder, and salt. Mix on low speed until the dough forms. The dough will start to come together, becoming a little more stiff, but that’s just perfect!
-
Divide the dough into two halves; leave one plain and color the other with red gel food coloring. Chill both doughs for 1 hour. This is an important step—it allows the dough to rest and makes it easier to shape later.
-
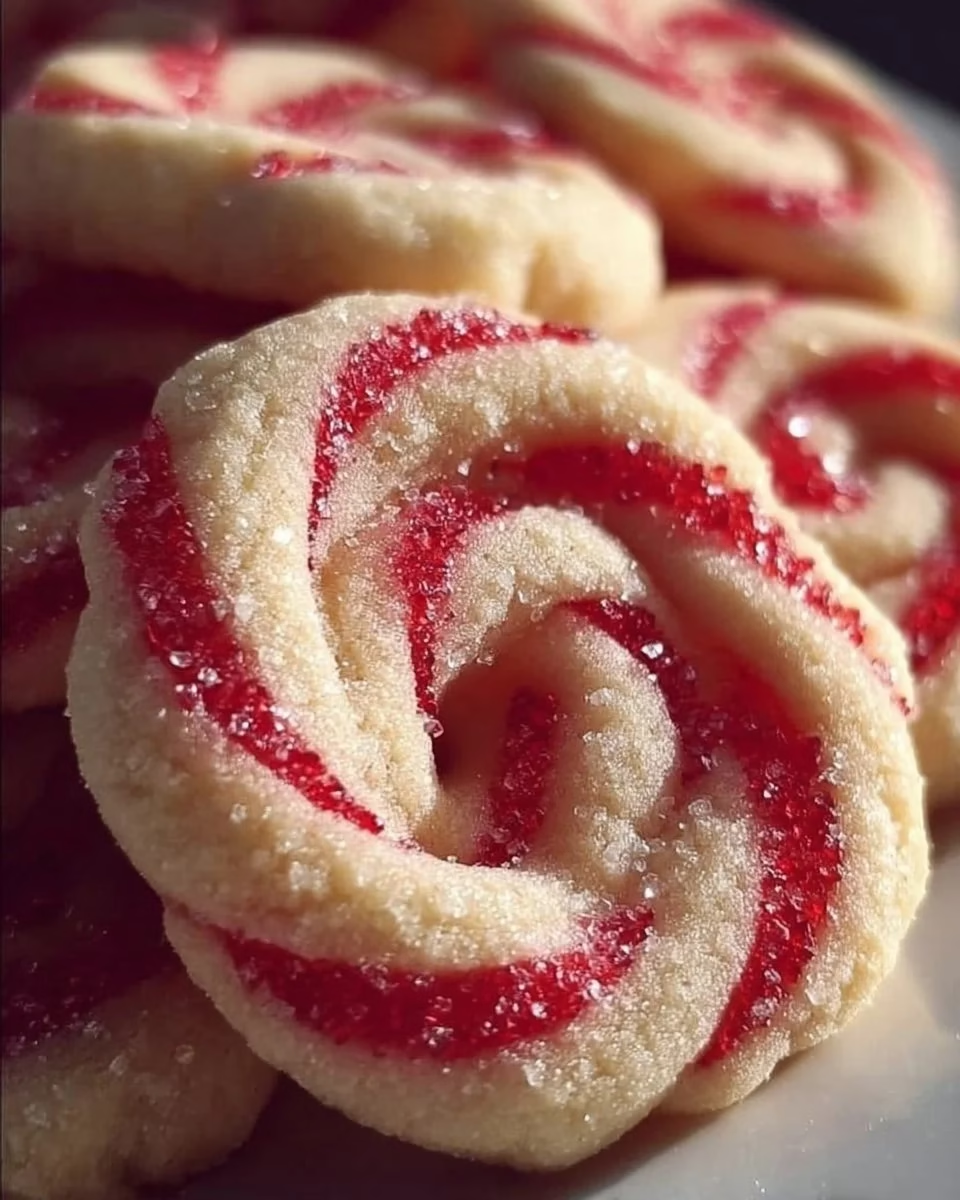
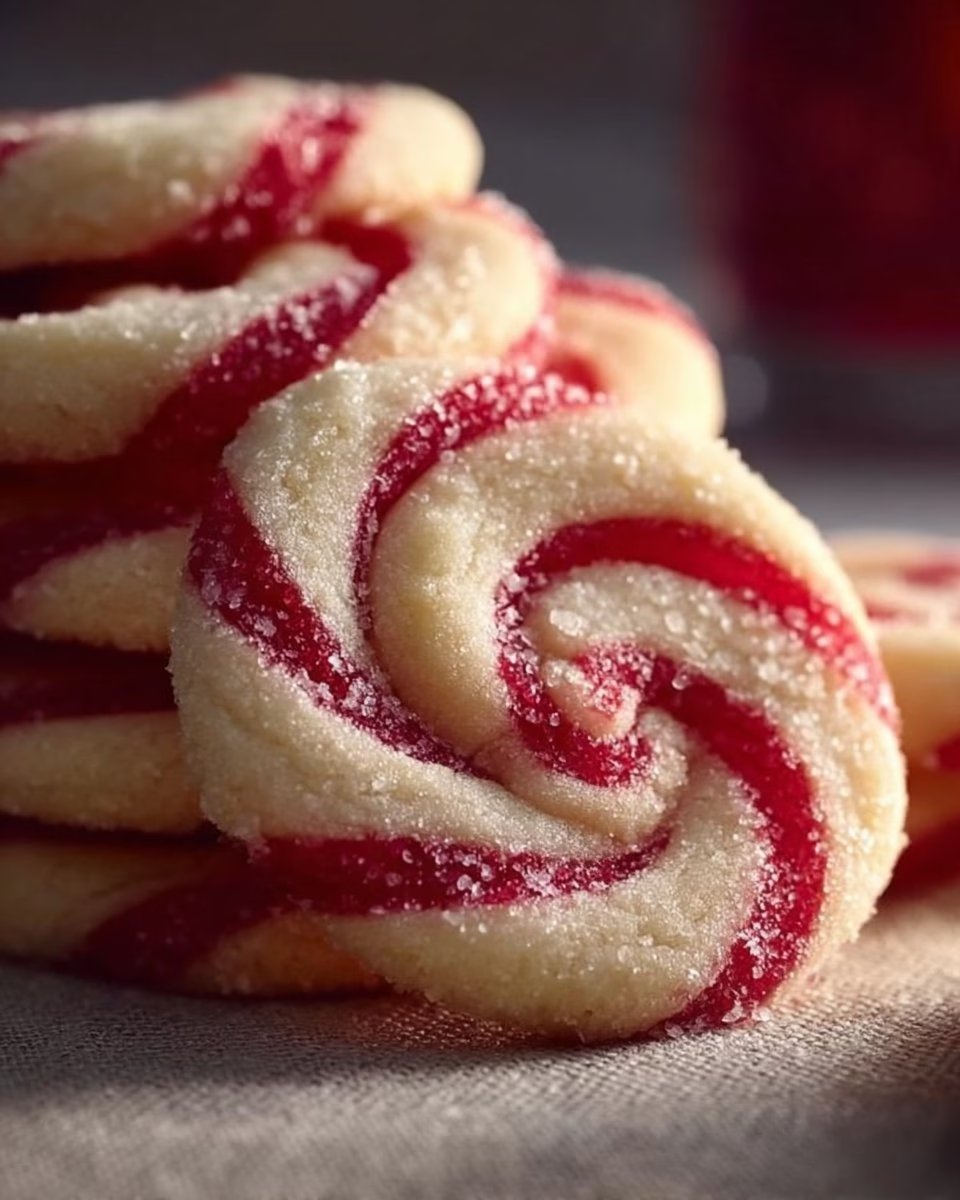
Preheat the oven to 350°F (175°C). Roll out pieces of each dough into ropes and twist them together. Form into a wreath shape, showcasing the beautiful red swirls alongside the plain dough.
-
Press the top of each cookie into coarse sugar. Place on a parchment-lined baking sheet. The sparkling sugar will not only add sweetness but also a lovely shimmer, making them irresistible.
-
Bake for 8–10 minutes until barely golden on the bottom and soft on the top. You’ll want to breathe in the aroma that fills your kitchen as they bake, a true holiday delight.
-
Allow to cool for 5 minutes before moving to a wire rack. This step helps set the cookies while maintaining their soft interior.
Serving Candy Cane Swirl Cookies With Family Warmth
Once these festive little wonders have cooled, it’s time to gather everyone around the table. As I place the Candy Cane Swirl Cookies on a bright platter, adorned with little touches of greenery or even some holiday ornaments, I can almost hear the happy chatter filling the air.
We share stories around the table, reminiscing about previous holidays as we savor each bite. The combination of buttery sweetness and peppermint never fails to bring smiles. Sometimes we enjoy them with hot cocoa or creamy cups of warm milk, enhancing that cozy feeling even more. These moments together, sharing good food and laughter, are the heart of what makes our home special.
Storing Candy Cane Swirl Cookies for Tomorrow
If you find yourself with leftovers (which can happen, but not often), storing these cookies is simple. Place them in an airtight container, separating layers with parchment paper to keep them from sticking together. They will keep well at room temperature for several days, and honestly, the flavors often settle and deepen a little overnight, adding to their charm.
If you want to enjoy them later, they can also be frozen. Just wrap them individually in plastic wrap and place them in a freezer bag. When you’re ready for a sweet treat, simply let them thaw at room temperature. I love how easy they are to store, ensuring that the warmth and comfort can be revisited anytime.
Amelia’s Kitchen Notes
Here are a few small tips I’ve learned along the way that can help make your baking experience a bit smoother:
-
Butter soften time: Take your butter out ahead of time to let it soften naturally, or cut it into chunks and microwave it for just a few seconds, but don’t let it melt! Softened butter makes a huge difference in your cookie texture.
-
Make a dough ahead: This dough can be made a day in advance. After chilling, wrap it tightly in plastic wrap, and it can be refrigerated for up to 2 days, ready to bake when the spirit moves you.
-
Baking sheets matter: Use parchment paper for the baking sheets to ensure easy removal and clean surfaces for the cookies.
-
Experiment with colors: If you feel creative, try using other colors for the dough—like green for a festive twist or even a mixture of colors, making your cookies unique.
-
Taste test fun: Always keep a small piece of dough aside to bake off for a quick taste test. Nothing beats knowing how your creation will taste before everyone else gets a bite.
Family Variations on Candy Cane Swirl Cookies
While the original Candy Cane Swirl Cookies hold a special place in my heart, there are many ways to put a personal twist on them. For me, holiday baking is about creativity and making the recipe truly yours.
One family favorite is to incorporate crushed candy canes into the sugar topping. Just a sprinkle adds a beautiful crunch and enhances that peppermint flavor. Alternatively, you can experiment with different extracts—perhaps a hint of hazelnut or almond, which pairs wonderfully with chocolate dough for a swirl variation.
Another idea is to turn these swirls into festive shapes. Use cookie cutters to cut out stars or trees, stacking them together for a whimsical look. The possibilities are endless, inviting you and your family to celebrate the warmth and fun of baking fresh treats together.
FAQs About Candy Cane Swirl Cookies
Can I make this ahead of time?
Yes, and honestly, it might taste even better the next day once the flavors have settled and come together, enhancing the lovely peppermint aroma.
Can I freeze the dough?
Absolutely! The dough can be frozen for up to 3 months. Just shape it into logs before wrapping it tightly in plastic wrap.
What if I don’t have peppermint extract?
That’s okay; vanilla works just fine too. You can also use mint extract, but use half the amount, as it can be stronger.
How do I know when they’re done baking?
Look for barely golden edges. The tops should look set but soft. Remember, they will continue to cook slightly after you take them out, ensuring perfect softness.
Can I use a different type of sugar?
Yes! While coarse sparkling sugar gives a nice aesthetic, you could also use granulated sugar or even powdered sugar if you prefer a softer finish.
A Final Thought
As I sit here in my kitchen, reflecting on this season’s joys, I hope these Candy Cane Swirl Cookies bring a little warmth and inspiration to your kitchen, the same way they do in mine. Their ability to evoke childhood memories and create new ones is something truly special. Baking is so much more than just following steps; it’s about capturing moments of togetherness, joy, and love. I invite you to create your own kitchen memories and enjoy each delicious bite, perhaps sharing them with family or friends, who will cherish them just as much. Until our next recipe, may your kitchen be filled with laughter and the irresistible aroma of freshly baked goodies.
Candy Cane Swirl Cookies
Ingredients
Cookie Base
- 1 cup Unsalted butter, softened Use fresh butter for rich flavor.
- 1 cup Granulated white sugar
- 1 large Egg
- 1 tsp Vanilla extract A splash adds warmth and aroma.
- 1/2 tsp Peppermint extract Crucial for festive flavor.
- 3 cups All-purpose flour
- 1 1/2 tsp Baking powder
- 1/4 tsp Salt
Decorative Elements
- 1 bottle Red gel food coloring For coloring one half of dough.
- 1/2 cup Coarse sparkling sugar or sanding sugar Adds sweetness and shimmer.
Instructions
Preparation
- In a large bowl, cream together the softened butter and granulated sugar until light and fluffy.
- Beat in the egg, vanilla extract, and peppermint extract until smooth.
- Gradually add flour, baking powder, and salt. Mix on low speed until the dough forms.
- Divide the dough into two halves; leave one plain and color the other with red gel food coloring.
- Chill both doughs for 1 hour.
- Preheat the oven to 350°F (175°C).
Shaping and Baking
- Roll out pieces of each dough into ropes and twist them together to form a wreath shape.
- Press the top of each cookie into coarse sugar and place on a parchment-lined baking sheet.
- Bake for 8–10 minutes until barely golden on the bottom and soft on the top.
- Allow to cool for 5 minutes before moving to a wire rack.
